
How to Make Traditional Homemade Bread : A Simple and Delicious Recipe
This classic homemade bread recipe is perfect for beginners and seasoned bakers alike. With just a few simple ingredients, you can create a fluffy bread loaf with a crispy golden crust. Whether you enjoy it straight out of the oven or slightly cooled, this bread is perfect for sandwiches, toast, or just slathered with butter. Let’s dive into this traditional bread recipe that is easy, foolproof, and incredibly rewarding.
Why You’ll Love This Homemade Bread Recipe
- Perfect for Beginners: This recipe requires only a few ingredients, making it ideal for novice bakers.
- Versatile: Serve it with butter, make it into sandwiches, or enjoy it plain—this bread is perfect for any occasion.
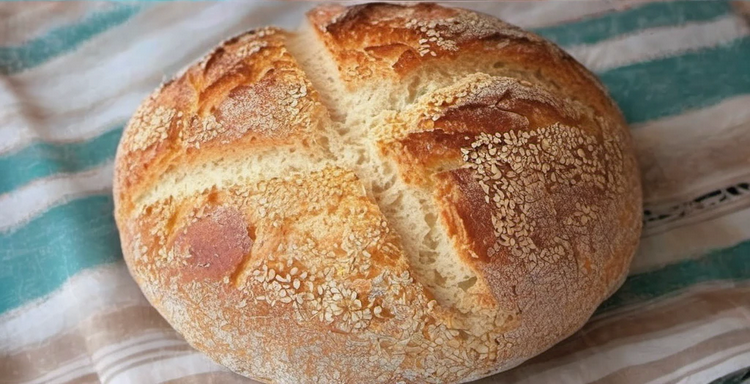
- Golden Crust and Fluffy Inside: The combination of a crispy exterior and soft, airy interior makes this bread irresistible.
Ingredients for Traditional Homemade Bread
- 1.5 cups warm water
- 1 tablespoon active dry yeast
- 4 cups (500g) all-purpose flour
- 1 teaspoon salt
Instructions to Make Traditional Homemade Bread
Step 1: Activate the Yeast
- In a large bowl, combine 1.5 cups of warm water with 1 tablespoon of active dry yeast.
- Let the mixture sit for 5-10 minutes until it becomes frothy. This ensures your yeast is active and ready.
Step 2: Make the Dough
- Add 4 cups of all-purpose flour and 1 teaspoon of salt to the yeast mixture.
- Stir until the ingredients come together to form a shaggy dough.
Step 3: Knead the Dough
- Lightly flour a clean surface and knead the dough by hand for 8-10 minutes, until it becomes smooth and elastic.
- If the dough feels too sticky, gradually add more flour, one tablespoon at a time.
Step 4: First Rise
- Place the dough in a lightly greased bowl, cover with a damp cloth, and let it rise in a warm place for 1-2 hours, or until doubled in size.
Step 5: Shape the Dough
- Punch down the dough to release any air bubbles.
- Shape the dough into a loaf and place it on a parchment-lined baking sheet or in a greased loaf pan.
Step 6: Second Rise
- Cover the dough again and let it rise for another 30-45 minutes until doubled in size.
Step 7: Bake the Bread
- Preheat your oven to 400°F (200°C).
- Bake the bread for 25-30 minutes, or until the top is golden brown and the loaf sounds hollow when tapped.
Step 8: Cool and Serve
- Remove the bread from the oven and let it cool on a wire rack.
- Slice and enjoy warm, with butter, or your favorite toppings!
Pro Tips for Making the Perfect Homemade Bread
- Soft Crust: Brush melted butter on the crust right after baking for a softer, more flavorful crust.
- Additions: For a unique twist, try adding herbs, seeds, or nuts to the dough.
- Warm Environment for Rising: Let the dough rise in a warm, draft-free place to ensure proper fermentation.
Frequently Asked Questions
Q1: Can I use instant yeast instead of active dry yeast?
Yes, you can use instant yeast in place of active dry yeast. Just skip the activation step and mix the instant yeast directly with the dry ingredients.
Q2: How can I tell if my yeast is still active?
If you're unsure about your yeast, dissolve it in warm water with a pinch of sugar. After 5-10 minutes, it should start to foam. If not, it may be expired, and you'll need a fresh batch.
Q3: Can I make gluten-free bread using this recipe?
Yes, you can substitute the all-purpose flour with a gluten-free flour blend designed for bread baking. Keep in mind, gluten-free dough may require longer rising times and a bit more attention to texture.
Q4: How can I make the crust softer?
To achieve a softer crust, brush melted butter over the loaf as soon as it comes out of the oven.
Q5: Can I add seeds or dried fruit to the dough?
Absolutely! You can incorporate herbs, seeds, nuts, or even dried fruits into the dough for extra flavor and texture.
How to Store Homemade Bread
- Room Temperature: Store the bread at room temperature for up to 3 days in a sealed bread bag or bread box to maintain freshness.
- Freezing: For longer storage, freeze the loaf in a resealable bag for up to 3 months. When ready to eat, thaw at room temperature or toast slices directly from frozen.
Healthy Benefits of Homemade Bread
- No Preservatives: Making bread at home ensures you're eating bread free of additives and preservatives.
- Nutrient-Dense: By adding seeds, nuts, or whole grains, you can increase the fiber and nutrient content of your bread.
- Cost-Effective: Homemade bread is an economical way to enjoy fresh, healthy loaves without breaking the bank.
Final Thoughts
Making bread at home doesn’t have to be complicated. With just a few basic ingredients and a bit of patience, you can create a delicious, homemade loaf that will become a family favorite. Whether you enjoy it plain, toasted, or as the base for your favorite sandwich, this traditional homemade bread recipe is a must-try.