Grandma’s Unbelievably Creamy Chocolate Pie
A rich, old-fashioned dessert that tastes like love, memories, and pure chocolate comfort
There are some recipes you don’t just make — you remember them. This chocolate pie is one of those. It’s the kind Grandma made when she wanted to spoil everyone just a little extra, when the kitchen smelled like cocoa and warm milk, and you knew something special was coming even before it cooled on the counter.
This isn’t a fancy bakery pie or a trendy dessert with complicated steps. It’s smooth, deeply chocolatey, perfectly set, and unbelievably comforting. One bite and you’re back at the table, legs swinging, waiting patiently (or not so patiently) for your slice. If you love classic desserts that never go out of style, this pie belongs in your recipe box forever.
Why You’ll Love This Recipe
- Ultra-creamy, pudding-like filling that slices beautifully
- Old-fashioned flavor made with simple pantry ingredients
- Not overly sweet — rich, balanced chocolate taste
- Perfect for holidays, Sundays, or “just because” desserts
- Make-ahead friendly and even better once fully chilled
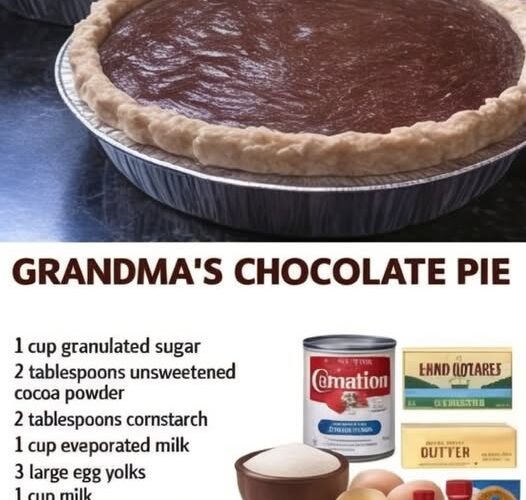
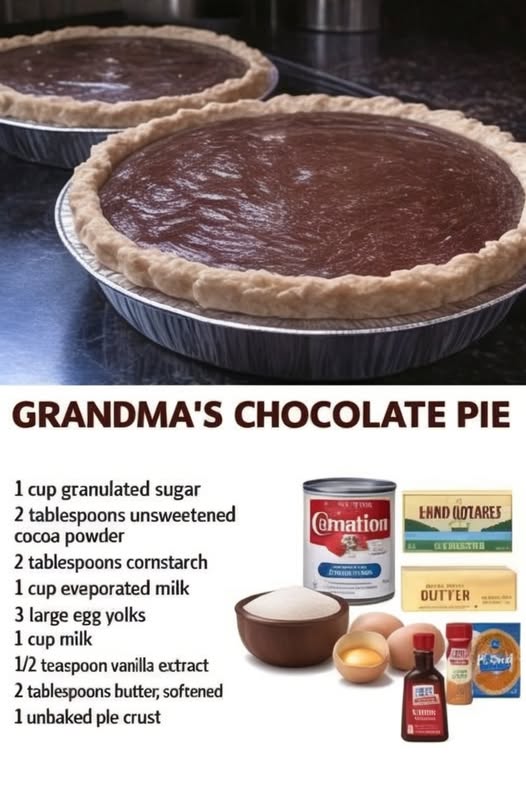
Ingredients
- 1 unbaked 9-inch pie crust (store-bought or homemade)
- 1½ cups granulated sugar
- ¼ cup unsweetened cocoa powder
- ¼ cup cornstarch
- 2½ cups whole milk
- 4 large egg yolks
- 2 tablespoons unsalted butter, cut into pieces
- 1 teaspoon vanilla extract
- Pinch of salt
Equipment Needed
- Medium saucepan
- Whisk
- Mixing bowl
- Measuring cups and spoons
- Baking sheet
- Wire rack
Step-by-Step Instructions
1. Preheat & Prepare
Preheat your oven to 375°F (190°C). Place the unbaked pie crust on a baking sheet to catch any drips and make transferring easier.
2. Mix the Dry Ingredients
In a medium saucepan off the heat, whisk together the sugar, cocoa powder, cornstarch, and salt until fully combined and lump-free.
3. Add the Milk
Slowly whisk in the milk until smooth. Take your time — this ensures a silky filling later.
4. Temper the Egg Yolks
In a separate bowl, lightly beat the egg yolks. Gradually whisk about ½ cup of the milk mixture into the yolks to warm them gently. This prevents curdling.
5. Combine Everything
Pour the tempered egg mixture back into the saucepan, whisking constantly.
6. Cook Until Thick
Place the saucepan over medium heat, stirring constantly. Bring to a gentle boil and cook 1–2 minutes, until thickened to a smooth, pudding-like consistency.
7. Finish with Butter & Vanilla
Remove from heat. Stir in the butter and vanilla until melted and glossy.
8. Fill the Crust
Carefully pour the warm chocolate filling into the unbaked pie crust.
9. Bake
Bake for 40–45 minutes, until the crust is golden and the filling is set but slightly jiggly in the center.
10. Cool Completely
Let the pie cool on a wire rack for 2–3 hours, then refrigerate if desired. This step is crucial for clean slices.
11. Slice & Serve
Serve plain or topped with whipped cream. Every bite is pure chocolate nostalgia.
Pro Tips for the Best Chocolate Pie
- Whisk constantly while cooking to avoid lumps or scorching
- Use whole milk for the creamiest texture
- Don’t rush the cooling time — the pie firms as it chills
- Cover with plastic wrap touching the surface to prevent skin
- For deeper flavor, add ½ teaspoon espresso powder
Variations & Substitutions
- Chocolate Meringue Pie: Use the reserved egg whites for topping
- Extra Dark Chocolate: Replace half the cocoa with dark cocoa powder
- Dairy-Free: Use full-fat coconut milk and vegan butter
- Gluten-Free: Use a gluten-free pie crust
Serving, Pairing & Storage
Serving
- Serve chilled or at cool room temperature
- Perfect with whipped cream or vanilla ice cream
Storage
- Refrigerate covered for up to 4 days
Freezing
- Freeze slices individually for up to 1 month
- Thaw overnight in the refrigerator
FAQ
Why is my pie runny?
It likely didn’t cook long enough or didn’t cool fully.
Can I make it ahead?
Yes — it’s best made a day in advance.
Can I use low-fat milk?
You can, but the filling will be less creamy.
Does it need refrigeration?
Yes, after cooling — especially for food safety.
Grandma’s Unbelievably Creamy Chocolate Pie
Ingredients
Equipment
Method
- Preheat oven to 375°F (190°C). Place crust on baking sheet.
- Whisk sugar, cocoa, cornstarch, and salt in saucepan.
- Whisk in milk until smooth.
- Temper egg yolks with warm mixture, then return to pan.
- Cook over medium heat, stirring constantly, until thick.
- Remove from heat; stir in butter and vanilla.
- Pour filling into unbaked crust.
- Bake 40–45 minutes until set.
- Cool completely before slicing.
Notes