How to Remove Grease and Cooking Odors from Kitchen Cabinets Without Harsh Chemicals
Kitchen cabinets quietly collect more grime than almost any other surface in your home. Even when they look clean, a thin layer of airborne grease from cooking oils slowly settles on doors and handles. Over time, this buildup becomes sticky, attracts dust, and traps stubborn cooking odors that ordinary cleaners struggle to remove.
If your cabinets feel tacky, look dull, or seem to hold onto food smells no matter how often you wipe them down, you’re not imagining it. And the solution is simpler than you might expect.
Why Standard Cleaners Often Fail on Cabinet Grease
Most people reach for water or all-purpose sprays when cleaning cabinets. The problem is that grease is oil-based, and water alone can’t dissolve oil. Instead of lifting the residue, water tends to slide over it—leaving the greasy film behind.
That’s why cabinets often look clean at first, only to feel sticky again once they dry.
The key is understanding one simple principle:
Oil dissolves oil.
The Simple Pantry Solution That Actually Works
Using a very small amount of household oil can safely break down grease buildup and release trapped odors—without scrubbing, harsh fumes, or damage to cabinet finishes.
Best Oils to Use
- Vegetable oil (canola or sunflower): Effective and inexpensive
- Mineral oil: Odorless and won’t spoil over time
- Coconut oil: Leaves a light, clean scent (liquid forms work best)
Avoid olive oil for this task—it can leave a strong scent and may become sticky over time.
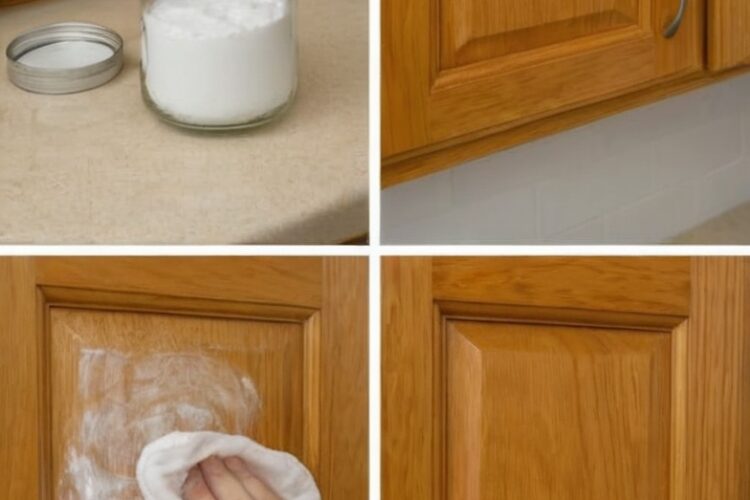
Step-by-Step: How to Clean Greasy Cabinets with Oil
-
Apply a Small Amount
Place just a few drops of oil onto a soft microfiber cloth. The cloth should feel slightly damp, not oily. -
Wipe Gently
Clean one small section at a time. Wipe in the direction of the wood grain if your cabinets are wood, or use smooth, even strokes on painted or laminate surfaces. -
Lift the Grease
You’ll notice the greasy film loosening almost immediately as the oil dissolves the buildup. -
Buff Clean
Use a second dry microfiber cloth to remove any remaining residue and polish the surface to a smooth, clean finish.
No rinsing is required.
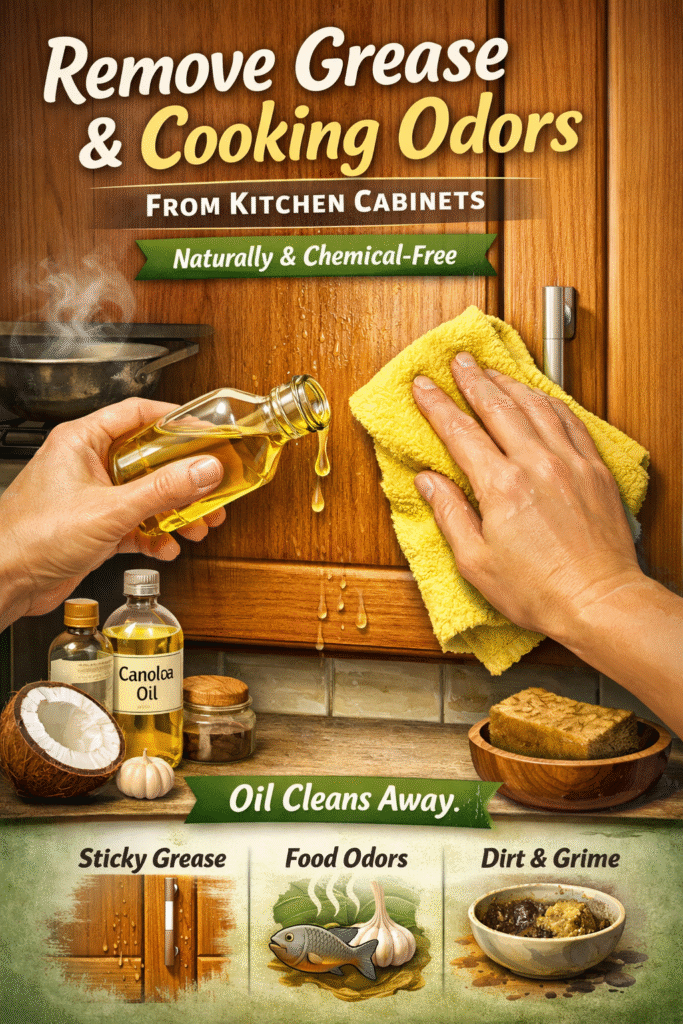
Why This Method Also Removes Odors
Cooking smells cling to grease, not the cabinet itself. Once the greasy layer is removed, the odor disappears with it. Unlike sprays that simply mask smells, this method eliminates the source.
As an added benefit, oil lightly conditions wood cabinets, helping prevent dryness and dullness over time.
Where This Method Works Best
✔ Finished wood cabinets
✔ Painted cabinets
✔ Laminate or veneer surfaces
✔ Cabinet doors, handles, and frames
Always Do a Spot Test
Before cleaning the entire cabinet, test the oil on a hidden area (inside a door or near a hinge) to confirm compatibility with your finish.
Why This Beats Harsh Degreasers
- No chemical fumes
- No residue buildup
- No finish damage
- No sticky aftermath
- Safe for homes with kids or pets
Commercial degreasers often strip protective finishes, leaving cabinets vulnerable to future staining. This method cleans without compromising the surface.
How Often Should You Do This?
For most kitchens:
- Light cooking: Every 2–3 months
- Frequent frying or sautéing: Monthly
- Cabinet handles: Every few weeks
Regular maintenance prevents heavy buildup and keeps cabinets fresh.
Final Thought
Greasy kitchen cabinets aren’t a sign of poor cleaning—they’re a natural result of everyday cooking. The mistake most people make is fighting oil with water.
By using a small amount of oil the right way, you can restore cabinet shine, remove hidden grime, and eliminate lingering cooking odors in minutes—using something you already have at home.
Sometimes the most effective cleaning solutions aren’t found in spray bottles…
they’re sitting quietly in your pantry.