
The Candy That Saved Christmas When I Forgot to Bake
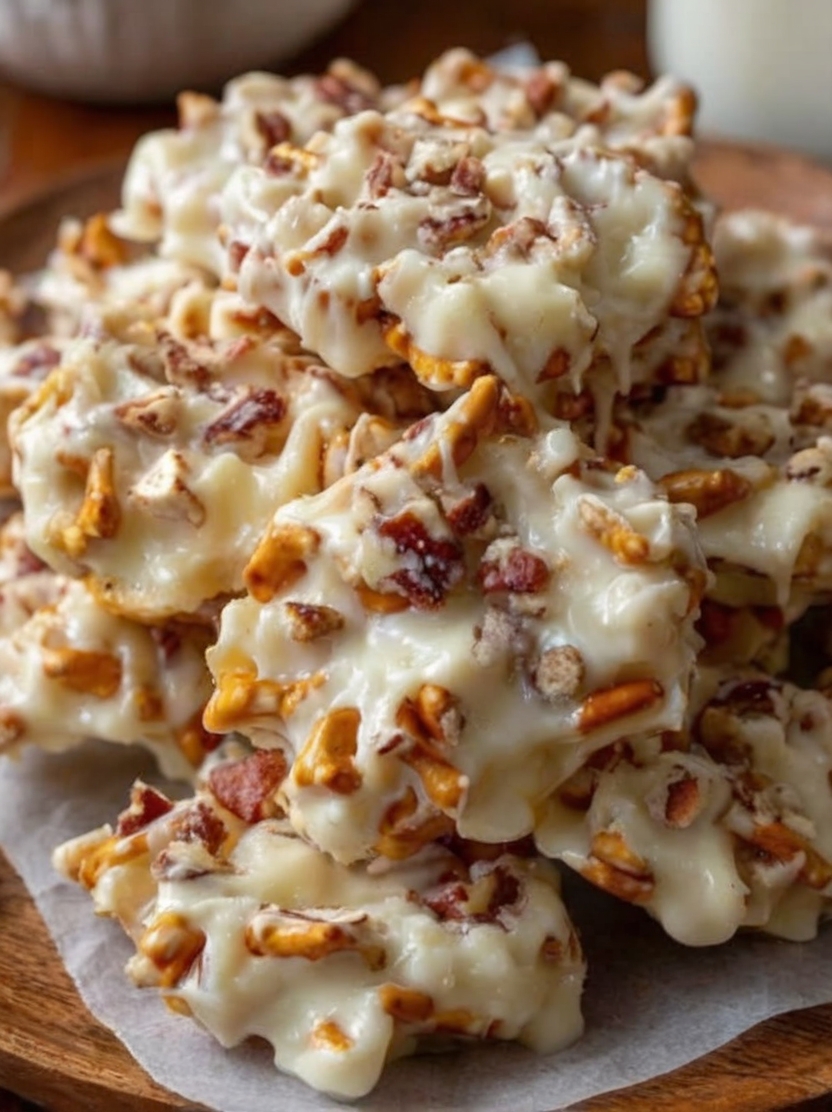
Some recipes feel like a warm hug from generations past, and these Ragtag Candies are exactly that. Born from the kind of resourceful kitchen magic that turned pantry staples into pure joy during tough times, this treat has survived decades for one simple reason: it's absolutely irresistible. Crunchy pretzels, toasted peanuts, and crispy rice cereal all bound together in glossy white chocolate—it's the perfect marriage of salty and sweet, simple and sophisticated, nostalgic and timeless.
What makes these candies truly special is how they transform humble ingredients into something that feels like a gift every single time. No oven required, no complicated techniques, just ten minutes of your time and four ingredients that probably already live in your pantry. The result? Golden, jagged pieces of pure happiness that taste like childhood county fairs, Christmas tins from grandma, and lazy summer afternoons all rolled into one. Whether you're making them for a bake sale, filling tins for teacher gifts, or just need something sweet to get you through the week, these ragtag beauties deliver every single time.
Why You'll Love This Recipe
- Only 4 ingredients—white chocolate, rice cereal, pretzels, and peanuts
- No baking required—just melt, mix, and let it set
- Ready in 10 minutes of hands-on time with minimal cleanup
- Perfectly balanced salty-sweet flavor that's absolutely addictive
- Naturally nostalgic with that homemade candy shop vibe
- Perfect for gifting—looks impressive, travels beautifully
- Freezer-friendly for up to 2 months—make ahead and forget about it
- Endlessly customizable with different nuts, add-ins, or flavors
- Kid-approved and crowd-pleasing at every gathering
- Budget-friendly using pantry staples you probably already have
Ingredients
- 1 (12 oz) bag white chocolate chips (Guittard or Ghirardelli recommended)
- 4 cups crispy rice cereal (Rice Krispies-style; gluten-free if needed)
- 3 cups pretzel sticks, lightly crushed (Snyder's or Bachman)
- 1½ cups roasted peanuts, unsalted (Virginia or Spanish)
- Optional: 1 tsp coconut oil (if chocolate seizes)
Equipment
- Large rimmed baking sheet (18x13 inch)
- Parchment paper
- Large mixing bowl
- Medium microwave-safe bowl (glass works best)
- Silicone spatula
- Rolling pin
- Zip-top bag (for crushing pretzels)
- Greased spoon or offset spatula
Step-by-Step Instructions
Step 1: Prep Your Pan
Line a large rimmed baking sheet with parchment paper, leaving a few inches of overhang on two opposite sides—this creates handles that make lifting out the finished candy a breeze. Lightly grease the parchment with butter to prevent any sticking. This small step makes all the difference when it's time to break your candy into pieces.
Step 2: Toast Those Peanuts (Don't Skip This!)
If your peanuts aren't already roasted, spread them on a small baking sheet and toast at 350°F for 5-7 minutes until they smell nutty and incredible. Let them cool completely before using. This step transforms them from flat and boring to rich, buttery, and absolutely essential to the recipe. Raw peanuts simply can't compete with the depth of flavor toasted ones bring.
Step 3: Crush Your Pretzels the Right Way
Place your pretzel sticks in a zip-top bag and gently tap with a rolling pin until they break into roughly ½-inch pieces. You want satisfying shards and chunks, not powder or dust. Those larger pieces give you that joyful crunch in every bite—pulverize them too much and you lose all the texture that makes these candies special.
Step 4: Mix Your Dry Ingredients
In a large bowl, combine the crispy rice cereal, crushed pretzels, and toasted peanuts. Toss them together gently with your hands—no crushing, just mixing. You want to preserve all that beautiful texture, not turn it into crumbs. Set this mixture aside while you work on the chocolate.
Step 5: Melt the White Chocolate Carefully
Put your white chocolate chips in a medium microwave-safe glass bowl. Microwave on medium power (50%) in 30-second bursts, stirring thoroughly between each interval until the chocolate is smooth, glossy, and completely melted. This usually takes about 1.5-2 minutes total. The key is patience—rushing with high heat will scorch the chocolate and ruin the texture. If your chocolate seizes up and gets grainy, stir in 1 teaspoon of coconut oil to rescue it.
Step 6: Bring It All Together
Working quickly (chocolate sets fast!), pour the melted white chocolate over your cereal mixture. Using a silicone spatula, fold everything together gently but thoroughly until every single piece is coated in that gorgeous white chocolate. You want complete coverage so every bite has that perfect sweet-salty balance.
Step 7: Spread and Set
Pour the mixture onto your prepared baking sheet and use the back of a greased spoon or offset spatula to spread it into an even layer, about ½ to ¾ inch thick. Don't stress about making it perfect—rustic is part of the charm. Let it sit at room temperature for 1-2 hours until completely firm, or pop it in the fridge for 30 minutes if you're impatient (though room temperature setting gives you a glossier finish without the risk of chocolate bloom).
Step 8: Break Into Ragtag Pieces
Once the candy is completely set and firm, use the parchment overhang to lift the entire sheet out of the pan. Here's the fun part: break it by hand into jagged, irregular pieces. No knife needed—the ragtag, imperfect edges are what give these candies their character and charm. Every piece should be unique, just like the hands that made them.
Pro Tips
- Quality chocolate is non-negotiable. Cheap chocolate chips contain oils and stabilizers that won't set properly. Stick with Guittard or Ghirardelli for the best results.
- Don't over-crush those pretzels. Large shards give you joyful crunch; powder gives you sad, gritty texture. Break, don't pulverize.
- Toast everything for maximum flavor. Even if your pretzels are already baked, a quick 5-minute stint at 300°F deepens their flavor significantly.
- Room temperature setting is better than refrigeration. The fridge can cause chocolate bloom (those white streaks), which is harmless but makes your candies less glossy and beautiful.
- Work quickly once the chocolate is melted. White chocolate sets faster than you think, so have everything ready to go before you start melting.
- Say "Ready?" before breaking. It's not superstition—it's ritual. And rituals make sweets sweeter.
Variations & Substitutions
- Maple-Pecan Ragtag: Swap peanuts for toasted pecans and stir 2 tablespoons of maple syrup into the melted chocolate for autumn-perfect flavor.
- S'mores Dream: Add 1 cup of mini marshmallows and ½ cup of crushed graham crackers to the dry mix for campfire nostalgia without the fire.
- Spiced Holiday: Stir ½ teaspoon of cinnamon and ¼ teaspoon of cayenne into the melted chocolate before pouring for warmth that's perfect for gift tins.
- Nut-Free Joy: Use roasted sunflower seeds instead of peanuts and double-check that your cereal and pretzels are nut-free for a safe, still-delicious version.
- Dark Chocolate Version: Use dark chocolate chips instead of white for a less-sweet, more sophisticated candy.
- Add dried fruit: Fold in ½ cup of dried cranberries, cherries, or chopped apricots with the cereal for fruity sweetness.
- Make it dairy-free: Use Enjoy Life white baking chips and certified dairy-free pretzels.
- Go gluten-free: Use Barbara's crispy rice cereal and Snyder's gluten-free pretzels.
Serving, Pairing & Storage
How to Serve:
These candies are perfect as-is, broken into rustic pieces and piled on a serving platter. Serve them at room temperature for the best texture and flavor. They're equally at home at a casual backyard barbecue or arranged elegantly on a gold tray for book club.
What It Pairs Well With:
Serve with cold milk, hot cocoa after sledding, or espresso shots for an elegant dessert course. They're perfect alongside vanilla ice cream, fresh berries, or just grabbed by the handful as an afternoon pick-me-up.
Storage:
Store in an airtight container at room temperature in a cool, dry place for up to 2 weeks. Layer pieces between parchment paper to prevent sticking.
Freezing Instructions:
These freeze beautifully! Spread pieces in a single layer on a baking sheet and freeze until solid, then transfer to freezer bags or containers. Freeze for up to 2 months. Thaw at room temperature for 15 minutes before serving—they're also delicious eaten straight from the freezer.
Make-Ahead Tips:
Toast your nuts and pretzels up to 3 days ahead and store in airtight jars. You can also make a double batch—just use two baking sheets with the same chilling time.
FAQ
Can I use almond bark instead of chocolate chips?
Yes! Almond bark sets firmer and is easier to work with, but it lacks the creamy depth and rich flavor of real white chocolate. It's a trade-off between convenience and quality.
Why is my chocolate grainy or seized up?
This usually happens if it's overheated or if even a tiny bit of water gets into the bowl. Always use a completely dry bowl and microwave in short bursts on medium power. If it seizes, stir in 1 teaspoon of coconut oil to rescue the texture.
Can I make these dairy-free?
Yes! Use Enjoy Life white baking chips and verify that your pretzels and cereal are certified dairy-free.
Are these gluten-free?
They can be! Use gluten-free crispy rice cereal like Barbara's and gluten-free pretzels like Snyder's. Always verify all ingredient labels.
Can I add dried fruit?
Absolutely! Fold in ½ cup of dried cranberries, cherries, or raisins with the cereal mixture for extra sweetness and chew.
How do I prevent white streaks (chocolate bloom)?
Let the candy set at room temperature instead of in the fridge. Bloom is caused by temperature changes and is harmless but makes the chocolate less glossy.
Ragtag Candies
Ingredients
Equipment
Method
- Line a large rimmed baking sheet (18x13 inch) with parchment paper, leaving overhang on two sides. Lightly grease parchment with butter.
- If peanuts aren't already roasted, spread on a baking sheet and toast at 350°F for 5-7 minutes until fragrant. Cool completely.
- Place pretzel sticks in a zip-top bag and gently tap with a rolling pin until broken into ½-inch pieces. Avoid creating powder—you want chunks.
- In a large bowl, combine crispy rice cereal, crushed pretzels, and toasted peanuts. Toss gently to mix without crushing.
- In a medium microwave-safe glass bowl, add white chocolate chips. Microwave on medium (50%) power in 30-second bursts, stirring well between each, until smooth and glossy (1.5-2 minutes total). If chocolate seizes, stir in 1 tsp coconut oil.
- Working quickly, pour melted chocolate over cereal mixture. Using a silicone spatula, fold gently until every piece is completely coated.
- Pour mixture onto prepared baking sheet. Spread into an even layer (½ to ¾ inch thick) with the back of a greased spoon.
- Let sit at room temperature for 1-2 hours (or refrigerate 30 minutes) until fully firm.
- Lift out using parchment overhang. Break by hand into rustic, jagged pieces—no knife needed.
Notes
Toast peanuts even if they're already roasted for maximum flavor depth. Raw peanuts taste flat; toasted are rich and buttery.
Don't over-crush pretzels. Large shards = joyful crunch; powder = gritty texture.
Room temperature setting is better than refrigeration. Fridge can cause chocolate bloom (white streaks)—harmless but less glossy.
Work quickly once chocolate is melted—it sets fast!
Optional: Toast pretzels at 300°F for 5 minutes before crushing for even deeper flavor.
Say "Ready?" before breaking—ritual makes sweets sweeter.
Store at room temperature in airtight container for up to 2 weeks. Layer with parchment to prevent sticking.
Freeze in single layer, then bag, for up to 2 months. Thaw at room temperature 15 minutes or eat frozen.
Make components ahead: Toast nuts and pretzels 3 days ahead and store in jars.
Double batch: Use two baking sheets—same chilling time.
Maple-Pecan variation: Swap peanuts for pecans, add 2 tbsp maple syrup to chocolate.
S'mores variation: Add 1 cup mini marshmallows and ½ cup crushed graham crackers.
Spiced Holiday: Add ½ tsp cinnamon and ¼ tsp cayenne to melted chocolate.
Nut-free: Use sunflower seeds instead of peanuts and verify pretzel labels.
Dairy-free: Use Enjoy Life white baking chips and certified dairy-free pretzels.
Gluten-free: Use Barbara's crispy rice cereal and Snyder's gluten-free pretzels.
Add ½ cup dried cranberries or cherries for fruity sweetness.
Perfect for gifting: Layer in cupcake liners in vintage tins with ribbon, or package 6 pieces in cellophane bags tied with raffi