
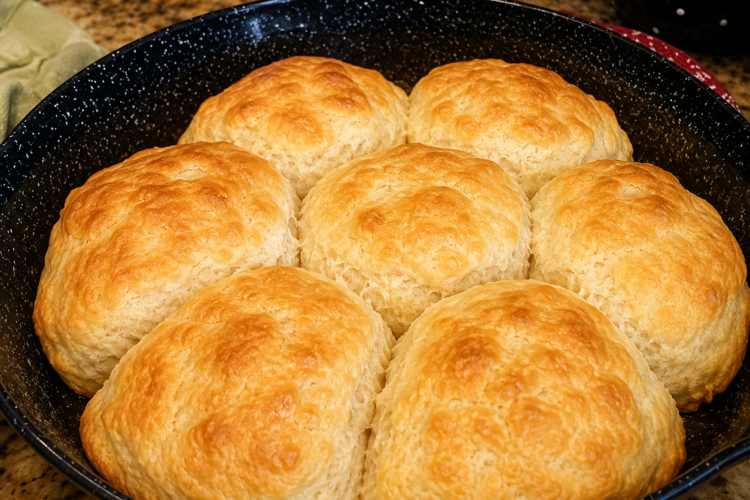
The Ultimate Old-Fashioned Appalachian Cathead Biscuits Recipe – Big, Buttery & Fluffy
Some recipes don't just feed your family — they become part of your family's story.
These Old-Fashioned Appalachian Cathead Biscuits are one of those treasured recipes. Passed down through generations in Appalachian kitchens, they're known for their enormous size, pillowy texture, and rich buttery flavor. Their unusual name comes from their generous shape — each biscuit is about as big as a cat's head, making them hearty enough to satisfy even the hungriest breakfast crowd.
Growing up, Sunday mornings always began the same way.
Long before anyone stirred from bed, the warm aroma of baking biscuits drifted through the house. Butter melted into the cast iron skillet, flour dusted the kitchen table, and a bowl of cold buttermilk waited nearby. My grandmother — like so many Appalachian grandmothers — never measured with fancy gadgets. She worked by feel, knowing exactly when the dough had been mixed just enough and when it needed one more splash of buttermilk.
The best part was watching her shape the biscuits.
There was no rolling pin. No delicate circles. She simply patted the dough into a thick slab with gentle hands and cut enormous rounds that barely fit in the cast iron skillet. They nestled together so they could rise tall instead of spreading wide.
As they baked, the tops turned a beautiful golden brown while the inside stayed incredibly soft and tender. The moment they came out of the oven, she brushed them generously with melted butter, creating a glossy finish that made them almost impossible to resist.
Nobody waited for breakfast to be served.
Someone always reached for the first biscuit straight from the skillet, carefully splitting it open as steam escaped into the kitchen. A pat of butter melted instantly into the fluffy layers, followed by a drizzle of honey or a spoonful of homemade blackberry jam.
On special mornings, there would be creamy sausage gravy waiting nearby.
Other days, butter alone was enough.
That's the beauty of a true Appalachian Cathead Biscuit. It doesn't need anything fancy. Its rich buttery flavor, tender crumb, and crisp golden crust are satisfying all on their own. And unlike many trendy gluten-free or low-carb recipes that sacrifice texture for dietary labels, these biscuits embrace every gram of flour, every pat of butter, and every drop of buttermilk — whole, unapologetic, and deeply delicious.
The secret isn't hidden in expensive ingredients or complicated techniques. It's all about handling the dough gently. The less you mix it, knead it, or fuss with it, the lighter the biscuits become. Overworking the dough develops gluten, making biscuits tough instead of soft. That's why generations of Appalachian bakers have always repeated the same advice:
"Touch the dough as little as possible."
Simple ingredients also play an important role. Self-rising flour provides the perfect lift, cold butter creates flaky pockets throughout the biscuit, shortening adds tenderness, and cold buttermilk brings moisture and a slight tang that balances the richness beautifully.
The result is exactly what Southern biscuit lovers hope for. A lightly crisp exterior. A fluffy, cloud-like interior. Rich buttery flavor. And biscuits sturdy enough to hold plenty of butter, honey, jam, or thick sausage gravy.
Whether you're serving a healthy family breakfast, hosting a holiday brunch, or simply craving authentic Southern comfort food, these Old-Fashioned Appalachian Cathead Biscuits belong on the table. They're budget-friendly, made from pantry staples, and the kind of cost-effective meal that saves money at the grocery store while still tasting absolutely incredible.
One bite explains why this humble recipe has remained a beloved staple in Appalachian kitchens for generations.
Why You'll Love This Recipe
These biscuits are everything homemade biscuits should be — big, fluffy, buttery, and wonderfully tender. They're made with only a handful of pantry staples, yet they bake into impressive, bakery-style biscuits with crisp golden tops and soft, airy centers.
Because they're larger than traditional biscuits, they're perfect for hearty breakfasts, breakfast sandwiches, or serving alongside soups, stews, fried chicken, and barbecue. Their rustic, artisan appearance adds to their charm, and they're equally at home on a holiday table or at a casual Sunday family breakfast.
They're also incredibly forgiving. As long as you keep the ingredients cold and avoid overworking the dough, you'll be rewarded with tall, tender biscuits every time. This makes them one of the best beginner-friendly baking recipes for anyone just learning to cook — a genuinely kid-friendly kitchen project that builds confidence in the oven.
Why This Recipe Works
Every ingredient has an important purpose in creating authentic Appalachian Cathead Biscuits.
Self-rising flour provides the perfect balance of flour, baking powder, and salt, allowing the biscuits to rise high without additional leavening. A high-quality, premium flour — like a soft-wheat variety — makes a noticeable difference in the final texture, yielding a more tender, delicate crumb.
Cold butter melts during baking, creating tiny steam pockets that produce flaky layers and rich buttery flavor. European-style butter, with its higher fat content, creates even more impressive flaky layers — a small upgrade that delivers bakery-quality results.
Shortening contributes tenderness and helps the biscuits stay soft inside while maintaining their lofty height. The combination of butter and shortening provides both incredible flavor and the soft, fluffy texture these biscuits are famous for.
Cold buttermilk hydrates the flour while adding a gentle tang that complements the butter beautifully. Its acidity also works with the leavening in the self-rising flour to encourage an even, fluffy rise. Fresh, high-quality buttermilk — or a good homemade buttermilk substitute using milk and lemon juice — keeps the dough moist without making it heavy.
Melted butter brushed on the tops before baking promotes beautiful golden color, while another brush immediately after baking adds flavor, softness, and the classic glossy finish that makes homemade biscuits so irresistible.
Finally, gently patting the dough instead of rolling or kneading preserves the delicate structure, resulting in biscuits that are light, fluffy, and easy to pull apart by hand.
Ingredient Breakdown
The beauty of Old-Fashioned Appalachian Cathead Biscuits lies in their simplicity. With just a handful of traditional ingredients, you can create biscuits that are tall, fluffy, buttery, and tender enough to pull apart with your hands.
Self-Rising Flour
Self-rising flour is the foundation of authentic Cathead Biscuits. It already contains baking powder and salt, making it perfectly balanced for light, fluffy biscuits without any additional leavening.
For the best texture, spoon the flour into your measuring cup and level it off rather than scooping directly from the bag. This prevents packing too much flour into the cup, which leads to dry, heavy biscuits.
If self-rising flour isn't available, it's easy to make your own: whisk together 3 cups all-purpose flour with 4½ teaspoons baking powder and ¾ teaspoon salt. For a higher-fiber option, substitute a portion of the all-purpose flour with whole wheat pastry flour — this adds fiber and nutrition while maintaining a tender crumb.
For anyone following a gluten-free diet or managing celiac disease, a high-quality gluten-free baking blend can work here. Look for one that includes xanthan gum, or add ¼ teaspoon yourself, which helps the biscuits hold together without becoming gummy.
Cold Butter
Cold butter creates the flaky layers everyone loves. As the small pieces of butter melt in the hot oven, they release steam that creates tiny air pockets throughout the biscuits.
Keep the butter as cold as possible until you're ready to mix it into the flour. Cut it into small cubes, and if your kitchen is warm, pop the cubes back in the freezer for ten minutes before using them.
European-style butter, with a butterfat content of 82% or higher, creates even more dramatic flaky layers and a richer flavor. It's a small investment that delivers premium, artisan-quality results — the kind of biscuit you'd expect from a high-end bakery, not your home kitchen.
Shortening
Shortening has long been a staple in Appalachian baking. It produces exceptionally tender biscuits while helping them hold their tall shape during baking.
The combination of butter and shortening provides both incredible flavor and the soft, fluffy texture these biscuits are famous for. For a more traditional approach, lard — a classic Appalachian ingredient — creates exceptionally flaky biscuits and has seen a resurgence among home bakers who appreciate old-fashioned, heritage cooking methods.
If you prefer to use only butter, that works too. The biscuits will be slightly richer and may not rise quite as tall, but they'll still be delicious.
Cold Buttermilk
Cold buttermilk brings moisture and a subtle tang that balances the richness of the butter. Its acidity also reacts with the leavening in the self-rising flour, helping the biscuits rise beautifully.
Add only enough buttermilk for the dough to come together — it should remain soft, shaggy, and slightly sticky. A wetter dough produces a softer biscuit.
If you don't have buttermilk on hand, create a quick substitute: combine 1½ cups milk with 1½ tablespoons lemon juice or white vinegar, and let it sit for five minutes until it thickens slightly. Plain yogurt thinned with a little milk, or kefir, also works well.
Melted Butter
Brushing melted butter over the biscuits before baking encourages even browning and a golden, glossy crust. Another brush immediately after baking gives the biscuits a luxurious finish while adding even more buttery flavor.
This double-butter technique is what separates ordinary biscuits from the kind you'd find at a premium Southern restaurant — and it takes almost no extra effort.
Kitchen Equipment
You don't need fancy tools to make authentic Appalachian biscuits — just a few reliable kitchen essentials.
- Large Mixing Bowl: For combining the flour, butter, shortening, and buttermilk.
- Pastry Cutter or Fork: Used to cut the butter and shortening into the flour until coarse crumbs form.
- Measuring Cups: Accurate measuring ensures tender biscuits every time.
- Biscuit Cutter or Drinking Glass: A large cutter creates the signature oversized "cathead" biscuits. Avoid twisting the cutter, as this can seal the edges and reduce the rise.
- Cast Iron Skillet: A cast iron skillet is traditional and creates beautifully browned bottoms while helping the biscuits rise tall as they bake close together. If you don't have one, a greased baking pan works just as well.
- Pastry Brush: Perfect for brushing the biscuits with melted butter before and after baking.
- Cooling Rack: Allows steam to escape while keeping the biscuits from becoming soggy on the bottom.
A well-seasoned cast iron skillet is one of the best kitchen investments you can make — it lasts a lifetime, improves with age, and is one of the most versatile pieces of cookware in any kitchen.
Step-by-Step Instructions
Step 1: Prepare the Oven
Preheat your oven to 450°F (230°C). Lightly grease a cast iron skillet or baking pan with butter or nonstick spray.
Step 2: Combine the Dry Ingredients
Place the self-rising flour into a large mixing bowl. Add the cold butter pieces and shortening. Using a pastry cutter or fork, cut the fats into the flour until the mixture resembles coarse crumbs with pea-sized pieces remaining. These pieces of butter create flaky layers during baking.
Step 3: Add the Buttermilk
Create a well in the center of the flour mixture. Pour in the cold buttermilk. Using a fork, gently stir until the dough barely comes together. The dough should look shaggy, soft, and slightly sticky. Avoid overmixing — this is the single most important rule of biscuit baking.
Step 4: Shape the Dough
Turn the dough onto a lightly floured surface. Using your hands, gently pat the dough into a rectangle about 1 inch thick. Do not knead. Do not roll with a rolling pin. Gentle handling is the secret to tender biscuits.
Step 5: Cut the Biscuits
Using a large biscuit cutter or the rim of a glass, cut out oversized rounds. Each biscuit should be about the size of a cat's head. Press straight down without twisting the cutter. Gather scraps gently and reshape only once — the less you handle the scraps, the softer they'll be.
Step 6: Arrange in the Skillet
Place the biscuits into the prepared skillet so they are just barely touching. This helps them rise upward instead of spreading outward.
Step 7: Brush with Butter
Brush the tops generously with melted butter. This creates a rich golden crust and encourages even browning.
Step 8: Bake
Bake for 12–15 minutes, or until the tops become deeply golden brown. The biscuits should have risen beautifully and feel light when gently tapped. The kitchen will smell like a warm, buttery dream.
Step 9: Butter Again
Immediately after removing them from the oven, brush with another layer of melted butter. Allow them to cool for about 5 minutes before serving — if you can wait that long.
Expert Tips
- Keep Everything Cold. Cold butter and cold buttermilk produce the flaky, tender biscuits. If your kitchen is warm, chill the bowl and flour in the refrigerator for ten minutes before starting.
- Handle the Dough Gently. The less you work the dough, the softer the biscuits. Pat, don't press.
- Never Knead. Cathead biscuits should be patted, never kneaded. Kneading develops gluten and creates tough biscuits.
- Don't Twist the Cutter. Press straight down to help the biscuits rise evenly. Twisting seals the edges.
- Bake in Cast Iron. Cast iron creates beautifully browned bottoms and distributes heat evenly.
- Let the Biscuits Touch. Touching biscuits support one another and rise taller.
- Brush with Butter Twice. Before and after baking for maximum flavor and a gorgeous glossy finish.
- Use Fresh Self-Rising Flour. Older flour may lose some of its leavening power, resulting in flat, dense biscuits.
- Avoid Adding Too Much Flour. Sticky dough makes softer biscuits. A little stickiness is your friend.
- Bake in a Fully Preheated Oven. High heat creates the rapid rise that gives cathead biscuits their impressive height.
- Eat Them Warm. Fresh biscuits always taste best, with the flakiest texture and the most buttery flavor.
- Freeze Extras. They reheat beautifully for quick breakfasts — a smart meal prep strategy for busy mornings.
Common Mistakes to Avoid
- Overmixing the Dough. This develops gluten and creates tough biscuits instead of tender ones.
- Warm Butter. Soft butter won't create flaky layers. Keep it cold until the moment it goes into the flour.
- Kneading the Dough. Too much handling reduces tenderness. Pat gently and stop.
- Twisting the Biscuit Cutter. This seals the edges and prevents the biscuits from rising to their full height.
- Too Much Flour. Dry dough creates dry biscuits. Embrace a slightly sticky dough.
- Not Using Cold Buttermilk. Warm liquid reduces lift and results in flat, dense biscuits.
- Overbaking. Biscuits quickly become dry if baked too long. Watch them closely after the 12-minute mark.
- Crowding Too Much. Light contact is good, but overpacking can prevent even baking and heat circulation.
- Using Expired Flour. Fresh flour ensures the highest rise and the best flavor.
- Opening the Oven Too Soon. Heat loss can reduce the rise. Wait at least 10 minutes before peeking.
- Skipping the Butter Finish. Butter keeps the crust soft and flavorful — don't skip this step.
- Serving Cold. Warm biscuits have the best flavor and texture. Reheat gently if they've cooled.
Ingredient Substitutions
These biscuits are wonderfully adaptable while still maintaining their old-fashioned charm.
Butter Options: European-style butter for richer flavor, or salted butter if you're reducing added salt elsewhere in the recipe.
Shortening Alternatives: All butter for a richer result, lard for a traditional Appalachian approach, or butter-flavored shortening for convenience.
Buttermilk Alternatives: 1½ cups milk + 1½ tablespoons lemon juice, plain yogurt thinned with milk, or kefir — all produce a similar tangy acidity.
Flour Alternatives: If self-rising flour isn't available, combine 3 cups all-purpose flour with 4½ teaspoons baking powder and ¾ teaspoon salt. For a high-fiber or whole-grain version, substitute up to one-third of the all-purpose flour with whole wheat pastry flour.
Recipe Variations
- Cheddar Cathead Biscuits: Fold shredded sharp cheddar into the dough for a savory, cheesy version.
- Garlic Butter Biscuits: Mix garlic powder into the flour and brush with garlic butter after baking.
- Herb Biscuits: Add chopped chives, parsley, thyme, or rosemary for an elegant savory side.
- Bacon Biscuits: Fold crispy crumbled bacon into the dough for a protein-rich breakfast option.
- Jalapeño Cheddar Biscuits: Add diced jalapeños and cheddar cheese for a spicy kick.
- Honey Butter Biscuits: Brush with honey butter after baking — wonderful with coffee or tea.
- Ham and Cheese Biscuits: Add diced country ham and cheddar for a hearty, protein-packed breakfast sandwich base.
- Pepper Jack Biscuits: Use Pepper Jack cheese for a spicy, melty variation.
- Everything Seasoning Biscuits: Sprinkle everything bagel seasoning on top before baking for a modern twist.
- Cinnamon Honey Biscuits: Brush with butter and sprinkle with cinnamon sugar before baking — a sweet breakfast treat.
- Sausage Biscuit Sandwiches: Split and fill with sausage patties and eggs for a satisfying, protein-rich morning meal.
- Blackberry Jam Biscuits: Serve warm with homemade Appalachian blackberry preserves for a truly traditional experience.
Make It Healthier
Although traditional Cathead Biscuits are wonderfully rich, a few simple adjustments can make them a little lighter while preserving their homemade character.
- Replace half of the shortening with cold butter for a richer flavor using less shortening overall.
- Substitute part of the self-rising flour with whole wheat pastry flour to add extra fiber while maintaining a tender crumb.
- Use low-fat buttermilk instead of full-fat, and brush the tops lightly with butter rather than generously if you want to reduce saturated fat.
- Serve the biscuits alongside scrambled eggs, fresh fruit, or homemade vegetable soup for a balanced, heart-healthy meal instead of relying solely on butter or gravy.
These small changes make a meaningful difference in the overall nutrition without sacrificing the flavor and comfort that make these biscuits so special.
Meal Prep Guide
One of the best things about Old-Fashioned Appalachian Cathead Biscuits is that much of the work can be done ahead of time. Whether you're preparing breakfast for guests, a holiday brunch, or a cozy weekend meal, these biscuits are easy to plan in advance while still tasting freshly baked.
Prepare the Dough Ahead: Mix the dough according to the recipe, then gently pat it into a thick rectangle. Wrap it tightly in plastic wrap and refrigerate for up to 24 hours before cutting the biscuits. When ready to bake, cut the biscuits, brush with butter, and bake as directed.
Cut the Biscuits in Advance: After cutting the biscuits, place them on a parchment-lined baking sheet. Cover tightly and refrigerate overnight. Bake directly from the refrigerator, adding 1–2 extra minutes if needed.
Holiday Breakfast Prep: These biscuits are perfect for Thanksgiving, Christmas morning, Easter brunch, or family reunions. Prepare the dough the night before so you can enjoy fresh, hot biscuits with minimal morning effort. This kind of smart meal planning turns a hectic holiday morning into a relaxed, enjoyable experience.
Storage
Allow the biscuits to cool completely before storing. Place them in an airtight container or resealable storage bag. Store at room temperature for 2 days or refrigerate for up to 5 days. To keep them from drying out, line the container with a paper towel to absorb excess moisture.
Freezing
These biscuits freeze exceptionally well — making them one of the best make-ahead breakfast recipes for busy families.
Before Baking: Arrange the cut biscuits on a baking sheet and freeze until solid. Transfer them to a freezer-safe bag or airtight container. Freeze for up to 3 months. Bake directly from frozen, adding 3–5 extra minutes to the baking time.
After Baking: Allow the baked biscuits to cool completely. Wrap each biscuit individually in plastic wrap or aluminum foil. Place them in a freezer-safe container or zip-top bag. Freeze for up to 3 months.
Reheating
Oven (Best Method): Preheat the oven to 350°F (175°C). Wrap the biscuits loosely in foil and bake for 8–10 minutes, or until warmed through.
Air Fryer: Heat at 325°F (165°C) for 3–5 minutes. This helps restore the lightly crisp exterior.
Microwave: Wrap a biscuit in a slightly damp paper towel. Microwave for 20–30 seconds. This keeps the biscuit soft, although the crust won't be as crisp as oven reheating.
What to Serve with Appalachian Cathead Biscuits
These oversized biscuits pair beautifully with both sweet and savory dishes, making them a versatile addition to any breakfast, brunch, or holiday meal.
Breakfast Favorites: Country sausage gravy, scrambled eggs, fried eggs, country ham, crispy bacon, breakfast sausage, hash browns, cheese grits.
Lunch and Dinner: Fried chicken, roast chicken, beef stew, chicken and dumplings, vegetable soup, chili, barbecue pulled pork, smoked brisket.
Sweet Toppings: Butter, honey, homemade blackberry jam, strawberry preserves, peach preserves, apple butter, cinnamon honey butter, maple butter.
Beverage Pairings
Hot Drinks: Freshly brewed coffee, sweet cream coffee, black tea, Earl Grey tea, hot chocolate, hot apple cider.
Cold Drinks: Sweet iced tea, fresh lemonade, whole milk, buttermilk, fresh orange juice, apple cider.
Frequently Asked Questions
1. Why are they called Cathead Biscuits? Because they're traditionally made about as large as a cat's head, making them much bigger than standard biscuits.
2. Can I use all-purpose flour? Yes. Add 4½ teaspoons baking powder and ¾ teaspoon salt to replace self-rising flour. For a higher-fiber version, substitute part of the flour with whole wheat pastry flour.
3. Why must the butter stay cold? Cold butter creates steam pockets that produce flaky, tender layers. Warm butter melts into the flour and creates a dense, flat biscuit.
4. Can I use only butter? Yes. The biscuits will have a richer flavor, although they may be slightly less tender than when shortening is included.
5. Why shouldn't I knead the dough? Overworking the dough develops gluten, resulting in tougher biscuits. Pat gently and stop.
6. Can I make smaller biscuits? Absolutely. Reduce the baking time to about 10–12 minutes.
7. Can I freeze the dough? Yes. Freeze cut biscuits before baking for up to 3 months. Bake directly from frozen, adding a few extra minutes.
8. Should the biscuits touch while baking? Yes. Placing them just barely touching encourages a taller rise and softer sides.
9. Can I bake these without a cast iron skillet? Yes. A greased baking sheet or baking pan works well too, though cast iron creates the best browned bottoms.
10. Why are my biscuits dry? Too much flour or overbaking are the most common causes. Keep the dough slightly sticky and watch the oven carefully.
11. Can I add cheese? Absolutely. Sharp cheddar is a favorite addition, and Pepper Jack adds a spicy kick.
12. Can I make them sweeter? Yes. Brush with honey butter after baking or serve with fruit preserves.
13. How do I know when they're done? The tops should be deeply golden, and the bottoms should be lightly browned. A biscuit should sound slightly hollow when tapped.
14. Can I use lard instead of shortening? Yes. Lard is a traditional Appalachian ingredient and creates exceptionally flaky biscuits — a true heritage cooking method.
15. What's the best way to serve them? Warm from the oven with melted butter, honey, homemade jam, or creamy sausage gravy. For a balanced meal, pair with scrambled eggs and fresh fruit.
Nutrition Information
Estimated Per Biscuit:
| Nutrient | Amount |
|---|---|
| Calories | 295 |
| Protein | 5g |
| Fat | 15g |
| Saturated Fat | 7g |
| Carbohydrates | 35g |
| Fiber | 1g |
| Sugars | 2g |
| Cholesterol | 18mg |
| Sodium | 520mg |
| Calcium | 120mg |
| Iron | 2mg |
| Potassium | 90mg |
Nutrition Disclaimer: Nutrition values are estimates and will vary depending on ingredient brands, portion sizes, and preparation methods.
There's a reason Old-Fashioned Appalachian Cathead Biscuits have been a cherished tradition for generations. With their towering size, flaky golden tops, and cloud-soft centers, they embody the warmth and hospitality of Appalachian home cooking.
Made with simple pantry staples and a gentle touch, these biscuits prove that the best recipes don't need to be complicated. Whether served with creamy sausage gravy, slathered in butter and honey, or filled with slices of country ham, every bite is comforting, satisfying, and wonderfully nostalgic.
Bake a batch for a lazy Sunday breakfast, a family gathering, or a holiday brunch, and you'll quickly understand why these giant biscuits have earned their place as a Southern classic. They're the kind of budget-friendly, cost-effective meal that brings everyone to the table — and keeps them coming back for more.
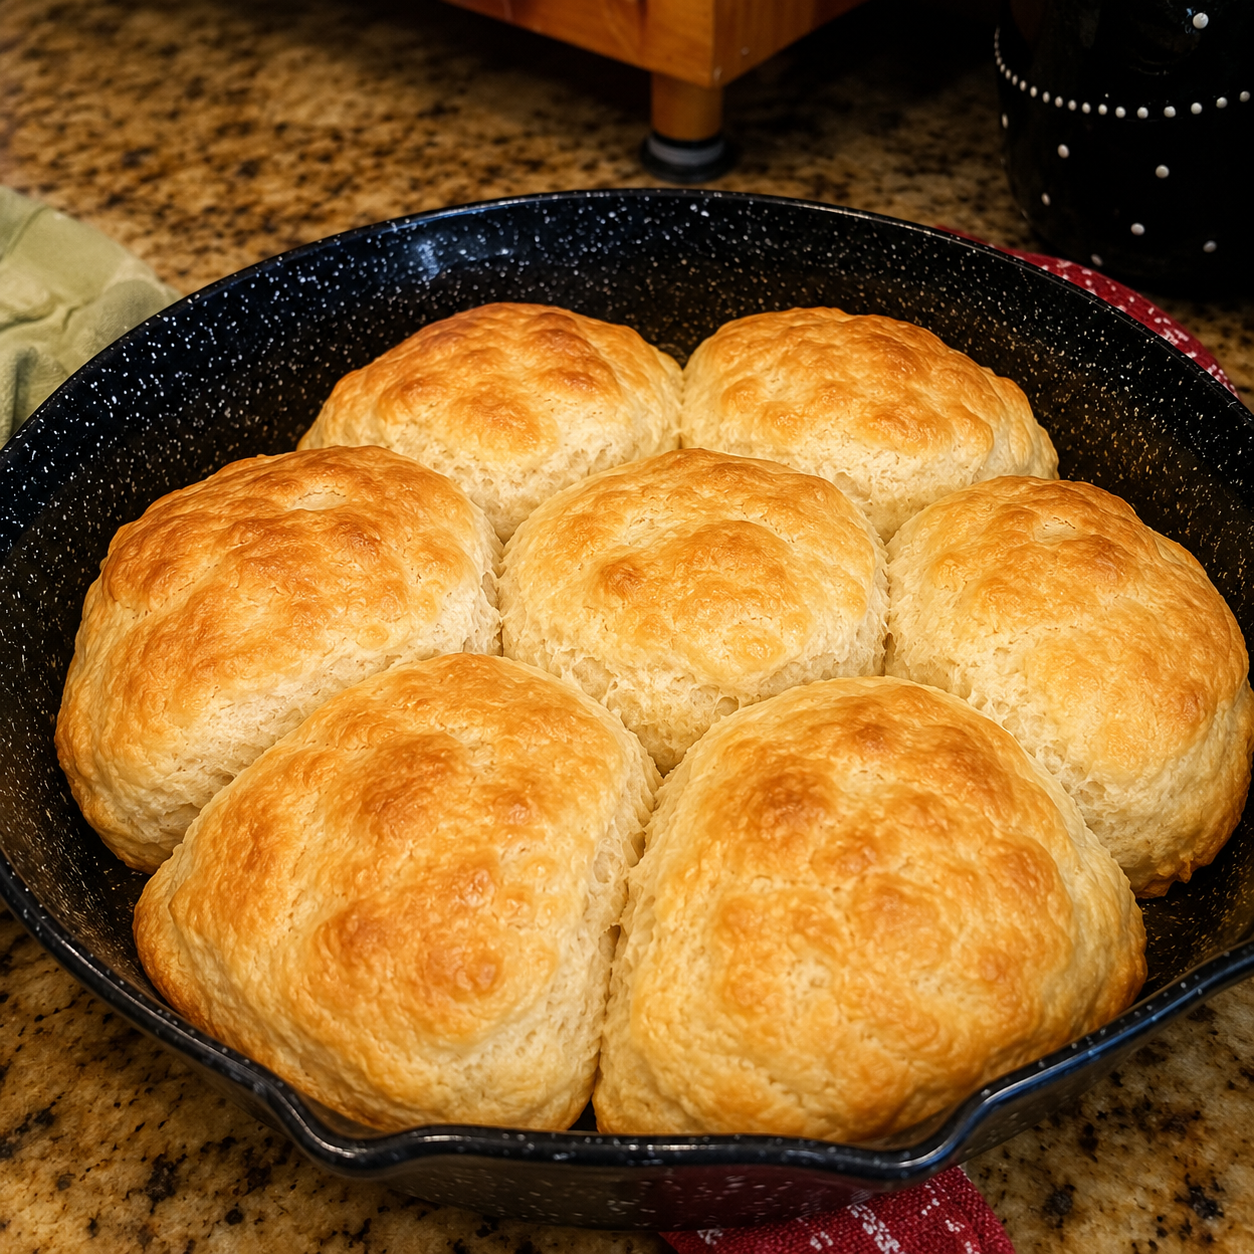
Old-Fashioned Appalachian Cathead Biscuits
Ingredients
Equipment
Method
- Preheat the oven to 450°F (230°C) and lightly grease a cast iron skillet or baking pan.
- Cut the cold butter and shortening into the self-rising flour until the mixture resembles coarse crumbs.
- Add the cold buttermilk and stir gently with a fork until a soft, shaggy dough forms.
- Turn the dough onto a lightly floured surface and gently pat it into a 1-inch-thick rectangle.
- Cut large rounds using a biscuit cutter or the rim of a glass. Do not twist the cutter.
- Arrange the biscuits in the prepared skillet so they are just touching.
- Brush the tops with melted butter.
- Bake for 12–15 minutes, until deeply golden brown.
- Immediately brush with more melted butter and serve warm.
Notes
Avoid kneading or overmixing the dough.
Fresh self-rising flour provides the best rise.
Cast iron creates beautifully browned bottoms.
Delicious served with butter, honey, homemade jam, or sausage gravy.