
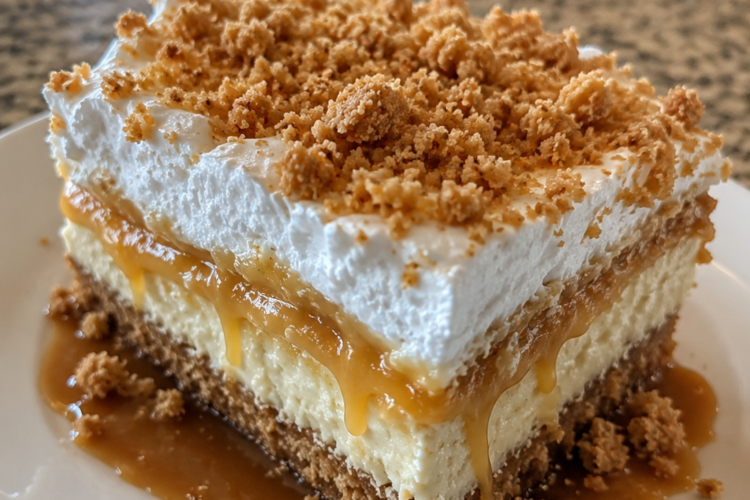
Butterscotch Pudding Pie Bars: The No-Bake Dessert That Tastes Like Every Family Reunion
There’s a certain kind of Thursday night that sneaks up on you. The kind where the week has already stretched thin, the fridge feels half-empty, and your mind keeps drifting back to a specific memory you didn’t even realize you were missing. For me, it was the sound of my aunt’s aluminum pan hitting the counter at every family gathering. She never announced it. She just walked in, set the pan down, and within thirty seconds someone was already hovering with a plate, asking if they could cut the first square while it was still cold from the fridge.
Those bars lived in the middle of the dessert table like royalty. Buttery graham cracker crust that stayed crisp even under all those creamy layers. A thick, slightly tangy cream cheese middle that somehow never got lost. Then this glossy, almost caramel-colored butterscotch pudding that melted into everything around it. And on top, soft peaks of whipped cream scattered with extra crumbs that stuck to your fingers. One bite and the whole room went quiet for a second. That was the power of her recipe.
I recreated them last week on a random Thursday because I couldn’t shake the craving. My husband ate two pieces before I even finished making dinner. No apology. No shame. Just pure, quiet satisfaction. These butterscotch pudding pie bars deliver exactly that feeling: sweet, creamy, crunchy, and ridiculously comforting. They require almost no skill, zero oven time, and they somehow taste like they took all day. If you’ve ever needed a dessert that feels like a hug from someone who always knew how to make a table feel complete, this is it.
Why You'll Love This Recipe
These bars check every box that matters when you’re feeding people you care about. They’re no-bake, which means your kitchen stays cool and your schedule stays flexible. The layers set up reliably in the fridge, so you can make them the night before and actually enjoy your own gathering instead of hovering over the oven. The flavor combination is pure nostalgia without being one-note: the graham crust brings warm, toasty notes, the cream cheese layer cuts the sweetness with a gentle tang, and the butterscotch pudding delivers that deep, buttery caramel flavor that feels both familiar and a little luxurious.
They’re also incredibly forgiving. Kids can help press the crust. Teenagers can whisk the pudding. You can assemble the whole thing in under twenty minutes of active work and then walk away. They travel well in the pan, they slice cleanly once chilled, and they look impressive without any fancy piping or garnishes. And because every layer uses pantry staples and refrigerator basics, you can usually throw them together without a special grocery run. That combination of ease, nostalgia, and crowd-pleasing power is rare. These bars have it.
Why This Recipe Works
Every component here has a job, and they all do it well. The graham cracker crust isn’t just a base; it’s the structural foundation that stays firm under the weight of the creamy layers. The melted butter and sugar bind the crumbs into a cohesive, slightly sweet shell that softens just enough at the edges while staying crisp in the middle. Chilling it first is the quiet hero move that prevents the cream cheese layer from sinking or mixing.
The cream cheese layer acts as both a flavor bridge and a textural buffer. Softened cream cheese beaten with powdered sugar becomes light and spreadable, and folding in whipped topping keeps it from turning dense. That slight tang is what keeps the finished bars from tasting cloying. Without it, the butterscotch would dominate. With it, every bite has contrast.
Instant butterscotch pudding is the workhorse. When whisked with cold milk, it thickens into a glossy, spoonable layer that sets firmly enough to hold its shape when sliced but still melts on the tongue. Using two boxes ensures the layer is substantial rather than skimpy. Letting it sit a few minutes after whisking gives it a chance to fully thicken so it doesn’t bleed into the cream cheese layer below.
The final whipped topping and crumb sprinkle finish the job. Soft swirls of topping add airiness and visual height, while the extra crumbs give a final textural pop and a little more of that buttery graham flavor. Together the layers create a dessert that feels more complex than the short ingredient list suggests. It’s classic American no-bake logic at its best: simple ingredients, smart order of assembly, and enough chill time to let everything settle into something greater than the sum of its parts.
Ingredient Breakdown
Graham cracker crumbs form the crust. You can crush whole sheets yourself in a food processor or zip-top bag, or buy the pre-crushed kind. Fresh crumbs give the best flavor and texture. Look for a brand that tastes distinctly of honey and wheat rather than plain cardboard. If your crumbs seem dry, a tiny extra drizzle of melted butter helps them hold together.
Granulated sugar sweetens the crust and helps the butter bind. It also encourages a slight caramelization of flavor even though we’re not baking. Don’t skip it; the crust needs that balance.
Unsalted butter, melted is the glue. Unsalted lets you control the salt level. Melt it fully and let it cool just a minute so it doesn’t cook the crumbs. The mixture should look like wet sand that clumps when you squeeze it.
Cream cheese must be full-fat and properly softened. Cold cream cheese will leave lumps no matter how long you beat it. Leave it on the counter for at least an hour, or microwave it in short bursts if you’re in a hurry. The tang is essential for balance.
Powdered sugar dissolves easily into the cream cheese and keeps the layer smooth. Granulated sugar would leave a grainy texture here.
Whipped topping (the frozen tub kind) is used in both the cream cheese layer and the final topping. It stays stable longer than freshly whipped cream and gives that classic light, sweet cloud texture. If you prefer homemade whipped cream, you can use it, but the bars will be slightly less stable at room temperature.
Instant butterscotch pudding mix is non-negotiable for the classic version. The instant variety sets without cooking and delivers that specific artificial-yet-beloved butterscotch flavor that tastes like childhood. Two 3.4-ounce boxes give the right thickness for a 9x13 pan.
Cold milk activates the pudding. Whole milk produces the richest result, but 2% works fine. Cold is important; warm milk can prevent proper thickening.
Extra graham cracker crumbs for the top are optional but highly recommended. They add visual appeal and one last crunch.
Kitchen Equipment
You need very little. A 9x13-inch baking pan (metal or glass both work; glass lets you see the layers). A medium mixing bowl for the crust. A larger bowl and hand mixer or stand mixer for the cream cheese layer. A whisk and another bowl for the pudding. A rubber spatula for spreading. Measuring cups and spoons. That’s it. No special pans, no water baths, no thermometers. If you want perfectly clean slices, a sharp knife dipped in hot water between cuts helps, but it’s not required.
Step-by-Step Instructions
Start by preparing the crust. In a medium bowl combine 1½ cups graham cracker crumbs, ⅓ cup granulated sugar, and ½ cup melted unsalted butter. Stir until every crumb is moistened and the mixture looks like damp sand. When you press a handful, it should hold its shape. Tip the mixture into a 9x13 pan and use the bottom of a measuring cup or your fingers to press it into an even layer, paying special attention to the corners and edges. Press firmly; a loosely packed crust will crumble when you try to serve the bars. Once pressed, slide the pan into the refrigerator while you make the next layer. This short chill firms the butter so the cream cheese won’t sink in.
While the crust chills, make the cream cheese layer. Place 8 ounces of softened cream cheese in a large bowl. Beat it with a hand mixer on medium speed for about a minute until it’s completely smooth and free of lumps. Add ½ cup powdered sugar and beat again until the mixture is light and fluffy, about another minute. Scrape down the sides of the bowl. Now gently fold in 1 cup of thawed whipped topping with a rubber spatula. Use broad, slow strokes so you don’t deflate the topping. The mixture should look pale, creamy, and slightly mousse-like. Remove the crust from the fridge and spread the cream cheese mixture evenly over it, going all the way to the edges. Smooth the top as best you can; small ridges will disappear under the next layer.
Next comes the butterscotch pudding. In a clean bowl whisk together two 3.4-ounce boxes of instant butterscotch pudding mix and 3 cups of cold milk. Whisk steadily for a full two minutes. The mixture will look thin at first, then thicken and turn glossy. Let it stand for three to five minutes so it can finish setting. It should be thick enough to mound on a spoon but still spreadable. Carefully spoon or pour it over the cream cheese layer and spread it gently to the edges. Work from the center outward so you don’t disturb the layer underneath. The pudding should sit in a smooth, even sheet.
For the final topping, spoon the remaining 2 cups of whipped topping over the pudding. Use the back of a spoon or an offset spatula to create soft, billowy swirls. There’s no need for perfection; the uneven peaks look homemade and inviting. Finish by sprinkling a generous handful of extra graham cracker crumbs over the top. They’ll stick to the whipped topping and give every square a little extra crunch.
Cover the pan loosely with plastic wrap or a lid and refrigerate for at least four hours, preferably overnight. The longer chill allows the layers to firm up and the flavors to marry. When you’re ready to serve, run a sharp knife under hot water, wipe it dry, and cut into squares. Wipe the knife between cuts for the cleanest edges. The bars should hold their shape beautifully, with distinct layers visible from the side.
Expert Tips
Softened cream cheese is non-negotiable. If it’s still cold in the center, you’ll fight lumps the entire time. Plan ahead or use the microwave in 10-second bursts, stirring between each.
Press the crust firmly and evenly. Weak spots in the corners are the first places the bars will fall apart when lifted.
Whisk the pudding the full two minutes even if it looks thick earlier. Under-whisked pudding can stay grainy or fail to set properly.
Spread each layer gently. Aggressive spreading mixes the layers and muddies the final look.
If your kitchen is warm, chill the cream cheese layer for ten minutes before adding the pudding. This extra insurance keeps the layers distinct.
For the prettiest slices, chill the finished bars overnight and cut them straight from the fridge. Room-temperature bars are still delicious but softer.
A light dusting of flaky sea salt on top of a few squares right before serving is a grown-up twist that makes the butterscotch taste even richer.
Common Mistakes to Avoid
Using cold cream cheese is the most common error. It creates lumps that no amount of beating will fully erase, and those lumps show up as white streaks in the finished bars.
Not chilling the crust before adding the cream cheese layer can cause the crust to soften and mix slightly with the next layer, especially if the cream cheese is very soft.
Pouring the pudding on too soon, before it has thickened, leads to a thin, runny middle layer that doesn’t hold its shape when sliced.
Over-mixing the whipped topping into the cream cheese deflates it and makes the middle layer dense instead of light.
Cutting the bars before they’ve fully chilled produces messy, collapsing squares. Four hours is the minimum; overnight is better.
Using warm milk for the pudding prevents proper thickening. Always start with cold milk straight from the fridge.
Ingredient Substitutions
If you don’t have graham crackers, digestive biscuits or vanilla wafer crumbs work in a pinch. The flavor will shift slightly but the texture remains solid.
For a dairy-free version, use a plant-based cream cheese and a coconut or almond-based whipped topping. Choose a butterscotch pudding mix that is dairy-free (some brands are) and pair it with your preferred non-dairy milk. Results vary by brand, so test a small batch if you’re serving guests with allergies.
Homemade whipped cream can replace the tub whipped topping. Whip 1½ cups heavy cream with 3 tablespoons powdered sugar and 1 teaspoon vanilla until medium peaks form. Use it in both the middle layer and the topping, but know the bars will soften faster at room temperature.
If butterscotch pudding is unavailable, vanilla pudding mixed with a tablespoon of butterscotch sauce or caramel sauce can approximate the flavor, though it won’t be identical.
Gluten-free graham-style crumbs exist and work exactly the same way for the crust.
Recipe Variations
Add a thin layer of salted caramel sauce between the cream cheese and pudding for extra depth. Warm the caramel just enough to spread, then chill briefly before adding the pudding.
Fold mini chocolate chips or butterscotch chips into the cream cheese layer for little pockets of texture.
Swap the butterscotch pudding for chocolate or banana for a completely different but still nostalgic bar.
Top the finished bars with a drizzle of melted chocolate or caramel right before serving for a bakery-style finish.
For a lighter look, pipe the final whipped topping in neat rosettes instead of freeform swirls and sprinkle the crumbs more sparingly.
Make individual portions in a muffin tin lined with paper liners. Press a spoonful of crust into each, then layer the remaining ingredients. They set faster and look charming on a dessert tray.
Make It Healthier
These are dessert bars, not health food, but you can nudge them in a better direction. Use reduced-fat cream cheese and light whipped topping to cut some calories and fat without destroying the texture. Choose a sugar-free pudding mix and reduce the powdered sugar in the cream cheese layer by half. The bars will still taste sweet because of the pudding and crust. Serve smaller squares and pair them with fresh berries on the side to add fiber and balance the plate. Whole-grain graham crackers, if you can find them, add a bit more fiber to the crust. None of these changes turn the bars into a salad, but they make the indulgence feel a little more reasonable when you’re feeding a crowd that includes health-conscious eaters.
Meal Prep Tips
These bars are ideal for advance preparation. Assemble them the day before you need them and leave them covered in the refrigerator. The flavors actually improve after a full night of chilling. If you’re packing them for a potluck or picnic, keep the pan cold in a cooler with ice packs until serving time. You can also cut the bars ahead, place them in a single layer in an airtight container with parchment between layers, and transport them that way. They hold up better than most cream-based desserts when kept cold.
Storage
Store the bars covered in the refrigerator for up to four days. The crust will soften slightly over time but remains pleasant. Keep them away from strong-smelling foods because the whipped topping can absorb odors. If you’ve already cut them, place a piece of parchment or plastic wrap directly against any cut surfaces to limit drying.
Freezing
These bars freeze surprisingly well. Freeze the entire pan uncovered until solid, then wrap tightly in plastic wrap followed by foil, or cut into individual squares and freeze them on a baking sheet before transferring to a freezer bag. They keep for up to two months. Thaw overnight in the refrigerator. The texture of the whipped topping may soften a little after freezing, but the overall result is still excellent. Do not refreeze once thawed.
Reheating
These are meant to be served cold. Reheating is not recommended; the layers will melt and lose their distinct textures. If a square has been sitting out and feels a bit soft, simply return it to the refrigerator for twenty minutes to firm up again.
What to Serve With It
These bars shine on their own, but they also play well with others. A bowl of fresh strawberries or raspberries on the side cuts the richness. A scoop of vanilla ice cream turns them into an over-the-top sundae situation. For a potluck spread, pair them with a tart lemon bar or a simple fruit salad so guests have contrast. At a casual family dinner they make a perfect ending after grilled chicken, meatloaf, or any comforting main dish. They’re also excellent with a cup of coffee after a long day when you just want something sweet and familiar.
Beverage Pairings
A hot cup of black coffee or a latte balances the sweetness beautifully. Cold milk is the classic childhood pairing and still works perfectly. For something a little more grown-up, a glass of chilled dessert wine or a lightly sweet sparkling wine complements the butterscotch notes. Iced tea, especially with a squeeze of lemon, is refreshing alongside a rich square. And on a warm evening, a simple glass of cold water with ice is sometimes the best choice so the dessert can take center stage.
Frequently Asked Questions
Can I make these without instant pudding? The instant version is what gives the classic texture and set. Cook-and-serve pudding requires different handling and won’t produce the same result in this no-bake format.
Why is my cream cheese layer lumpy? The cream cheese wasn’t soft enough. Next time, let it sit at room temperature longer or soften it carefully in the microwave.
Can I use homemade whipped cream? Yes, but the bars will be less stable if left at room temperature for extended periods. Keep them cold.
How far in advance can I make these? Up to two days ahead is ideal. After that the crust softens more than most people prefer.
Do I have to use a 9x13 pan? It’s the best size for the given quantities. An 8x8 pan will produce thicker bars that need longer to set and may be harder to slice cleanly.
Can I double the recipe? Yes. Use two 9x13 pans or one very large sheet pan. Mixing the pudding in two separate batches is easier than trying to whisk a huge volume at once.
Why did my layers mix together? Usually the pudding was too thin when spread, or the cream cheese layer was too soft and warm. Extra chilling between layers helps.
Are these safe to leave out at a party? They can sit at cool room temperature for about two hours. After that, return them to the refrigerator. In hot weather, keep them on ice.
Can I add nuts? Chopped toasted pecans or walnuts sprinkled on top or folded into the crust add nice crunch and flavor.
Is there a way to make the butterscotch flavor stronger? A teaspoon of butterscotch extract or a swirl of thick butterscotch sauce between layers intensifies the taste without changing the texture.
Nutrition Information
Approximate nutrition per serving (based on 15 squares): Calories: 310 Total Fat: 16g Saturated Fat: 10g Cholesterol: 35mg Sodium: 320mg Total Carbohydrates: 38g Dietary Fiber: 0.5g Total Sugars: 28g Protein: 4g
These values are estimates and will vary with specific brands and any substitutions. The bars are rich, so smaller portions are satisfying.
Final Thoughts
There’s something deeply comforting about a dessert that doesn’t ask much of you and still manages to taste like it came from someone who has been feeding people for decades. These butterscotch pudding pie bars are that kind of recipe. They carry the quiet magic of every church potluck, every family reunion, every Thursday night when you needed something sweet and familiar. The layers are simple, the method is forgiving, and the end result is the kind of dessert people remember. Make them once and you’ll understand why my aunt’s pan always disappeared first. Make them again and they’ll start showing up at your own table, ready for the next person who asks if they can have the first piece.
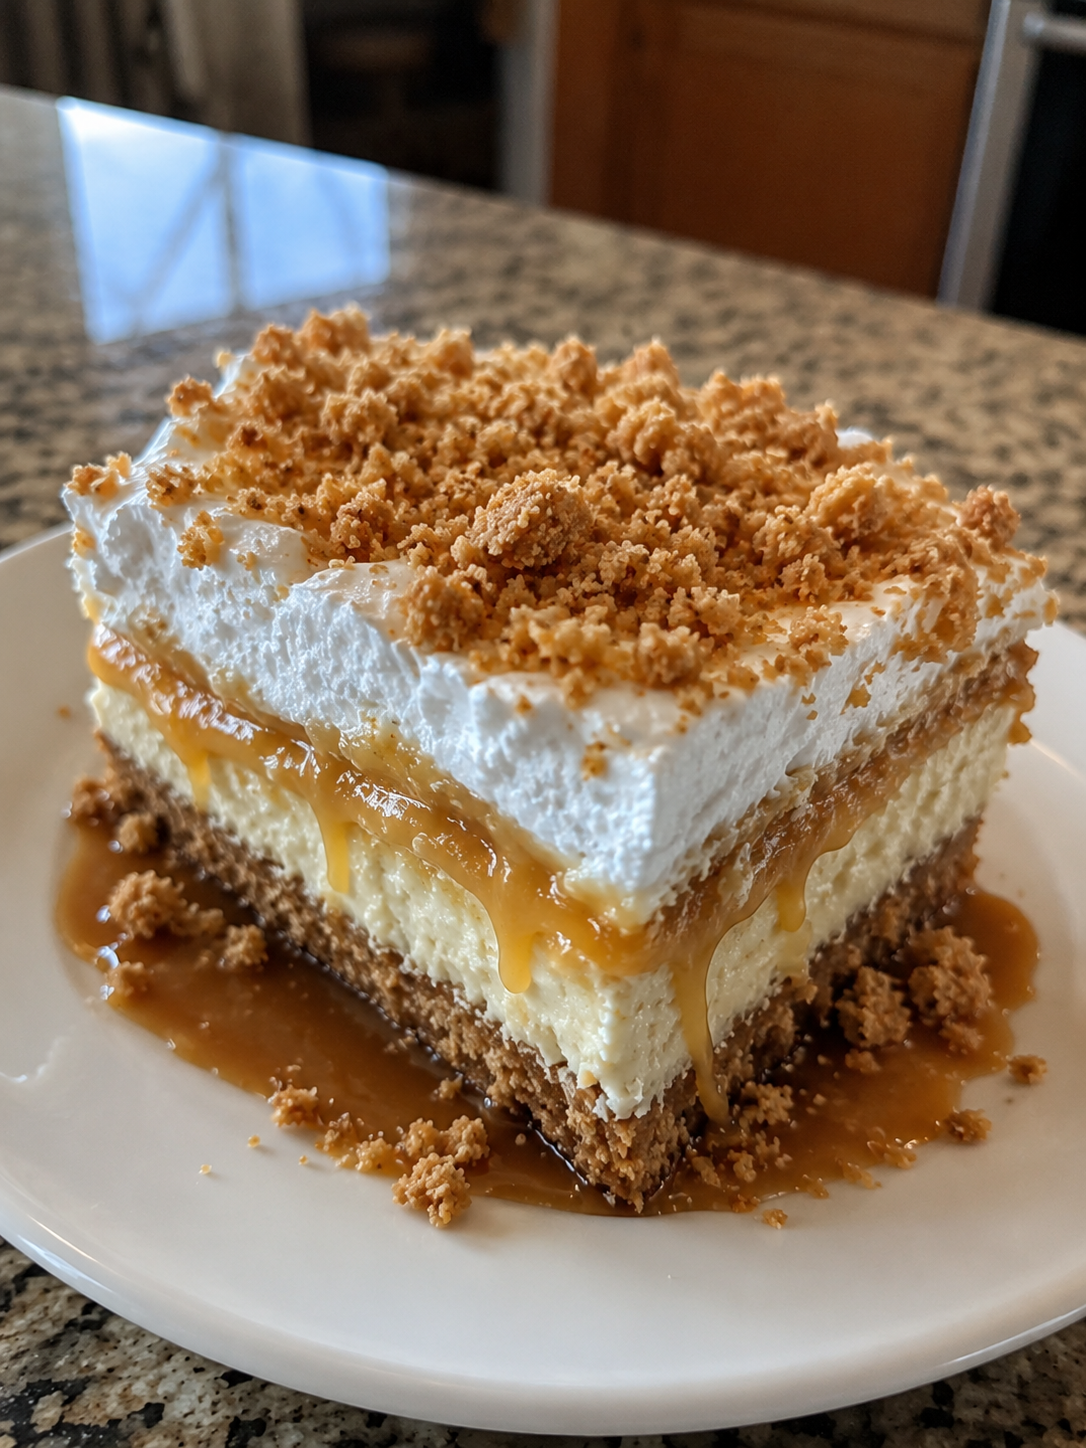
Butterscotch Pudding Pie Bars
Ingredients
Equipment
Method
- In a medium bowl, mix graham cracker crumbs, granulated sugar, and melted butter until the mixture resembles wet sand. Press firmly and evenly into the bottom of a 9x13-inch pan. Refrigerate while preparing the next layer.
- In a large bowl, beat softened cream cheese until smooth. Add powdered sugar and beat until light and fluffy. Gently fold in 1 cup whipped topping. Spread evenly over the chilled crust.
- In another bowl, whisk together both boxes of butterscotch pudding mix and cold milk for 2 full minutes until thickened. Let stand 3–5 minutes, then carefully spread over the cream cheese layer.
- Spread the remaining 2 cups whipped topping over the pudding in soft swirls. Sprinkle generously with extra graham cracker crumbs.
- Cover and refrigerate at least 4 hours or overnight until fully set. Cut into squares and serve cold.
Notes
Chill overnight for the cleanest slices and best flavor.
Store covered in the refrigerator up to 4 days.
Freezes well for up to 2 months.
Nutrition: Serving Size: 1 square Calories: 310 Fat: 16g Carbohydrates: 38g Protein: 4g
Category: Dessert Method: No-Bake Cuisine: American