
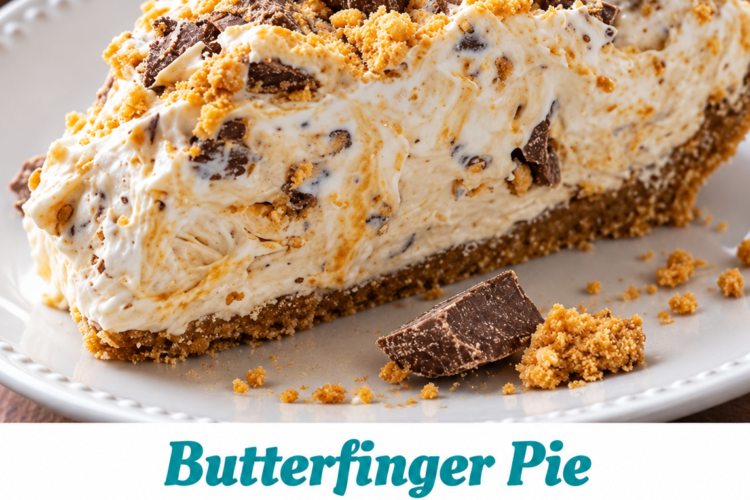
No-Bake Butterfinger Pie – The Creamy, Crunchy Peanut Butter Dessert That Turns Adults into Midnight Thieves
My sister brought this pie to Thanksgiving last year, and I watched three grown men argue over the last slice. I am not exaggerating. My uncle literally hid a piece in the back of the fridge behind the milk. We found it two days later and he was not even embarrassed. That is the kind of power this Butterfinger Pie has. It turns reasonable people into dessert criminals.
This pie is dangerously good. The filling is an unbelievably creamy peanut-butter situation—smooth, rich, just sweet enough—with crunchy bursts of Butterfinger candy scattered throughout. It tastes like the grown-up version of sneaking candy bars after school, except now you can call it dessert and serve it on a nice plate. The best part? There is no oven. No stress. Just mix, chill, and try not to eat half of it before anyone else sees it.
I have made this pie for potlucks, birthdays, and quiet Friday nights when I needed something special without turning on the oven. Every single time the reaction is the same: people take one bite, go silent, and then immediately ask how I made it. When I tell them it is only a handful of ingredients and zero baking, they look personally offended that something this good could be so easy. Once you realize how simple it is to make a pie this creamy, crunchy, and addictive, store-bought desserts start to feel optional.
Why You’ll Love This Recipe
You will love this no-bake Butterfinger Pie because it delivers bakery-level satisfaction with almost no effort. The filling comes together in one bowl in about ten minutes. The crust is store-bought. The only real requirement is a few hours of refrigerator time so the pie can set into clean, creamy slices. The combination of smooth peanut-butter cream cheese filling and crunchy Butterfinger pieces is pure texture heaven.
You will love how reliable it is. The ingredients are easy to find. The method is nearly foolproof. It travels well, slices beautifully once fully chilled, and keeps for days in the refrigerator. It is perfect for holidays, potlucks, summer gatherings, or any time you want a dessert that feels special without heating up the kitchen.
You will love the flavor balance. The cream cheese and peanut butter create a rich, slightly tangy base. Powdered sugar sweetens it just enough. Cool Whip lightens the texture so the filling feels cloud-like rather than heavy. The crushed Butterfingers add salty-sweet chocolate-and-peanut-butter crunch in every bite. A few extra pieces on top make it look bakery-finished.
Most of all, you will love the way people react. This is the pie that disappears first. It is the one someone quietly hides a slice of. It is the one that makes guests ask for the recipe before they finish their plate. In a world of complicated desserts, a no-bake pie this good is pure magic.
Why This Recipe Works
The structure of this pie relies on a few simple but effective techniques. Softened cream cheese and creamy peanut butter beat together into a smooth, stable base. The fat and protein in both ingredients create a rich, emulsified mixture that holds air when the Cool Whip is folded in. Powdered sugar sweetens and slightly firms the filling without the graininess of granulated sugar. Vanilla rounds out the flavors so the peanut butter tastes fuller and less one-dimensional.
Folding in the Cool Whip (rather than beating it aggressively) keeps the filling light and mousse-like. The crushed Butterfinger pieces stay distributed throughout instead of sinking because the filling is thick enough to suspend them. Chilling for at least four hours (and ideally overnight) allows the fats to firm and the flavors to meld, producing clean slices and the best creamy-versus-crunchy contrast.
A store-bought graham cracker or Oreo crust provides a sturdy, flavorful base that needs no extra work. The final sprinkle of extra Butterfinger pieces and crumbs gives visual appeal and an extra hit of crunch on top. These straightforward steps turn a short list of ingredients into a dessert that tastes far more elaborate than the effort required.
Ingredient Breakdown
Cream Cheese (8 oz, room temperature) Cream cheese is the foundation of the creamy filling. Softened to room temperature, it beats smooth and gives the pie its slight tang and luxurious body. Full-fat cream cheese produces the best texture and richness. It contributes protein and calcium along with its signature flavor.
Creamy Peanut Butter (½ cup) Peanut butter supplies the dominant flavor and additional richness. A standard commercial creamy variety blends most smoothly. Natural peanut butter can be used if well stirred, though the texture may be slightly softer. Peanut butter adds protein, healthy fats, and that classic salty-sweet taste.
Vanilla Extract (2 teaspoons) Vanilla softens the sharper edges of the cream cheese and peanut butter and makes the filling taste more complete and rounded.
Powdered Sugar (1 cup) Powdered sugar sweetens the filling and helps it firm up without adding graininess. It dissolves easily into the cream cheese mixture and keeps the texture silky.
Cool Whip / Whipped Topping (8 oz, thawed) Whipped topping lightens the dense cream-cheese-and-peanut-butter base so the filling feels airy and mousse-like rather than heavy. It also helps the pie hold its shape when sliced. Thaw it completely in the refrigerator for best results.
Butterfinger Bars (1½ cups crushed, plus extra for topping) Crushed Butterfinger pieces provide the signature crunch and candy-bar flavor—chocolate, peanut butter, and crispy toffee-like shards. About 8–10 fun-size bars yield the right amount. The extra pieces and crumbs on top make the pie look finished and add more texture.
Graham Cracker or Oreo Crust (store-bought) A ready-made crust keeps the recipe truly no-bake and no-stress. Graham cracker is classic with peanut butter; Oreo adds a chocolate contrast that many people love. Either works beautifully.
Kitchen Equipment
A large mixing bowl, a hand mixer or stand mixer, a spatula, measuring cups and spoons, a knife or food processor for crushing the Butterfingers, and an airtight way to cover the pie are all you need. A sharp knife for serving and a paper towel for wiping the blade between cuts help produce clean slices. That is the complete list.
Step-by-Step Instructions
Place the cream cheese on the counter for about 30 minutes until it is fully softened to room temperature. It should give easily when pressed.
In a large mixing bowl, beat the softened cream cheese and creamy peanut butter together on medium speed until the mixture is completely smooth, fluffy, and free of lumps. Scrape the bowl as needed.
Add the vanilla extract and powdered sugar. Beat again until the mixture is silky, sweet, and fully combined.
Gently fold in the thawed Cool Whip with a spatula, using broad, sweeping motions until the filling is light, uniform, and cloud-like. Do not over-mix or the filling can deflate.
Crush the Butterfinger bars into a mix of small pieces and finer crumbs. Stir about 1½ cups of the crushed candy into the filling, reserving a handful for the topping.
Spoon the filling into the store-bought graham cracker or Oreo crust. Smooth the top with a spatula so it is even and attractive.
Sprinkle the reserved Butterfinger pieces and crumbs evenly over the top for a bakery-style finish.
Cover the pie carefully (plastic wrap or a lid that does not touch the surface) and refrigerate for at least 4 hours, or overnight for the firmest slices and best flavor.
When ready to serve, use a sharp knife wiped clean between cuts for neat slices. Serve cold and watch it disappear.
Expert Tips
- Soften the cream cheese fully; cold cream cheese will leave lumps that are hard to beat out.
- Use standard creamy peanut butter for the smoothest texture.
- Fold the Cool Whip gently so the filling stays light and airy.
- Crush the Butterfingers into varied sizes—some small chunks, some finer crumbs—for the best texture contrast.
- Chill the pie for the full 4 hours minimum; overnight is even better.
- Wipe the knife with a warm, damp cloth between slices for the cleanest presentation.
- Reserve some larger Butterfinger pieces for the top so the pie looks generous and finished.
- If the filling seems too soft after mixing, chill the bowl for 15–20 minutes before spreading it into the crust.
- An Oreo crust gives a chocolate-peanut-butter contrast that many people prefer.
- Taste the filling before adding the candy; a tiny pinch of salt can heighten the peanut-butter flavor if needed.
- Keep the pie cold until the moment you serve it so the slices hold their shape.
- For easier crushing, place the Butterfingers in a zip-top bag and gently pound with a rolling pin.
- Double the recipe and make two pies if you are feeding a crowd—these vanish quickly.
- Let the Cool Whip thaw in the refrigerator overnight rather than on the counter for the best texture.
Common Mistakes to Avoid
- Using cold cream cheese. Lumps will remain no matter how long you beat.
- Beating the Cool Whip aggressively instead of folding. The filling will lose volume and become dense.
- Skipping the chill time. The pie will be too soft to slice cleanly.
- Crushing the Butterfingers into uniform fine crumbs only. You lose the satisfying larger crunchy pieces.
- Spreading the filling into a warm or soft crust. Keep the crust cold and firm.
- Covering the pie with plastic wrap that touches the surface. It can stick and pull off the topping.
- Using natural peanut butter that has separated without stirring it thoroughly. The texture can become oily or dry.
- Adding the Butterfingers while the mixture is still very warm from beating. They can soften too much.
- Serving the pie immediately after assembling. It needs time to firm.
- Using whipped cream that has not been stabilized if you substitute it for Cool Whip. It may weep or deflate.
- Cutting the pie with a dull knife. The slices will look ragged.
- Storing the pie uncovered in the refrigerator. It can absorb odors or dry on the surface.
- Over-mixing after the candy is added and crushing the pieces further.
- Expecting leftover slices to last more than a couple of days in a house full of people. They rarely do.
Ingredient Substitutions
Cream cheese can be replaced with a thick dairy-free cream cheese alternative for a vegan version (texture may vary).
Creamy peanut butter can be replaced with almond butter, cashew butter, or sunflower seed butter for different flavors or allergy needs.
Cool Whip can be replaced with stabilized homemade whipped cream (heavy cream whipped with powdered sugar and a little vanilla, or gelatin-stabilized).
Powdered sugar can be replaced with a powdered sugar alternative designed for cold preparations, though results may differ slightly.
Graham cracker crust can be replaced with an Oreo crust, a shortbread crust, or a homemade graham crust if preferred.
Butterfinger bars can be replaced with another crunchy peanut-butter or toffee candy, though the classic flavor will change.
Recipe Variations
- Chocolate Butterfinger Pie – Use an Oreo crust and fold in ¼ cup mini chocolate chips along with the Butterfingers.
- Extra-Crunchy Version – Increase the crushed Butterfingers to 2 cups and press some into the bottom of the crust before adding the filling.
- Peanut Butter Cup Pie – Replace half the Butterfingers with chopped peanut butter cups.
- Salted Caramel Butterfinger Pie – Drizzle salted caramel over the top before serving.
- Mini Butterfinger Pies – Divide the filling among mini graham crusts or tart shells for individual servings.
- Chocolate-Drizzled Finish – Melt dark or milk chocolate and drizzle it over the chilled pie.
- Cookie Butter Twist – Replace the peanut butter with cookie butter or Biscoff spread.
- Mocha Butterfinger Pie – Add 1 teaspoon instant espresso powder to the cream cheese mixture.
- Holiday Peppermint Version – Add a few drops of peppermint extract and sprinkle crushed candy canes on top along with the Butterfingers.
- Double-Peanut Butter – Swirl a few extra spoonfuls of warmed peanut butter into the top of the filling before chilling.
- Gluten-Free Version – Use a gluten-free graham or cookie crust and confirm the Butterfingers and other ingredients are gluten-free.
- Layered Butterfinger Dessert – Skip the crust and layer the filling with crushed cookies and extra candy in a trifle dish or parfait glasses.
- Frozen Butterfinger Pie – Freeze the finished pie for a firmer, ice-cream-like texture; thaw slightly before slicing.
Make It Healthier
This is a rich, celebratory dessert and should be enjoyed as such. For a slightly lighter approach, use reduced-fat cream cheese and a light whipped topping, accepting a modest change in richness. Reduce the powdered sugar by a couple of tablespoons if you prefer it less sweet. Make smaller slices and serve them with fresh berries for brightness and balance. The no-bake nature already keeps the process simple; portion awareness does the rest.
Meal Prep Guide
This pie is ideal for making ahead. Assemble it the day before you need it and let it chill overnight. The flavor and texture improve with time. Keep it covered in the refrigerator until ready to serve. For longer planning, the pie freezes well (see freezing section). You can also crush the Butterfingers and measure the other ingredients a day or two in advance so assembly takes only minutes.
Storage
Keep the pie covered in the refrigerator for up to five days. The filling stays creamy and the crust remains sturdy when properly chilled. For the neatest slices, cut only what you need and return the rest to the refrigerator promptly. Always store it cold.
Freezing
This pie freezes beautifully for up to two months. Place the whole pie (or individual slices) in the freezer uncovered until firm, then wrap tightly in plastic wrap and foil or place in an airtight container. Thaw overnight in the refrigerator before serving. The texture remains excellent; some people even prefer it semi-frozen for a firmer, colder bite.
Reheating
This pie is meant to be served cold. There is no need to reheat it. If it has been frozen, simply thaw it in the refrigerator until it reaches the desired softness. Room-temperature slices will be softer and more like a thick mousse; most people prefer them well chilled.
What to Serve With It
This Butterfinger Pie is perfect on its own. A few fresh berries or a small drizzle of chocolate sauce can make it feel more dressed up. At a holiday table it sits beautifully next to fruit or lighter cookies. For a casual gathering, serve modest slices with coffee or milk. Leftover slices make an excellent late-night treat straight from the fridge—no plate required if no one is looking.
Beverage Pairings
Cold milk is the classic and most comforting pairing. Hot coffee or espresso cuts the richness and complements the peanut-butter and chocolate notes. Black tea or a mildly sweet iced tea also works well. For a special occasion, a small glass of dessert wine or a nutty amontillado sherry echoes the flavors nicely. Sparkling water with a squeeze of lemon refreshes the palate between bites. Choose a drink that either contrasts the creamy sweetness or leans into the cozy candy-bar character of the pie.
Frequently Asked Questions
Can I use natural peanut butter? Yes, as long as it is well stirred and not too oily. The filling may be slightly softer, so a longer chill helps.
Do I have to use Cool Whip? Stabilized homemade whipped cream works, but Cool Whip is reliable and keeps the texture light.
How long does the pie need to chill? At least 4 hours; overnight is best for clean slices and fully developed flavor.
Can I make it ahead? Yes. It is actually better when made a day in advance.
How do I get clean slices? Use a sharp knife wiped clean with a warm, damp cloth between each cut. Keep the pie well chilled.
Can I freeze the pie? Yes. Wrap it well and freeze for up to two months. Thaw in the refrigerator.
What crust is best? Graham cracker is classic with peanut butter; Oreo adds a chocolate contrast that many love. Both work perfectly.
Can I use a different candy? Yes, but Butterfinger gives the signature crunch and flavor. Other crispy peanut-butter or toffee candies can substitute.
Is this pie very sweet? It is sweet, as most candy-bar pies are, but the cream cheese and peanut butter keep it balanced.
Can I make it gluten-free? Use a gluten-free crust and confirm the Butterfingers and other ingredients are gluten-free.
How many servings does it make? About 8–10 generous slices.
Why is my filling lumpy? The cream cheese was not fully softened. Let it sit out longer next time.
Can I double the recipe? Yes. Make two pies or use a larger deeper crust if available.
How long do leftovers keep? Up to five days in the refrigerator, covered.
Can I add extra peanut butter? A little extra is fine, but too much can make the filling heavier and softer.
Nutrition Information
Estimated nutrition per slice (based on 10 slices): approximately 380–450 calories, 25–30 g fat, 35–40 g carbohydrates, 6–8 g protein. Values vary depending on the exact brands of peanut butter, cream cheese, Cool Whip, and crust used and the amount of Butterfinger added. These figures are estimates only and are not a substitute for professional nutritional advice. Enjoy this pie as an occasional special dessert within a varied and balanced way of eating.
Final Thoughts
This no-bake Butterfinger Pie has become one of the recipes I keep in my back pocket for every gathering that needs a guaranteed crowd-pleaser. It is creamy, crunchy, peanut-buttery, and almost ridiculously easy. I love that it starts with a few simple ingredients and ends up tasting like something you would order at a bakery. I love the way people go quiet for a second after the first bite, and I especially love that it has the power to make grown adults hide slices behind the milk.
I hope you make it soon—for Thanksgiving, for a potluck, or simply for a night when you want something special without turning on the oven. I hope the filling turns out silky, the Butterfinger pieces stay crunchy, and the first slice disappears before you even sit down. And I hope someone at your table quietly plans how to claim the last piece. If you try it, I would love to know how many adults argued over it at your house. From my kitchen to yours—creamy, crunchy, and completely irresistible.
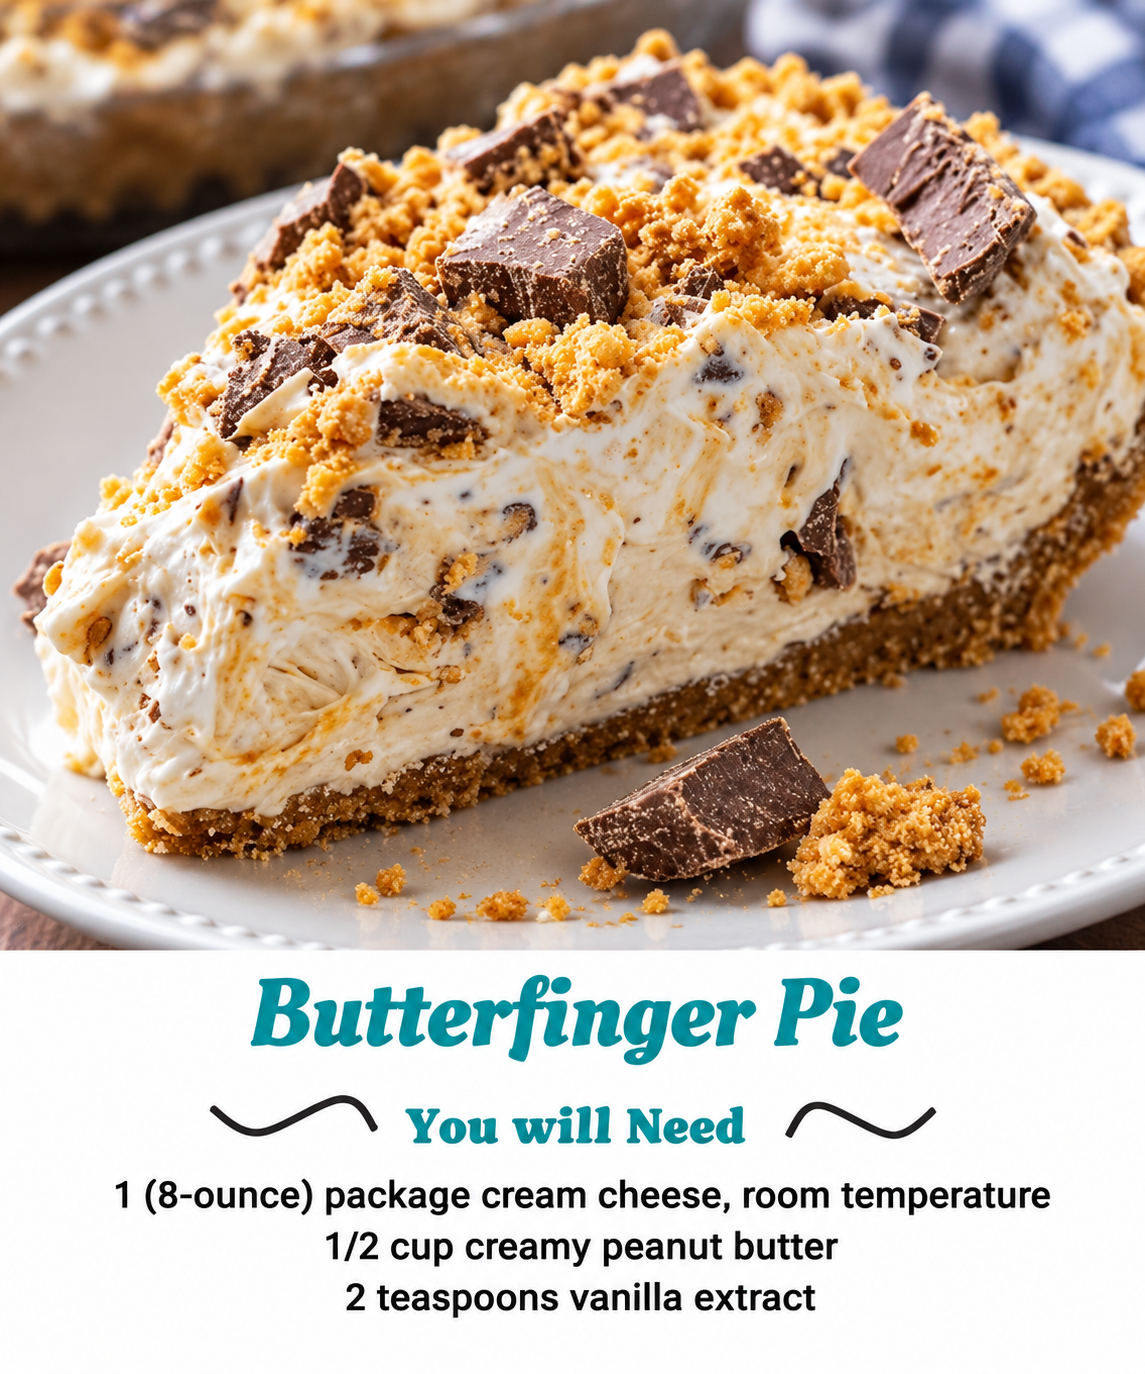
no-bake Butterfinger Pie
Ingredients
Equipment
Method
- Beat the cream cheese and peanut butter together until completely smooth and fluffy.
- Mix in the vanilla and powdered sugar until silky.
- Gently fold in the Cool Whip until the filling is light and cloud-like.
- Stir in 1½ cups crushed Butterfingers, reserving some for the top.
- Spread the filling into the crust and smooth the top.
- Sprinkle with extra Butterfinger pieces and crumbs.
- Cover and refrigerate at least 4 hours or overnight.
- Slice with a sharp knife wiped clean between cuts and serve cold.
Notes