
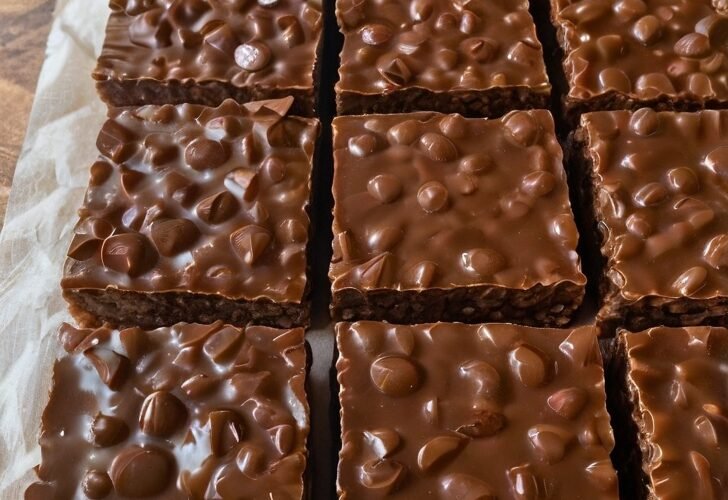
Homemade Crunch Bars – Crispy, Chocolatey, and Ready in Minutes
Craving that classic crispy chocolate snap? These Homemade Crunch Bars deliver everything you love about the familiar candy bar—crunchy rice cereal coated in rich chocolate—without turning on the oven. Five simple ingredients, about five minutes of actual work, and a short chill in the refrigerator are all it takes. The result is a batch of glossy, snappy bars that taste better than store-bought and happen to be naturally vegan, gluten-free, and dairy-free when you choose the right chocolate.
I make these when I want a quick chocolate fix that still feels special. The combination of melted chocolate, peanut butter, maple syrup, and coconut oil creates a smooth, shiny coating that clings to every piece of crispy rice. Once chilled and sliced, the bars have that satisfying snap and chewy-crisp texture that makes them disappear fast. Perfect for lunchboxes, after-dinner treats, or keeping a stash in the fridge for whenever the craving hits.
Why You’ll Love This Recipe
You will love these homemade crunch bars because they capture the nostalgic crunch and chocolate flavor of the classic candy bar with a short ingredient list and almost no effort. Crispy rice cereal gets coated in a rich mixture of chocolate, peanut butter, maple syrup, and coconut oil, then pressed into a pan and chilled until firm. The bars slice cleanly, snap when you bite them, and taste deeply chocolatey with a subtle nutty sweetness.
You will love how practical they are. Prep takes about five minutes. There is no baking. The recipe is naturally adaptable for vegan, gluten-free, and dairy-free diets. They keep well in the fridge or freezer and make excellent grab-and-go treats or homemade gifts. Ideal for busy days, last-minute desserts, or anytime you want candy-bar satisfaction without the store-bought version.
You will love the texture and flavor. The cereal stays crisp. The chocolate coating is smooth and rich. The peanut butter and maple syrup add depth so the bars taste more complex than plain chocolate-covered cereal. Every square is satisfying and just sweet enough.
Most of all, you will love the reactions. These are the bars that make people ask how something so simple can taste so good. They are the ones that vanish from the container before you meant to share them. In a world of complicated desserts, homemade crunch bars this good are pure easy chocolate joy.
Why This Recipe Works
Crispy rice cereal provides the signature light, airy crunch. Melting chocolate chips with peanut butter, maple syrup, and coconut oil creates a smooth, glossy mixture that coats the cereal evenly and sets firmly when chilled. Peanut butter adds richness and helps the coating stay slightly flexible rather than brittle. Maple syrup contributes sweetness and a subtle caramel note while helping the mixture bind. Coconut oil thins the chocolate just enough for easy coating and helps the bars set with a clean snap when cold.
Pressing the mixture firmly into a parchment-lined pan creates a compact layer that slices into neat bars. Chilling until completely firm allows the chocolate to harden so the bars hold their shape and deliver that classic crunch. These simple techniques produce reliable, candy-bar-style results with minimal time and effort.
Ingredient Breakdown
Crispy Rice Cereal (3 cups) The crunchy base. Use plain crispy rice cereal (gluten-free if needed). Fresh cereal gives the best texture.
Chocolate Chips (1½ cups) The main chocolate flavor. Use dairy-free or paleo chocolate chips if you want the bars fully vegan and dairy-free. Semi-sweet or dark chocolate both work well.
Peanut Butter (1 cup, creamy) Adds richness, helps bind the mixture, and gives a subtle nutty depth. Almond butter or sunflower seed butter can be substituted.
Maple Syrup (½ cup) Sweetens the bars and helps the coating stay smooth. Keto maple syrup alternatives can be used if desired.
Coconut Oil (¼ cup) Helps the chocolate melt smoothly, thins the coating for even coverage, and assists in firm setting when chilled. Grass-fed butter can be substituted for a non-vegan version.
Kitchen Equipment
An 8x8-inch baking dish, parchment paper, a large mixing bowl, a microwave-safe bowl (or small saucepan), a spatula, and a sharp knife are the main tools. That is all you need.
Step-by-Step Instructions
Line an 8x8-inch baking dish with parchment paper, leaving an overhang on two sides for easy removal later.
Pour the crispy rice cereal into a large mixing bowl and set it aside.
In a microwave-safe bowl, combine the chocolate chips, peanut butter, maple syrup, and coconut oil. Microwave in 30-second increments, stirring well between each, until the mixture is completely melted, glossy, and smooth. (Alternatively, melt gently in a saucepan over low heat, stirring constantly.)
Pour the warm chocolate mixture over the crispy rice cereal. Using a spatula, gently fold from the bottom up until every piece of cereal is evenly coated.
Transfer the mixture to the prepared baking dish. Press it down firmly and evenly with the back of the spatula (or a piece of parchment) so it forms a compact, level layer.
Refrigerate for at least 1 hour, or until the chocolate is completely firm to the touch.
Lift the block out of the pan using the parchment overhang. Place it on a cutting board and cut into neat squares or bars with a sharp knife.
Serve chilled or at cool room temperature.
Expert Tips
- Line the pan with parchment and leave an overhang so the whole slab lifts out cleanly.
- Use fresh, crisp cereal for the best texture; stale cereal will soften more quickly.
- Melt the chocolate mixture gently and stir frequently so it stays smooth and does not scorch.
- Fold the cereal gently but thoroughly so every piece is coated without crushing the rice.
- Press the mixture firmly into the pan—this helps the bars hold together when cut.
- Chill until fully firm before slicing; under-chilled bars will crumble or smear.
- A sharp knife wiped clean between cuts gives the neatest edges.
- For cleaner cuts, you can run the knife under hot water and dry it before slicing.
- Store the bars in the refrigerator for the snappiest texture.
- These bars are excellent for lunchboxes if kept cool.
- Double the recipe and use a 9x13-inch pan for a larger batch.
- Toast the cereal lightly in a dry skillet for extra depth of flavor if desired (cool completely before coating).
- Work relatively quickly once the chocolate mixture is melted so it stays fluid while coating.
- Taste the melted mixture before combining with the cereal and adjust sweetness or salt if your peanut butter or chocolate is very mild or very sweet.
Common Mistakes to Avoid
- Using a cold or unlined pan. Parchment makes removal and cutting much easier.
- Overheating the chocolate mixture. It can seize or become grainy; short microwave bursts and frequent stirring are best.
- Crushing the cereal while mixing. Fold gently to keep the light, crispy texture.
- Not pressing firmly enough into the pan. Loose mixture produces crumbly bars.
- Cutting before the bars are fully set. They need a solid chill to hold their shape.
- Using natural peanut butter that has separated and is oily. Stir it very well or choose a stable creamy variety for best results.
- Storing the bars in a warm place. They will soften; the refrigerator keeps them snappy.
- Expecting the exact texture of a commercial candy bar. Homemade versions are slightly richer and less processed-tasting—most people prefer them.
- Adding the cereal while the chocolate mixture is scorching hot. Let it cool just slightly if needed so the cereal stays crisp.
- Using old, soft cereal. Fresh cereal is important for crunch.
- Skipping the parchment overhang. It makes lifting the slab out much cleaner.
- Cutting with a dull knife. A sharp blade produces cleaner bars.
- Making the bars too thick or too thin. An even layer in an 8x8 pan gives a good classic thickness.
- Forgetting that these are rich—small squares are often more satisfying than large ones.
Ingredient Substitutions
Peanut butter can be replaced with almond butter, cashew butter, or sunflower seed butter (for a nut-free version).
Maple syrup can be replaced with honey (no longer vegan) or a keto-friendly maple-flavored syrup.
Coconut oil can be replaced with unsalted butter or a neutral oil, though coconut oil helps with setting and flavor.
Chocolate chips can be any variety you prefer—dark, semi-sweet, milk, or dairy-free/paleo as needed.
Crispy rice cereal can be replaced with another light crispy cereal if gluten-free or preferred brands are needed; texture may vary slightly.
Recipe Variations
- Dark Chocolate Sea Salt – Use dark chocolate chips and finish the top with a light sprinkle of flaky sea salt before chilling.
- Almond Butter Crunch – Replace peanut butter with almond butter for a different nutty profile.
- Nut-Free – Use sunflower seed butter and confirm the chocolate is nut-free.
- Peanut Butter Cup Style – Press a few chopped peanut butter cups into the top before chilling.
- Mocha – Stir ½–1 teaspoon instant espresso powder into the melted chocolate mixture.
- Coconut – Add a handful of shredded coconut to the cereal before coating.
- White Chocolate – Use white chocolate chips for a sweeter, creamier version (adjust expectations for sweetness).
- Layered – Press half the mixture into the pan, add a thin layer of extra peanut butter or caramel, then top with the remaining mixture.
- Mini Bars – Cut into smaller pieces for bite-sized treats or dessert trays.
- Gift Boxes – Wrap individual bars in parchment or wax paper for homemade gifts.
- Extra-Chocolatey – Increase the chocolate chips slightly for a thicker coating.
- Spiced – Add a pinch of cinnamon or a tiny pinch of cayenne to the melted mixture for warmth.
- Freezer Stash – Make a double batch and freeze individual bars for long-term chocolate emergencies.
Make It Healthier
These bars are already free of many ultra-processed ingredients found in commercial candy. To keep them lighter, use dark chocolate with a higher cacao percentage, reduce the maple syrup slightly if your chocolate is already sweet, and cut smaller squares. The recipe is naturally gluten-free and easily vegan and dairy-free. Enjoying one or two small bars as a deliberate treat is the most practical approach.
Meal Prep Guide
Homemade crunch bars are ideal for make-ahead treats. Prepare a batch on the weekend and keep it in the refrigerator for easy desserts or snacks throughout the week. They travel well in lunchboxes when packed with an ice pack. Individual wrapping makes them convenient for grab-and-go or gifting.
Storage
Store the bars in an airtight container in the refrigerator for up to 2 weeks for the best snappy texture. In a cool kitchen they can sit at room temperature for several days, but warmer conditions will soften them. Keep layers separated with parchment if stacking.
Freezing
These bars freeze excellently for up to 6 months. Wrap individual bars in parchment or wax paper and place them in a freezer-safe bag or container. Thaw in the refrigerator or at room temperature for a few minutes before eating. The texture remains crisp and the flavor stays true after freezing.
Reheating
These bars are meant to be eaten cold or at cool room temperature for the classic snap. They do not require reheating. If they have been frozen, a few minutes at room temperature is enough to make them ready to eat.
What to Serve With It
Homemade crunch bars are perfect on their own as a simple dessert or snack. They pair well with a glass of cold milk (dairy or plant-based), coffee, or tea. On a dessert tray they sit nicely alongside cookies, fruit, or other no-bake treats. They also make a fun lunchbox surprise or after-school snack. For a slightly more composed dessert, serve a square with a few fresh berries.
Beverage Pairings
Cold milk is the classic match and balances the chocolate richness. Coffee or a latte complements the deep chocolate and subtle nutty notes. Black tea, cold brew, or a mild herbal tea also work well. Plant-based milks (especially oat or almond) pair nicely with the vegan version. Choose a drink that either cuts the sweetness or enhances the chocolate flavor.
Frequently Asked Questions
Are these really like store-bought Crunch bars? They capture the same crispy-chocolate combination with a richer, less processed flavor. Most people find them even more satisfying.
Can I make them without peanut butter? Yes. Almond butter, cashew butter, or sunflower seed butter all work as substitutes.
Do I have to use maple syrup? Maple syrup adds flavor and helps with texture. Honey can be used if the bars do not need to be vegan. Other liquid sweeteners may work with slight texture differences.
How long do they need to chill? At least 1 hour, or until the chocolate is completely firm. Longer is fine.
Can I use a different size pan? An 8x8-inch pan gives a good classic thickness. A 9x9 pan will produce slightly thinner bars; a larger pan will make them thinner still.
Why did my bars turn out soft? They may not have chilled long enough, the kitchen may be warm, or the ratio of coconut oil/chocolate may have been slightly off. Keep them refrigerated for the snappiest texture.
Are these gluten-free? Yes, when made with certified gluten-free crispy rice cereal and chocolate.
Are they vegan? Yes, when made with dairy-free chocolate chips and maple syrup (no honey).
How should I cut them cleanly? Chill until very firm, use a sharp knife, and wipe the blade between cuts. A warm knife (wiped dry) can also help.
Can I add mix-ins? Yes. Small amounts of shredded coconut, mini marshmallows, or chopped nuts can be folded in with the cereal.
How long do leftovers keep? Up to 2 weeks in the refrigerator or up to 6 months in the freezer.
Can I melt the mixture on the stove instead of the microwave? Yes. Use low heat and stir constantly until smooth.
Why is coconut oil used? It helps the chocolate melt smoothly, coats the cereal easily, and sets firmly when chilled.
Do the bars need to stay refrigerated? For the best snap and longest shelf life, yes. In a cool kitchen they can sit out for a short time.
How many bars does this make? About 12–16 bars, depending on how you cut them.
Nutrition Information
Estimated nutrition per bar (based on 16 bars): approximately 180–220 calories, 12–15 g fat, 18–22 g carbohydrates, 3–5 g protein. Values vary depending on the specific chocolate, peanut butter, and maple syrup used. These figures are estimates only and are not a substitute for professional nutritional advice. These bars are a rich chocolate treat best enjoyed in moderate portions.
Final Thoughts
Homemade Crunch Bars prove that a handful of pantry ingredients and a few minutes of work can create something that tastes better than the store-bought version. The crispy rice, rich chocolate coating, and subtle peanut butter and maple notes come together into a bar that snaps when you bite it and satisfies every chocolate craving. They are easy enough for any day of the week and special enough to share—or keep entirely to yourself.
I hope you make a batch the next time you want a quick, no-bake chocolate treat. I hope the mixture turns glossy, the bars set firmly, and someone reaches for a second piece before you have even put the container away. If you try them, I would love to know how you cut them—and how long they lasted in your house. From my kitchen to yours—crispy, chocolatey, and pure easy happiness.
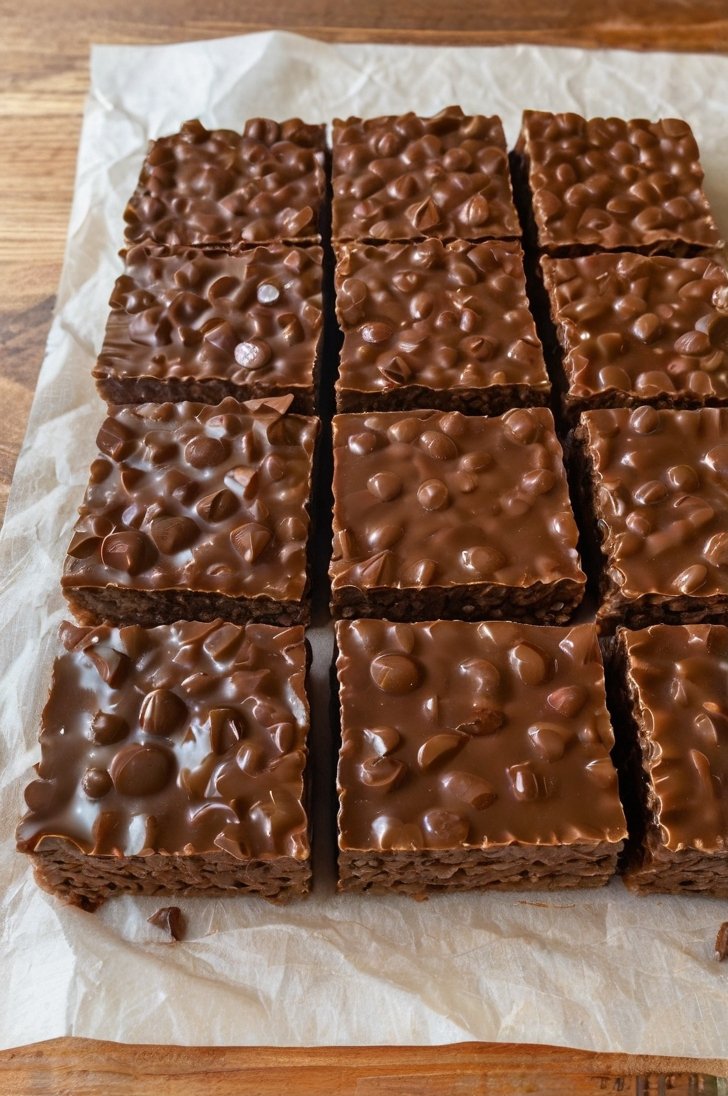
Homemade Crunch Bars
Ingredients
Equipment
Method
- Line an 8x8-inch pan with parchment paper, leaving an overhang.
- Place crispy rice cereal in a large bowl.
- Melt chocolate chips, peanut butter, maple syrup, and coconut oil together in the microwave (30-second bursts, stirring) or on the stove until smooth and glossy.
- Pour the chocolate mixture over the cereal and fold gently until evenly coated.
- Press firmly into the prepared pan in an even layer.
- Refrigerate at least 1 hour until completely firm.
- Lift out with parchment, cut into bars, and serve.
Notes
Nutrition
Estimated values only; see full article for details.