
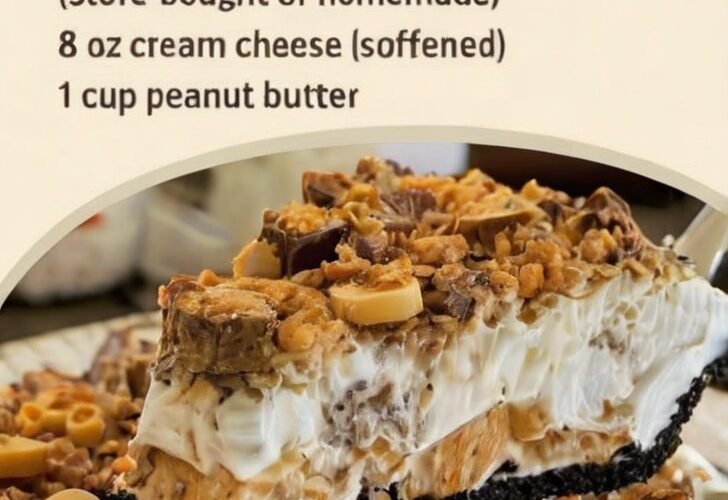
No-Bake Butterfinger Peanut Butter Pie – Creamy, Crunchy, and Dangerously Good
My sister-in-law brought this to Thanksgiving last year and I watched three grown men nearly fight over the last slice. I’m not even exaggerating.
I finally got the recipe out of her last month and I’ve made it twice since then. My husband keeps asking when I’m making “that pie” again. You know a dessert is dangerous when someone remembers it by description instead of name.
It’s one of those no-bake situations that feels like cheating but tastes like you spent all day in the kitchen. The combination of peanut butter, cream cheese, and crushed Butterfinger is absolutely ridiculous. Every bite has that perfect crunch from the candy and the filling is so creamy it practically melts on your tongue.
I keep mine in the freezer and just let it sit out for about 10 minutes before slicing. It’s even better slightly frozen on a warm day.
Why You’ll Love This Recipe
You will love this no-bake Butterfinger peanut butter pie because it delivers rich, creamy, candy-bar flavor with almost zero effort. Softened cream cheese and peanut butter create a smooth, dense base. Powdered sugar sweetens it perfectly. Cool Whip lightens the texture so the filling stays airy yet substantial. Crushed Butterfinger bars add that signature crunchy, chocolate-peanut butter candy texture throughout and on top. A simple graham cracker crust holds everything together.
You will love how practical it is. No oven, no water bath, no complicated steps. Mix, fold, freeze, and slice. Ideal for holidays, potlucks, warm-weather desserts, or any time you want something impressive without turning on the stove.
You will love the texture and flavor. The filling is ultra-creamy and melts on the tongue. The Butterfinger pieces stay crunchy. The combination of peanut butter, cream cheese, and candy is sweet, salty, and completely addictive.
Most of all, you will love the reactions. This is the pie that causes near-fights over the last slice. It is the one people remember simply as “that pie.” In a world of fussy desserts, no-bake Butterfinger peanut butter pie this good is pure easy danger.
Why This Recipe Works
Softened cream cheese provides structure and a slight tang that balances the sweetness of the peanut butter and powdered sugar. Peanut butter delivers rich, nutty flavor and creamy density. Powdered sugar dissolves smoothly and sweetens without grittiness. Folding in Cool Whip lightens the mixture so it freezes into a sliceable yet soft texture rather than becoming rock-hard. Crushed Butterfinger bars distribute crunch throughout the filling and create an attractive, candy-studded topping. Freezing firms the pie completely while the short rest at room temperature softens it just enough for clean slices. These simple techniques produce a reliable, crowd-pleasing dessert every time.
Ingredient Breakdown
Graham Cracker Pie Crust (1, store-bought or homemade)
The sturdy, slightly sweet base that holds the rich filling.
Cream Cheese (8 oz, softened)
Creates a smooth, stable, slightly tangy foundation for the filling.
Peanut Butter (1 cup)
Provides the main flavor and creamy richness. Creamy peanut butter works best.
Powdered Sugar (1 cup)
Sweetens the filling smoothly and helps stabilize it.
Cool Whip (1 cup + extra for topping)
Lightens the texture and keeps the frozen pie soft enough to slice and eat easily.
Butterfinger Candy Bars (1½ cups crushed, divided)
Add crunch, chocolate-peanut butter flavor, and visual appeal. Use about ¾ cup in the filling and the rest on top.
Kitchen Equipment
A mixing bowl, hand mixer or sturdy spoon, rubber spatula, and freezer-safe pie dish or the foil pan the crust comes in are the main tools. That is all you need.
Step-by-Step Instructions
In a large bowl, beat the softened cream cheese and peanut butter together until completely smooth and creamy.
Add the powdered sugar and mix until silky and fully combined with no lumps.
Gently fold in 1 cup of Cool Whip and about ¾ cup of the crushed Butterfinger until evenly distributed. Do not overmix.
Spread the filling into the graham cracker crust and smooth the top with a spatula.
Spread an additional layer of Cool Whip over the filling, then sprinkle the remaining crushed Butterfinger generously over the top.
Cover the pie carefully and freeze for at least 4 hours, or until firm.
Before serving, let the pie sit at room temperature for about 10 minutes so the knife cuts through cleanly. Slice and serve.
Expert Tips
- Soften the cream cheese fully so it mixes smoothly with no lumps.
- Use creamy peanut butter for the best texture.
- Crush the Butterfinger bars into a mix of fine crumbs and small chunks for varied texture.
- Fold the Cool Whip gently to keep the filling light and airy.
- Freeze the pie uncovered for the first hour if possible, then cover to prevent ice crystals.
- A 10-minute rest at room temperature makes clean slicing much easier.
- For neater slices, run a sharp knife under hot water and wipe it between cuts.
- Keep the pie frozen until shortly before serving for the best texture.
- Store leftovers tightly covered in the freezer.
- Slightly frozen slices are especially refreshing on warm days.
- A store-bought crust keeps this truly no-fuss; homemade works too.
- Toast the graham crust lightly first if you prefer a deeper flavor (optional).
- Double the recipe in two crusts for larger gatherings.
- A light chocolate drizzle is a popular optional upgrade if you want extra chocolate.
Common Mistakes to Avoid
- Using cold cream cheese. It will leave lumps in the filling.
- Overmixing after adding the Cool Whip. The filling can deflate and become dense.
- Skipping the freeze time. The pie needs the full 4 hours (or overnight) to firm properly.
- Trying to slice straight from the freezer without the 10-minute rest. The crust and filling can crack.
- Using natural peanut butter that separates. The filling may become oily or soft.
- Crushing the Butterfinger into complete powder. Some small chunks give better texture.
- Forgetting to cover the pie well in the freezer. It can pick up freezer odors or form ice crystals.
- Adding the topping Butterfinger too early if the Cool Whip is very soft—it can sink.
- Expecting a light mousse texture. This filling is rich and dense in the best way.
- Leaving the pie out too long before serving. It softens quickly.
- Using whipped cream instead of Cool Whip without stabilizing it. The texture may not hold as well when frozen.
- Under-sweetening. The powdered sugar balances the peanut butter and cream cheese.
- Serving without wiping the knife. Crumbs and candy pieces stick and make messy slices.
- Assuming it will last more than a day or two once people taste it.
Ingredient Substitutions
Creamy peanut butter is preferred. Crunchy can be used for extra texture.
Cool Whip can be replaced with stabilized whipped cream (whip heavy cream with a little powdered sugar and gelatin or cornstarch if needed).
Store-bought graham crust can be replaced with a homemade graham cracker or Oreo crust.
Butterfinger can be replaced with crushed Heath bars, Skor, or peanut butter cups, though the flavor will change.
Recipe Variations
- Chocolate Drizzle – Melt chocolate chips and drizzle over the top before freezing or just before serving.
- Oreo Crust – Use a chocolate cookie crust for a different base.
- Extra Candy – Increase the Butterfinger in the filling for more crunch.
- Chocolate Peanut Butter – Add 2–3 tablespoons cocoa powder to the filling.
- Mini Pies – Divide into mini graham crusts for individual servings.
- Layered – Add a thin layer of chocolate ganache on the crust before the filling.
- Salted – Sprinkle flaky sea salt over the top for contrast.
- Holiday – Add festive sprinkles on top along with the Butterfinger.
- Frozen Cups – Skip the crust and freeze the filling in cupcake liners for crustless bites.
- Make-Ahead – This pie is ideal made a day or two in advance.
- Peanut Butter Cup – Replace some or all of the Butterfinger with chopped peanut butter cups.
- Lighter Topping – Use less Cool Whip on top or pipe it decoratively.
- Double Batch – Make two pies at once for parties or to keep one in the freezer.
Make It Healthier
This is a rich, celebratory dessert. To enjoy it more mindfully, cut smaller slices, share it widely, and savor each bite slowly. The no-bake method keeps preparation simple, and the freezer storage makes it easy to portion over several days.
Meal Prep Guide
This pie is excellent for make-ahead entertaining. Prepare it fully, freeze, and keep it on hand for unexpected guests or planned gatherings. It slices best after the short room-temperature rest and holds well in the freezer for weeks.
Storage
Keep the pie covered tightly in the freezer for up to 2–3 weeks for best quality. Store leftovers the same way. Always let it sit 10 minutes before slicing.
Freezing
This pie is designed to be frozen. It is already a freezer dessert, so no extra steps are needed beyond proper covering to prevent freezer burn or odors.
Reheating
Do not heat this pie. It is meant to be served cold or slightly frozen. The short rest at room temperature is only to make slicing easier.
What to Serve With It
This pie stands alone as a rich dessert. A simple cup of coffee or glass of cold milk is perfect alongside it. Fresh berries can provide a light contrast if desired. Keep accompaniments minimal so the creamy peanut butter and Butterfinger flavors remain the focus.
Beverage Pairings
Cold milk is classic and highly recommended. Hot coffee or espresso cuts the richness beautifully. A cold glass of iced coffee also works well. For a special occasion, a dessert wine or small glass of bourbon pairs nicely with the peanut butter and candy flavors. Choose a drink that either balances the sweetness or enhances the nostalgic candy-bar taste.
Frequently Asked Questions
Does this pie need to be frozen?
Yes. Freezing is what sets the filling so it slices cleanly and holds its shape.
How long should it freeze?
At least 4 hours; overnight is even better.
Can I use natural peanut butter?
Regular creamy peanut butter is recommended. Natural styles can separate and make the filling oily or soft.
How do I get clean slices?
Let the pie sit 10 minutes at room temperature and use a sharp knife wiped clean between cuts.
Can I make it ahead?
Yes. This is an ideal make-ahead dessert. It keeps well in the freezer for 2–3 weeks.
What if I don’t have Butterfinger?
Heath bars, Skor, or chopped peanut butter cups can be substituted, though the flavor will be different.
Can I use whipped cream instead of Cool Whip?
Yes, but stabilize it first so it holds up better when frozen.
Is it very sweet?
It is rich and sweet, as expected from peanut butter, powdered sugar, Cool Whip, and candy. The cream cheese provides a little balance.
Can I add a chocolate drizzle?
Absolutely. Many people love the extra chocolate layer.
How long can it sit out?
Serve it promptly after the 10-minute rest. It softens relatively quickly at room temperature.
Can I make a homemade crust?
Yes. A standard graham cracker crust works perfectly.
Would you keep it classic or add chocolate drizzle?
Both are excellent. Classic lets the Butterfinger and peanut butter shine; a drizzle adds extra chocolate appeal.
Can I make mini versions?
Yes. Use mini graham crusts or line a muffin tin with liners and paper cups.
Is this pie gluten-free?
Only if you use a gluten-free crust and confirm the Butterfinger and other ingredients are gluten-free.
Why is it better slightly frozen?
The texture stays firm and refreshing, especially on warm days, and the crunch from the Butterfinger remains pronounced.
Nutrition Information
Estimated nutrition per slice (based on 8 slices): approximately 480–580 calories, 30–38 g fat, 45–55 g carbohydrates, 8–10 g protein. Values vary depending on exact brands and slice size. These figures are estimates only and are not a substitute for professional nutritional advice. This is a rich, indulgent dessert best enjoyed in moderate portions.
Final Thoughts
No-Bake Butterfinger Peanut Butter Pie is the dessert that causes near-fights over the last slice and lives in people’s minds as “that pie.” Creamy peanut butter filling, crunchy Butterfinger pieces, and a simple graham crust come together with almost no effort and maximum reward.
I hope you make it the next time you need a guaranteed crowd-pleaser. I hope the filling sets perfectly, the candy stays crunchy, and someone starts asking when you’re making it again. If you try it, I would love to know whether you kept it classic or added a chocolate drizzle—and how quickly the pie disappeared. From my kitchen to yours—creamy, crunchy, peanut-buttery, and pure no-bake danger.
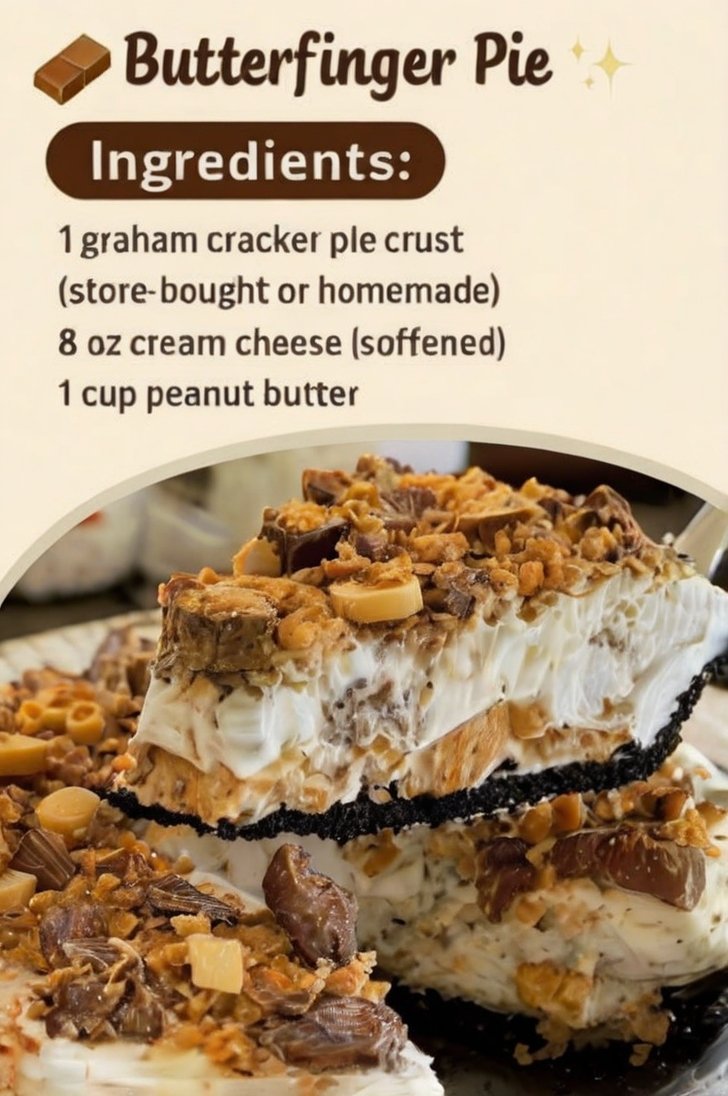
No-Bake Butterfinger Peanut Butter Pie
Ingredients
Equipment
Method
- Beat softened cream cheese and peanut butter until smooth. Mix in powdered sugar until silky.
- Gently fold in 1 cup Cool Whip and ¾ cup crushed Butterfinger.
- Spread filling into the crust and smooth the top.
- Top with additional Cool Whip and the remaining crushed Butterfinger.
- Cover and freeze at least 4 hours until firm.
- Let sit at room temperature 10 minutes before slicing. Serve cold or slightly frozen.
Notes
Nutrition