
Lunchroom Ladies Brownies – Fudgy, Glossy, and Pure Cafeteria Nostalgia
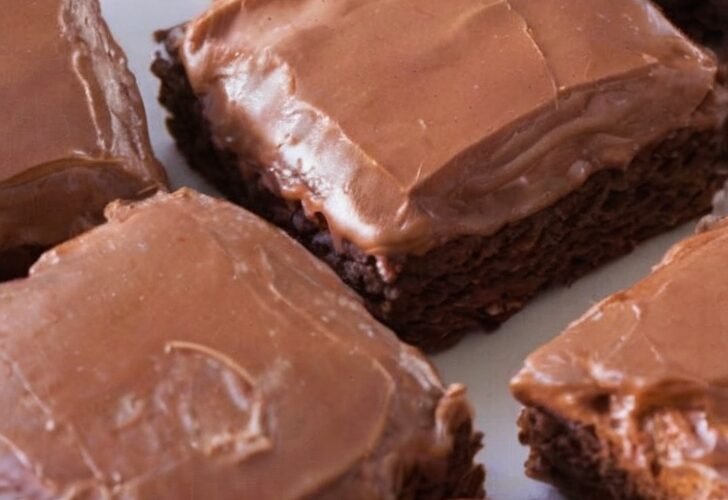
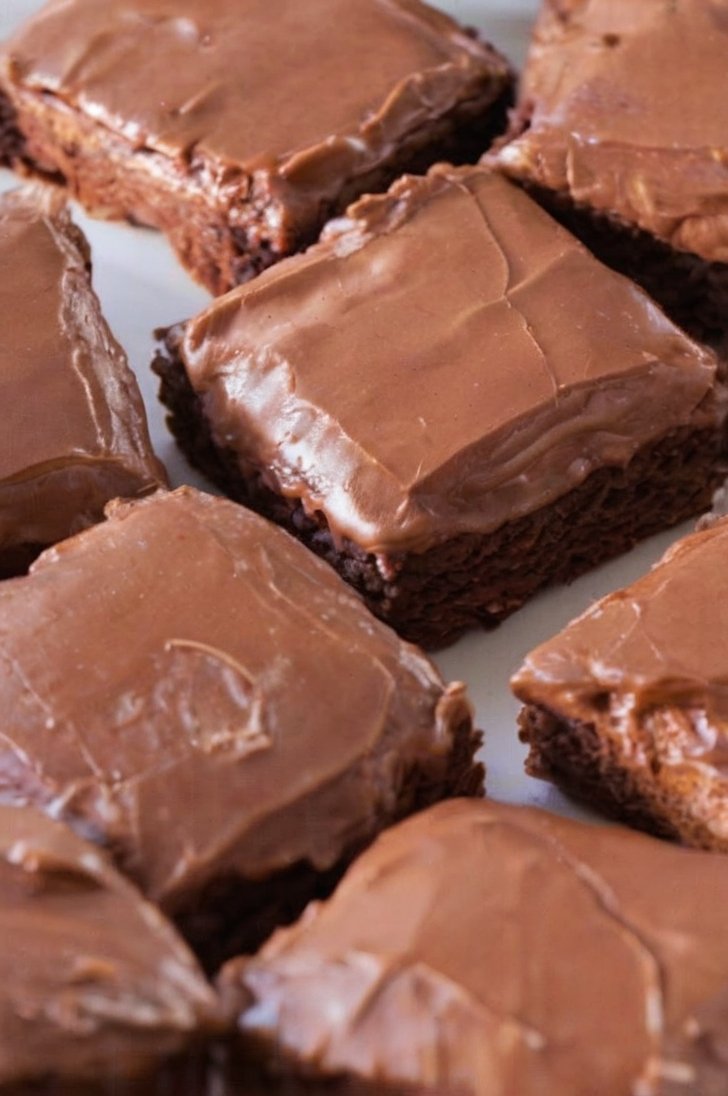
There are certain desserts that live rent-free in your memory, and these Lunchroom Ladies Brownies are one of them. Thick, fudgy squares of deep chocolate topped with a rich, glossy icing that cracks just slightly when you bite into it. The kind of brownie that appeared on a beige plastic tray next to a carton of milk and somehow tasted better than anything homemade.
I finally tracked down a version that captures that exact texture and flavor. No fancy chocolate bars. No complicated techniques. Just melted butter, sugar, eggs, cocoa, and flour for the brownies, then a simple powdered-sugar icing poured on while the pan is still warm so it melts into that signature shiny, crackly top.
These are the brownies that make people close their eyes for a second after the first bite. Dense, chocolatey, and deeply comforting. The kind you cut into generous squares and watch disappear.
Why You’ll Love This Recipe
You will love these Lunchroom Ladies Brownies because they deliver classic school-cafeteria nostalgia in the best possible way. Melted butter and sugar create a rich base. Eggs and vanilla add structure and depth. Cocoa powder and flour keep the crumb fudgy and thick. The warm poured icing sets into a glossy, slightly crackly layer that is the hallmark of these brownies.
You will love how straightforward they are. One bowl for the batter, one bowl for the icing, and a single 9×13 pan. No melting chocolate, no special equipment, no fussy steps.
You will love the texture contrast. The brownies themselves stay moist and dense. The icing forms a thin, shiny shell that cracks gently under your teeth.
Most of all, you will love the memories they bring back—or the new ones they create. These are the brownies that taste like childhood lunch trays and after-school treats all at once.
Why This Recipe Works
Melting the butter rather than creaming it produces a denser, fudgier crumb typical of cafeteria-style brownies. A high ratio of sugar to flour keeps the interior moist and chewy. Cocoa powder delivers straightforward chocolate flavor without the expense or variability of melted chocolate. Mixing the dry ingredients in last and stirring only until combined prevents toughness. Baking just until a toothpick comes out clean (or with a few moist crumbs) avoids dryness. Letting the brownies rest exactly 15 minutes after baking leaves them warm enough for the icing to melt slightly and bond with the top surface. Pouring the smooth icing over the warm brownies creates the signature glossy, crackly finish as it cools and sets. These techniques recreate the legendary lunchroom texture reliably at home.
Ingredient Breakdown
Butter (1 cup melted for brownies + ¼ cup softened for icing)
Provides richness and helps create the dense, fudgy texture.
Granulated Sugar (2 cups)
Sweetens the brownies and contributes to the moist crumb.
Eggs (4 large)
Add structure, richness, and help bind the batter.
Vanilla Extract (4 teaspoons)
Rounds out the chocolate flavor.
Unsweetened Cocoa Powder (½ cup for brownies + ¼ cup for icing)
Delivers deep chocolate taste in both layers.
All-Purpose Flour (2 cups)
Gives the brownies their classic structure without making them cakey.
Milk (¼ cup)
Thins the icing to a pourable consistency.
Powdered Sugar (3 cups)
Forms the base of the smooth, glossy icing.
Kitchen Equipment
A 9×13-inch baking dish, parchment or foil for a sling, mixing bowls, and a spatula or whisk are the main tools needed.
Step-by-Step Instructions
Preheat the oven to 350°F. Spray a 9×13-inch baking dish with nonstick spray and line it with a parchment or foil sling, leaving an overhang on the sides for easy removal.
In a large mixing bowl, stir together the melted butter and granulated sugar until well combined. Add the eggs and vanilla extract and mix until completely smooth.
Add the cocoa powder and flour. Stir until just combined. The batter will be thick. Do not overmix.
Spread the batter evenly in the prepared pan.
Bake for 20–25 minutes, until a toothpick inserted in the center comes out clean or with a few moist crumbs. Err on the side of slightly underbaked if unsure.
Remove the pan from the oven and let the brownies rest for exactly 15 minutes. They should still be quite warm.
While the brownies rest, make the icing: mix the softened butter, milk, cocoa powder, and powdered sugar until completely smooth and pourable.
Pour the icing evenly over the still-warm brownies and spread gently if needed.
Let the brownies cool completely in the pan so the icing can set into its glossy, crackly finish. Use the parchment sling to lift them out, then cut into squares.
Expert Tips
- Use melted butter for the batter—this is key to the dense, fudgy texture.
- Do not overmix once the flour and cocoa are added. Stop as soon as the dry ingredients disappear.
- Line the pan with a parchment or foil sling for clean removal and easy cutting.
- Check for doneness at 20 minutes. A few moist crumbs on the toothpick are ideal.
- Set a timer for the 15-minute rest. The brownies must still be warm when the icing goes on.
- Make the icing while the brownies rest so it is ready at the right moment.
- The icing should be smooth and pourable; adjust with a tiny splash of milk if it seems too thick.
- Pour the icing over the center and let it spread, or gently nudge it to the edges with an offset spatula.
- Cool completely before cutting so the icing sets properly and the squares hold their shape.
- For cleaner cuts, wipe the knife between slices.
- Whole milk gives the icing good body, but any milk works.
- These brownies taste even better the next day once the flavors have settled.
- Double the recipe in two pans if feeding a crowd—they disappear quickly.
- Store them in a single layer or with parchment between layers so the icing stays intact.
Common Mistakes to Avoid
- Creaming softened butter instead of using melted. The texture will be more cake-like.
- Overmixing the batter after adding flour. Tough brownies result.
- Overbaking. Dry edges and a less fudgy center are the consequence.
- Pouring the icing onto completely cooled brownies. You lose the glossy, crackly set.
- Skipping the 15-minute rest or waiting too long. Timing matters for the icing finish.
- Making the icing too thick. It will not spread smoothly.
- Cutting the brownies while the icing is still soft. The tops will smear.
- Using a dark metal pan without checking early—it can bake faster.
- Forgetting the parchment sling. Removing the brownies cleanly becomes harder.
- Substituting Dutch-process cocoa without expecting a slightly different flavor and color.
- Adding extra liquid to the batter. It is meant to be thick.
- Storing the brownies uncovered. The icing can dry out or the edges can harden.
- Expecting a cakey brownie. These are intentionally dense and fudgy.
- Rushing the cooling step. The signature icing texture needs time to set.
Ingredient Substitutions
Unsalted butter can be replaced with salted (reduce any added salt if present).
Whole milk in the icing can be replaced with 2% or evaporated milk.
All-purpose flour can be replaced with a 1:1 gluten-free baking blend (texture may vary slightly).
Granulated sugar can be replaced with an equal amount of coconut sugar for a deeper flavor (color and moisture will change).
Recipe Variations
- Walnut or Pecan – Fold 1 cup chopped nuts into the batter.
- Espresso – Add 1 teaspoon espresso powder to the brownie batter for deeper chocolate flavor.
- Mint – Add ½ teaspoon peppermint extract to the icing.
- Salted – Sprinkle flaky sea salt over the icing while it is still wet.
- Peanut Butter – Swirl a few spoonfuls of warmed peanut butter into the batter before baking.
- Triple Chocolate – Stir ½ cup chocolate chips into the batter.
- Thicker Icing – Reduce the milk slightly for a denser frosting layer.
- Sheet-Pan Crowd Size – Double the recipe and bake in a larger rimmed sheet pan (watch baking time).
- Dairy-Free – Use plant-based butter and milk alternatives.
- Mocha – Add espresso powder to both the batter and the icing.
- Coconut – Sprinkle toasted coconut over the wet icing.
- Orange – Add a little orange zest to the batter and a drop of orange extract to the icing.
- Classic Lunchroom – Keep the recipe exactly as written for maximum nostalgia.
Make It Healthier
These are a classic treat. To lighten them slightly, reduce the sugar in the brownie batter by a few tablespoons, use a portion of whole-wheat pastry flour, or cut smaller squares. Enjoying them as an occasional nostalgic dessert keeps the experience special.
Meal Prep Guide
The brownies can be baked and iced a day ahead. Store covered at room temperature. They actually improve slightly after resting overnight as the flavors settle.
Storage
Once completely cool, store the brownies in an airtight container at room temperature for up to 4 days. Place parchment between layers if stacking to protect the icing.
Freezing
Freeze individual squares or the whole slab (well wrapped) for up to 3 months. Thaw at room temperature still wrapped so condensation does not soften the icing. The texture remains very good after freezing.
Reheating
These brownies are excellent at room temperature. If you prefer them slightly warm, heat individual squares in the microwave for 8–10 seconds. The icing will soften.
What to Serve With It
Serve these brownies on their own or with a glass of cold milk for the full cafeteria experience. A scoop of vanilla ice cream turns them into an easy plated dessert. They also travel well for potlucks, bake sales, and lunchboxes. Keep accompaniments simple so the chocolate flavor stays front and center.
Beverage Pairings
Cold milk is the classic pairing. Hot coffee or black tea balances the sweetness. A glass of cold brew or a simple glass of water also works. For a nostalgic touch, serve with the same kind of milk carton energy—just a cold glass of milk.
Frequently Asked Questions
Why do I have to pour the icing on warm brownies?
That is what creates the signature glossy, slightly crackly finish. Cold brownies will not give the same result.
Can I use Dutch-process cocoa?
Yes, though natural unsweetened cocoa is more traditional for this style and flavor.
How do I know when the brownies are done?
A toothpick should come out clean or with a few moist crumbs. Err on the side of underbaking for fudginess.
Why is the batter so thick?
That is correct. Thick batter produces the dense, fudgy texture these brownies are known for.
Can I make these in a different pan size?
A 9×13 is ideal. A smaller pan will produce thicker brownies that need more time; a larger pan will produce thinner ones that bake faster.
How long do they keep?
Up to 4 days at room temperature in an airtight container.
Can I freeze them?
Yes. Wrap well and freeze for up to 3 months.
Is the icing supposed to be thin or thick?
Smooth and pourable. It should flow over the warm brownies and settle into a thin, even layer.
Why 4 teaspoons of vanilla?
It adds noticeable depth that balances the cocoa and sugar.
Can I add nuts?
Yes. Fold in about 1 cup of chopped walnuts or pecans with the dry ingredients.
Do these taste like boxed brownies?
They are richer, denser, and more chocolate-forward, with the distinctive lunchroom icing on top.
What if my icing is too thick?
Add milk a teaspoon at a time until it reaches a pourable consistency.
What if my icing is too thin?
Add a little more powdered sugar until it thickens.
Can I double the recipe?
Yes. Use two 9×13 pans for best results.
Why do these remind people of school lunch?
The combination of a dense cocoa brownie and the thin, glossy poured icing is exactly what many school cafeterias served for decades.
Nutrition Information
Estimated nutrition per brownie (based on 24 bars): approximately 240–280 calories, 10–13 g fat, 36–40 g carbohydrates, 2–3 g protein. Values vary depending on exact ingredients and size of cut. These figures are estimates only and are not a substitute for professional nutritional advice. These are a classic treat best enjoyed in moderation.
Final Thoughts
Lunchroom Ladies Brownies are the brownies that taste like memory—thick, fudgy, deeply chocolatey, and finished with that unmistakable glossy icing that cracks just a little when you take a bite. They are simple, reliable, and exactly as good as you remember (or better).
I hope you bake a pan the next time you want something nostalgic and crowd-pleasing. I hope the icing sets with that perfect shine, the squares cut cleanly, and someone in your house takes a bite and says they taste just like the ones from school. If you make them, I would love to know whether you kept them classic or added your own twist—and how quickly the pan disappeared. From my kitchen to yours—fudgy, glossy, chocolatey, and pure comfort.
Lunchroom Ladies Brownies
Ingredients
Equipment
Method
- Preheat oven to 350°F. Grease and line a 9×13-inch pan with a parchment or foil sling.
- Mix melted butter and sugar. Add eggs and vanilla; mix until smooth.
- Stir in cocoa powder and flour until just combined. Batter will be thick.
- Spread in pan and bake 20–25 minutes until a toothpick comes out clean or with moist crumbs.
- Rest the brownies in the pan for exactly 15 minutes.
- Mix icing ingredients until smooth.
- Pour icing over the still-warm brownies. Cool completely before cutting.
Notes