
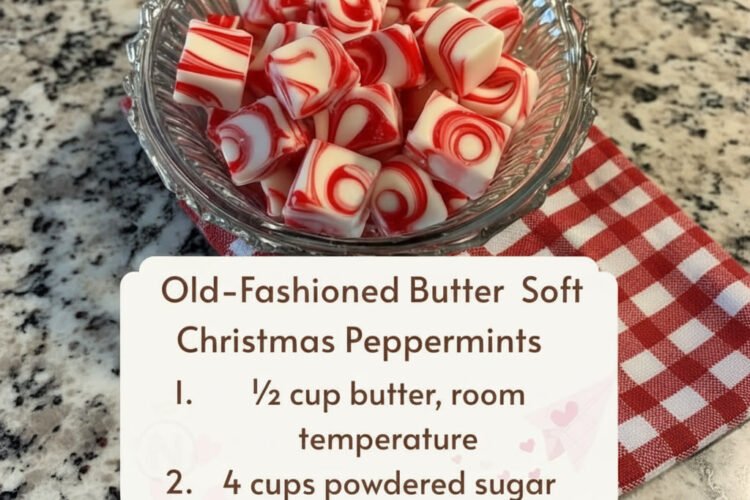
Soft Peppermint Butter Mints – Melty, Pillowy Old-Fashioned Christmas Candy (The Grandma's-Kitchen Holiday Treat, No Thermometer Needed)
The Candy That Tastes Like Being Eight Years Old Again
My grandma used to keep a crystal dish of these on her coffee table every December, and I'd sneak one every time I walked past. Soft, buttery, melt-on-your-tongue peppermint pillows that tasted like pure Christmas magic. I finally tracked down her recipe this year, and the second that peppermint smell hit the kitchen, I was eight years old again. There are some recipes that aren't just recipes — they're time machines. This is one of them. These aren't those hard store-bought mints that crack when you bite them. These are creamy, pillowy soft, with that old-fashioned butter richness that makes them impossible to stop eating. My husband ate six before I even finished shaping the rest — a fact I am entirely not embarrassed about. No candy thermometer. No fancy equipment. Just butter, powdered sugar, and peppermint extract swirled into the prettiest little holiday candies you've ever seen. They look fancy, and they honestly couldn't be easier. If you've been looking for that one nostalgic Christmas treat that actually tastes like childhood, this is it. Soft mints have been an old-fashioned American holiday tradition for generations — the sort of thing grandmothers kept in cut-glass dishes and tins meant to be passed around — and making them at home connects you to every kitchen counter that ever smelled like powdered sugar and December. And there's a wonderfully practical heart to them: they're nearly free to make (a whole tin costs about the same as a bottle of peppermint extract), they keep for weeks, and they turn into the prettiest homemade gifts and holiday-platter centerpieces you've ever set out. This recipe has survived all these generations for a reason: it works, it's lovable, and it tastes like the holidays in the most literal sense.
Why You'll Love These Treats
- Actually tastes like childhood: the nostalgic Christmas mint everyone remembers, in your own kitchen
- Soft, buttery, melt-on-your-tongue: the pillowy, creamy texture that store-bought mints never manage
- Shockingly easy: no candy thermometer, no confectionery skill — just butter, sugar, and a swirl
- Four ingredients: butter, powdered sugar, peppermint extract, and a little cream
- Almost free to make: a whole candy dish for pennies, versus premium prices at confectioners
- Beautiful marbled swirl: the red-and-white candy-cane look with just a few drops of red gel color
- Stays soft for weeks: make them ahead and ignore them until the holiday table needs them
- The perfect handmade gift: a box of homemade mints beats a store-bought tin on heart every time
- Naturally gluten-free: no wheat anywhere — a lovely safe treat for gluten-free friends (dairy swap below for sensitive tables)
- A wonderful kitchen activity: kids love rolling the ropes and twisting the colors — a memory being made
- Holiday-platter royalty: the prettiest little candies on any tray, and the ones everyone reaches for
- The recipe that gets shared: the "can I get this recipe?" text is basically guaranteed
Why This Recipe Works
This candy is pure old-fashioned engineering, and the beautiful part is that you never have to think about the engineering while making it. The butter — beaten properly soft and creamy first — is the richness that makes these taste expensive even though they cost pennies. It coats every grain of powdered sugar to create a tender, melt-in-the-mouth crumb rather than a mouthful of dry sugar. The powdered sugar is the structural heart: four cups, added one at a time, absorb the butter a little more with each addition, building that crumbly texture the recipe tells you to expect — and that crumb is exactly right. Then the liquid logic clicks in: the peppermint extract and a splash of heavy cream or milk turn the crumbly powder into a smooth, pliable dough. It's a beautiful lesson in ratios — add the cream one teaspoon at a time, and you feel the exact moment the mixture turns buttery and soft, ready to shape. The shaping is where the candy becomes Christmas. Rolling each half into a rope and twisting the white and red together creates that marbled candy-cane effect with no special tools — just your palms and a gentle roll. Sliced into small half-inch pillows, the candies keep their softness because of their high butter and fat content, which is precisely what keeps them tender for weeks while their powdered-sugar structure keeps them firm enough to hold their shape. A few hours uncovered on a tray lets them set slightly, and then they're ready: soft, creamy, peppermint-bright, and unmistakably Christmas.
Ingredient Breakdown
Butter (½ cup, softened to room temperature) – the heart of the richness. Softened butter beats smooth and creamy, and it's what makes these mints taste like old-fashioned butter mints instead of plain sugar. Dairy-free butter works just as well for a plant-based version. Powdered Sugar (4 cups) – the structure and sweetness. Added gradually, it builds the tender crumb that becomes soft candy; nothing substitutes for that pillowy texture. Peppermint Extract (1–2 teaspoons) – the Christmas soul. Start with 1 teaspoon, taste, and add more if you want that stronger peppermint kick. Pure peppermint extract gives the cleanest, brightest flavor. (There's a reason peppermint is the winter scent — that cool, bright aroma is Christmas in a bottle.) Heavy Cream or Milk (2–3 tablespoons) – the liquid magic. It turns crumbly sugar into a smooth, soft dough, one teaspoon at a time. Heavy cream gives the richest, most pliable texture; milk works in a pinch. Red Gel Food Coloring (optional, a few drops) – the classic candy-cane look. Gel food coloring tints without thinning the dough the way liquid drops would, keeping the texture perfect while the color swirls beautifully.
Kitchen Equipment
A large mixing bowl, a hand or stand mixer (though a sturdy wooden spoon works too), measuring cups and spoons, a rolling or shaping surface, a sharp knife for slicing, and a parchment-lined tray for setting. That genuinely is the whole kit — no candy thermometer, no special molds, no confectionery skills required.
How to Make Soft Peppermint Butter Mints
1. Cream the butter. Beat the softened butter in a large bowl until it's smooth and creamy — this is the texture that makes candy rich. 2. Add the sugar gradually. Add the powdered sugar one cup at a time, mixing well after each addition. It gets crumbly — that's entirely normal and exactly right. 3. Bring it together. Add the peppermint extract and 2 tablespoons of cream. Mix until it comes together into a soft, smooth dough. If it's too stiff, add a little more cream, one teaspoon at a time, until it's perfect. 4. Divide and color. Divide the dough in half. Leave one half white. Add a few drops of red gel coloring to the other half and knead until the color is evenly blended into a lovely Christmas red. 5. Twist the ropes. Roll each half into a long rope about ½ inch thick. Gently twist the white and red ropes together, then roll them together to create that beautiful marbled candy-cane effect. 6. Slice the pillows. Slice into small ½-inch pieces. Leave them as little pillows, or roll them into smooth little balls — both are gorgeous. 7. Set and store. Let them sit uncovered on a parchment-lined tray for a few hours to firm up slightly, then store in an airtight container at room temperature. They stay soft for weeks — if they last that long. Mine were gone in three days.
Pro Tips for Success
- Room-temperature butter is essential: softened butter creams smooth; cold butter leaves lumps
- Add the sugar slowly: one cup at a time is the difference between smooth dough and dusty mixer fireworks
- Trust the crumbly stage: crumbly is not a problem — it's the signal to start adding cream
- Taste as you go: peppermint is personal; start with 1 teaspoon and build from there
- Use gel coloring, not liquid drops: gel tints brilliantly without thinning the dough
- Knead the color in thoroughly: even color means a clean, beautiful marbled candy-cane swirl
- Let them set uncovered: a few hours firms them just enough to hold their pillow shape
- Store airtight: the airtight container is what keeps them soft for weeks instead of drying out
Common Mistakes to Avoid
- Cold butter: the whole recipe hinges on properly softened butter — give it time at room temperature first
- Dumping all the sugar at once: you'll fight clouds of powdered sugar and uneven texture
- Adding too much liquid too fast: a teaspoon at a time is the rule — one big glug and you're rolling dough instead of candy
- Skipping the taste test: your peppermint preference is the one real decision here, and it deserves a taste
- Twisting too aggressively: the ropes can tear; twist gently, then roll together smoothly
- Rushing the set time: a few hours on the tray is what lets them firm up without hardening
- Loose containers: a not-quite-sealed tin dries them out — airtight is the whole secret
Substitutions & Variations
- Dairy-free: plant-based butter and a dairy-free cream or milk alternative work seamlessly, and the recipe behaves identically — making these a naturally gluten-free AND dairy-free-friendly holiday treat with two simple swaps
- Stronger kick: use 2 teaspoons of peppermint extract, or add a drop of peppermint oil for serious intensity
- Softer, richer: use all heavy cream instead of milk for the most pillowy, buttery texture
- Colors for any holiday: swap red for green, pink, or blue — Valentine's, Easter, and baby-shower mints in one recipe
- Chocolate-dipped: dip half of each set mint in melted chocolate for a fancy twist
- Lemon or orange: substitute the peppermint with lemon or orange extract for a completely different vintage candy
- Sprinkle finish: a dusting of sanding sugar or a light cinnamon topping for extra prettiness
- Shaped balls instead of pillows: roll the pieces between your palms for the smoother, pearl-shaped look
Make It Healthier (Honestly)
This is a candy, and I'll never pretend otherwise — but the honest story has a few genuinely nice notes. Unlike most store-bought holiday candies, these are made from a short list of real, recognizable ingredients that you control: butter, sugar, flavor, color. They're naturally gluten-free at the base, they hold their texture for weeks without preservatives, and because you make them yourself, you decide exactly how much peppermint and how pretty the swirl is. The honest levers if you're counting sugar or managing blood sugar: this recipe is sugar-forward by nature — four cups of powdered sugar is the structure of the candy, not an accident. Those watching sugar or blood-sugar levels are best served by treating these as a celebration treat to enjoy in small portions (one or two little pillows, not the crystal dish), or by experimenting with a powdered sugar substitute like an allulose or monk fruit blend — note honestly that texture and sweetness vary by brand, so results differ from the classic. Beyond that, the real health content of this recipe is the season itself: a homemade gift, a child's hands rolling candy-cane ropes, a kitchen smelling like peppermint and December. That's the part that's genuinely good for you.
Meal Prep & Make-Ahead
These mints are the ultimate make-ahead holiday candy. They set in a few hours, firm up to their pillow-soft perfection, and then keep in an airtight container for weeks — which means you can make them literally anytime in early December and have the whole holiday season covered. Make a double batch for the tree-trimming tray, a tin for the teacher, a box for the neighbors, and a hidden stash that's for the person who cooks.
Storage
Store the mints in an airtight container at room temperature for up to 2–3 weeks. They stay soft and buttery the whole time — that's the old-fashioned magic — and they won't fuse together if you layer them gently or give them a light dusting of powdered sugar between layers.
Freezing
These freeze beautifully for up to 2–3 months. Set them fully first, then layer them in an airtight container or freezer bag with parchment between layers. Thaw at room temperature, and they come back pillowy and perfect — a wonderful way to get well ahead of the holiday.
Reheating (Not Needed)
No reheating here — these are a set-and-serve candy. If you've kept them airtight at room temperature, they're always ready for the dish. Bring them to the table straight from the tin.
What to Serve Them With
Set them in a crystal dish for the coffee table (grandma knows), arrange them on a holiday cookie tray, tuck them into gift tins, or leave a small bowl near the door for guests. They're beautiful on a charcuterie-adjacent holiday spread, perfect at the end of a big meal when a little sweetness is the only thing missing, and lovely presented as homemade gifts in a little box with a ribbon.
Beverage Pairings
Hot chocolate is the dream pairing — the creamy cocoa softens the bright peppermint exactly the way winter wants. Coffee holds its own beautifully, balancing the sweet butter with bitterness, and a steaming mug of tea is the cozy aunt-energy choice. For grown-up evenings, they're irresistible with a peppermint mocha or a hot toddy. The rule: hot drinks, cold nights, and a dish of mints within reach.
Frequently Asked Questions
Do I need a candy thermometer? No. This is the beautiful part — no thermometer, no special equipment, just soft butter and powdered sugar folded into candy. Why is my dough crumbly? That's the recipe working as intended. The crumbly stage comes after the sugar goes in; the cream brings it together into smooth dough, one teaspoon at a time. How strong should the peppermint be? Personal taste. Start with 1 teaspoon of extract, taste the dough, and add more — 2 teaspoons is a noticeably stronger, brighter candy-cane kick. Can I use liquid food coloring instead of gel? You can, but gel is better — liquid drops add extra moisture and can make the dough sticky. Gel gives clean color with zero texture change. How long do they stay soft? Stored airtight at room temperature, they stay soft and buttery for up to 2–3 weeks. (If they last that long — mine were gone in three days.) Are these gluten-free? Yes, naturally — there's no wheat anywhere in the ingredient list. For the dairy-free version, use plant-based butter and a dairy-free cream or milk alternative. Can I freeze them? Yes — set them fully, layer with parchment, and freeze up to 2–3 months. Thaw at room temperature, pillowy and perfect. How many mints does this recipe make? About four dozen small pillows from the full batch — plenty for a crystal dish, a gift tin, and (let's be honest) a few for the cook. Can I roll them into balls instead of pillows? Yes — after slicing, roll each piece gently between your palms for smooth, pearl-shaped mints. Are they a good homemade gift? The best kind. A little box, a ribbon, and a batch of homemade mints out-gifts anything from a store, and the recipe story makes them even better. What if they get too dry? They only dry out if the container is loose. Sealed airtight, they hold their texture; if one dries, no one will complain anyway. Can I make these with kids? Please do. Rolling the ropes and twisting the red and white together is the exact kind of kitchen magic kids remember — the candy may be soft, but the memory is set for life.
Nutrition Information
Estimated per mint (1 of about 48, classic version):
| Nutrient | Amount |
|---|---|
| Calories | ~60 |
| Protein | 0g |
| Carbohydrates | 10g |
| Fiber | 0g |
| Sugar | 10g |
| Total Fat | 2g |
| Saturated Fat | 1g |
| Sodium | 25mg |
| Values are estimates and vary by butter, cream, and portion. These are a treat by design — best enjoyed a pillow or two at a time. |
These soft peppermint butter mints are the taste of every grandmother's coffee table and every December that ever mattered. Creamy, pillowy, and melt-on-your-tongue soft, with that old-fashioned butter richness before the bright peppermint clears the finish — they're the nostalgic Christmas treat that actually tastes like childhood. And the magic is that they're nearly free to make, stunningly pretty, and require nothing more than butter, sugar, and a swirl of color and peppermint. Make them for the crystal dish, the gift tin, the cookie tray, and the neighbor you haven't seen since last year. Make them with a kid who's old enough to roll a rope and young enough to think it's a miracle. Keep them in an airtight tin and watch them disappear at triple speed — because that's what happens to the good stuff. So would you make these exactly like this, or add a little more peppermint kick? Either answer comes with a dish of buttery, soft, Christmas-magic mints. From my kitchen and my grandma's before me to yours — pillowy, peppermint-bright, and gone before January.
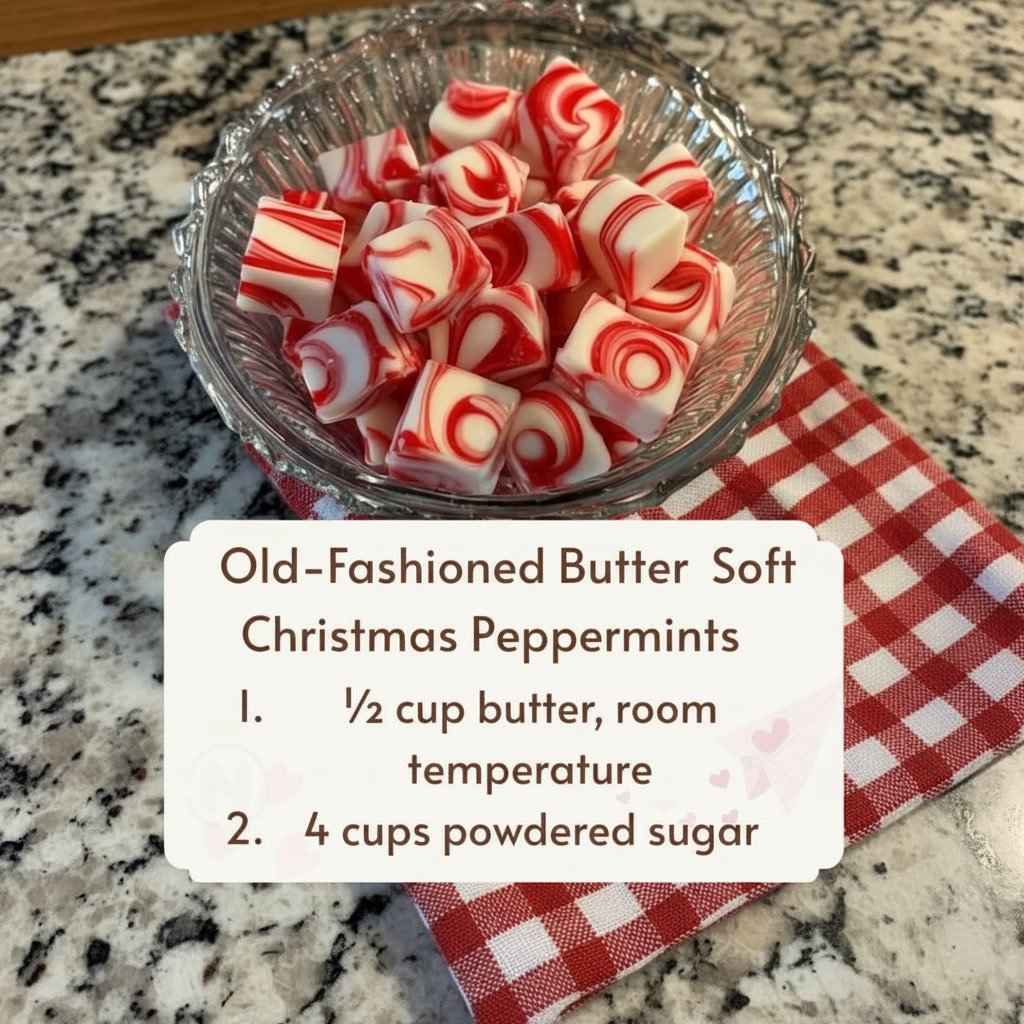
Soft Peppermint Butter Mints
Ingredients
Equipment
Method
- Beat the softened butter until smooth and creamy.
- Gradually add the powdered sugar, one cup at a time, mixing after each addition. It will be crumbly — that's normal.
- Add the peppermint extract and 2 tablespoons of cream. Mix until a soft, smooth dough forms; add more cream a teaspoon at a time if too stiff.
- Divide the dough; leave one half white, tint the other red with a few drops of gel coloring and knead until even.
- Roll each half into a ½-inch rope; twist the ropes together and roll gently for a marbled candy-cane effect.
- Slice into ½-inch pieces, leaving as pillows or rolling into balls.
- Let sit uncovered on a parchment-lined tray a few hours to firm, then store airtight at room temperature.
Notes
Stays soft 2–3 weeks airtight; freezes up to 2–3 months.
Use gel food coloring (not liquid) to avoid thinning the dough.
Budget: pennies per mint; far below confectioner prices.
- Nutrition (per mint, 1 of 48): ~60 calories, 10g carbs, 2g fat, 25mg sodium — estimates only.