
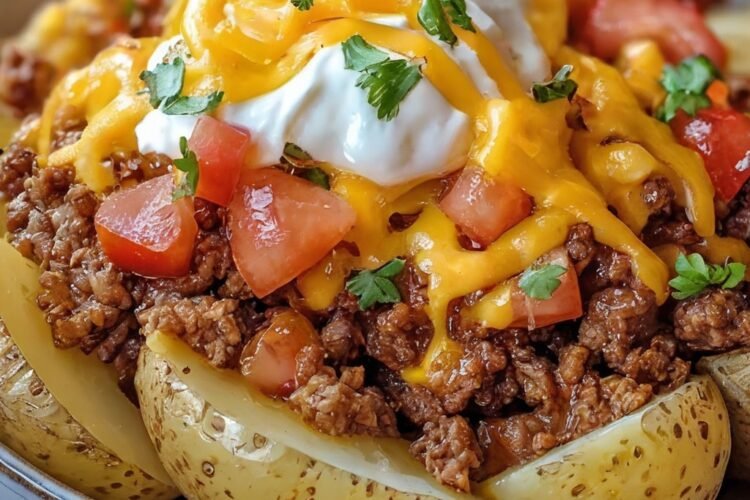
Taco Loaded Baked Potatoes
Crispy-skinned baked potatoes piled high with seasoned taco meat, melted cheddar, sour cream, green onions, and fresh tomatoes. This is the best of both worlds—fluffy baked potatoes and classic taco flavors—in one easy, satisfying plate.
The potatoes bake until the skins are crisp and the insides are soft and ready to fluff. While they roast, the ground beef browns and simmers with taco seasoning until it is thick, savory, and full of flavor. Then everything comes together: slice the potatoes open, load them with the meat, and finish with all the fresh toppings. It is simple, customizable, and always a hit.
Perfect for weeknights, casual gatherings, or anytime you want something hearty that still feels fun.
Why You’ll Love This Recipe
You will love these Taco Loaded Baked Potatoes because they combine two comfort-food favorites into one complete meal. Fluffy baked potatoes become the perfect base for seasoned taco beef, melted cheese, cool sour cream, and bright fresh toppings.
You will love how easy they are. The potatoes roast mostly unattended while you cook the simple taco meat on the stove. Assembly takes just a few minutes.
You will love the customizable toppings. Stick with the classics or add jalapeños, avocado, black beans, cilantro, or hot sauce—whatever your table likes best.
Most of all, you will love how satisfying they are. Each potato is a full, balanced plate of crispy skin, soft potato, savory meat, and cool, fresh finishes. They feel special without requiring complicated steps.
Why This Recipe Works
Baking Russet potatoes at 400°F produces crisp skins and fluffy interiors that hold up well under hearty toppings. Piercing the potatoes allows steam to escape so they cook evenly without bursting. Lean ground beef browns quickly and stays flavorful once simmered with taco seasoning and a little water. The short simmer thickens the meat mixture so it sits nicely on the potatoes instead of running off. Sharp cheddar melts from the heat of the meat, while sour cream, green onions, and tomatoes add cool, fresh contrast. Loading the potatoes just before serving keeps the skins crisp and the toppings bright. These straightforward techniques create a complete, crowd-pleasing meal with excellent texture and flavor balance.
Ingredient Breakdown
Russet Potatoes (4–6 medium)
Ideal for baking. They become fluffy inside and crisp outside.
Lean Ground Beef (1 pound)
The savory taco filling. Lean beef keeps the finished potatoes from feeling greasy.
Taco Seasoning (1 oz packet) + Water (½ cup)
Quickly seasons and sauces the beef.
Sharp Cheddar Cheese (1 cup, shredded)
Melts over the hot meat for classic taco flavor.
Sour Cream (½ cup)
Adds cool creaminess.
Green Onions (¼ cup, chopped)
Bring mild onion freshness and color.
Fresh Tomatoes (½ cup, diced)
Provide juicy brightness.
Kitchen Equipment
A baking sheet or oven rack, a large skillet, a fork for piercing and fluffing, a sharp knife, and serving spoons are the main tools needed.
Step-by-Step Instructions
Wash and scrub the potatoes well, then pierce them all over with a fork. Place them in a 400°F oven and bake for 45–50 minutes, until they are fork-tender and the skins give slightly when pressed.
While the potatoes bake, heat a large skillet over medium heat and cook the ground beef until browned and no longer pink. Drain any excess grease.
Stir in the taco seasoning and water. Simmer for about 5 minutes, stirring occasionally, until the mixture thickens and the flavors meld.
When the potatoes are done, carefully slice them open lengthwise and fluff the insides with a fork.
Spoon the seasoned beef generously over each potato. Top with shredded cheddar, dollops of sour cream, chopped green onions, and diced tomatoes.
Serve immediately while the potatoes are hot and the cheese is melty.
Expert Tips
- Choose medium Russet potatoes of similar size so they bake at the same rate.
- Scrub the potatoes well and pierce them thoroughly to prevent bursting.
- For extra-crispy skins, rub the potatoes with a little oil and salt before baking.
- Bake directly on the oven rack or on a baking sheet—both work.
- Drain the beef well so the filling stays flavorful without excess grease.
- Let the seasoned beef simmer until it thickens slightly so it sits nicely on the potatoes.
- Fluff the potato insides gently to create a good base for the toppings.
- Load the potatoes just before serving so the skins stay crisp.
- Freshly shredded cheddar melts more smoothly than pre-shredded.
- Warm the sour cream slightly or let it sit at room temperature so it doesn’t cool the potatoes too much.
- Offer extra toppings on the side so everyone can customize.
- Potatoes can be baked ahead and reheated before loading.
- A quick broil after adding the cheese (before the cold toppings) gives extra melt if desired.
- Serve with lime wedges or hot sauce for extra brightness and heat.
Common Mistakes to Avoid
- Skipping the piercing step and risking burst potatoes.
- Underbaking so the centers stay hard.
- Overbaking until the potatoes dry out.
- Leaving too much grease in the beef and making the filling oily.
- Adding the water and seasoning without simmering long enough so the meat stays watery.
- Loading the potatoes too early and letting the skins soften.
- Using cold toppings straight from the fridge that cool everything down too fast.
- Cutting the potatoes before they have rested a minute and losing steam (and risking burns).
- Choosing very large potatoes that take much longer to bake.
- Forgetting to fluff the insides and ending up with a dense base.
- Overloading with so many toppings that the potato becomes hard to eat.
- Using pre-shredded cheese that doesn’t melt as nicely.
- Skipping the drain step after browning the beef.
- Serving without napkins—loaded potatoes can be delightfully messy.
Ingredient Substitutions
Ground beef can be replaced with ground turkey, ground chicken, or a plant-based ground.
Taco seasoning packets can be swapped for a homemade blend of chili powder, cumin, paprika, garlic powder, onion powder, salt, and oregano.
Sharp cheddar can be replaced with Mexican blend, Colby Jack, or pepper jack.
Sour cream can be substituted with Greek yogurt or a dairy-free alternative.
Green onions can be swapped for chopped red onion or chives.
Fresh tomatoes can be replaced with pico de gallo or salsa.
Recipe Variations
- Chicken Taco – Use seasoned shredded or ground chicken instead of beef.
- Black Bean – Add or replace some meat with seasoned black beans for a vegetarian version.
- Breakfast Style – Top with scrambled eggs, cheese, and bacon or sausage.
- Deluxe – Add avocado, jalapeños, cilantro, and a squeeze of lime.
- BBQ Ranch – Swap taco seasoning for barbecue seasoning and drizzle with ranch.
- Chili Loaded – Use leftover chili in place of the taco meat.
- Fully Loaded – Add bacon bits, extra cheese, and a fried egg.
- Low-Carb Approach – Serve the taco meat and toppings over roasted cauliflower or in a bowl with less potato.
- Mini Potatoes – Use smaller potatoes for individual party portions.
- Meal-Prep – Bake potatoes and cook meat ahead; reheat and assemble when ready.
- Spicy – Use hot taco seasoning or add cayenne and jalapeños.
- Cheese Lover’s – Broil a layer of cheese on the potato before adding the cold toppings.
- Turkey Version – Substitute lean ground turkey and keep the same seasonings.
- Double Protein – Mix black beans into the seasoned beef.
Make It Healthier
Use lean or extra-lean ground beef (or turkey) and drain thoroughly. Load up on the fresh toppings—tomatoes, green onions, and optional lettuce or salsa—and use a moderate amount of cheese and sour cream. Greek yogurt works well in place of sour cream. Pair with a side salad if you want even more vegetables. The potato already provides fiber and staying power; balanced toppings keep the meal satisfying.
Meal Prep Guide
Bake the potatoes and cook the taco meat up to 2–3 days ahead. Store separately in the refrigerator. Reheat the potatoes in the microwave or oven and the meat on the stove or microwave, then assemble with fresh toppings just before serving.
Storage
Store leftover components separately when possible. Cooked potatoes and taco meat keep in airtight containers in the refrigerator for up to 3–4 days. Assembled leftovers are still tasty but the skins will soften.
Freezing
Cooked taco meat freezes well for up to 2–3 months. Baked potatoes can be frozen but the texture softens; they are best freshly baked or refrigerated. Thaw meat overnight in the refrigerator and reheat gently.
Reheating
Oven: Best for potatoes. Reheat at 350°F until hot; add meat and toppings afterward.
Microwave: Convenient for both potatoes and meat. Heat separately, then assemble.
Stovetop: Reheat the meat with a splash of water to loosen it.
What to Serve With It
These loaded potatoes are a complete meal on their own. A simple green salad, Mexican street corn, or chips and salsa make easy sides. Lime wedges, hot sauce, and extra toppings on the table let everyone customize. Keep sides light and fresh so the potatoes remain the focus.
Beverage Pairings
Iced tea, sparkling water with lime, or a cold light beer pairs well with the savory, cheesy flavors. A classic margarita or agua fresca also fits the Tex-Mex theme. Choose something refreshing that cuts the richness.
Frequently Asked Questions
How do I know when the potatoes are done?
They should be fork-tender all the way through and give slightly when pressed. Large potatoes may need a few extra minutes.
Can I bake the potatoes ahead?
Yes. Reheat them in the oven or microwave before loading with the hot meat and toppings.
Can I use a different potato?
Russets are best for the classic fluffy texture and sturdy skin. Yukon Golds also work but will be creamier and less fluffy.
Is this gluten-free?
Yes, as written (confirm your taco seasoning is gluten-free if needed).
Can I make these vegetarian?
Yes. Replace the beef with seasoned black beans, lentils, or a plant-based ground.
How can I make the skins extra crispy?
Rub the potatoes with a little oil and salt before baking, and bake directly on the oven rack if possible.
Can I use leftover taco meat?
Absolutely. Reheat it and load the potatoes as directed.
What other toppings work well?
Avocado, jalapeños, cilantro, black beans, salsa, hot sauce, pickled onions, or a drizzle of queso.
How many potatoes should I plan per person?
One medium-to-large potato per person is usually enough as a main dish.
Can I cook the potatoes in the microwave?
Yes for speed, but the skins won’t be as crisp. Finish in a hot oven for a few minutes if you want better texture.
Do I need to wrap the potatoes in foil?
No. Baking them unwrapped gives crispier skins.
How do I keep the cheese melty?
Add it right on top of the hot meat so it softens from the residual heat. A quick broil also works.
Can I double the recipe?
Yes. Use a larger skillet for the meat and bake the potatoes in batches or on multiple racks if needed.
Are these kid-friendly?
Very. Mild toppings and familiar flavors usually appeal to kids; serve extra toppings on the side for picky eaters.
Would you add extra toppings like avocado and jalapeños or keep them classic?
Both are excellent. Classic is always satisfying; extra toppings make them even more fun and customizable.
Nutrition Information
Approximate nutrition per serving (based on 5 servings): about 425 calories, 18 g fat, 42 g carbohydrates, and 24 g protein. Values will vary depending on potato size, exact beef leanness, and topping amounts. These figures are estimates only and are not a substitute for professional nutritional advice. This is a balanced, filling main dish that pairs well with extra vegetables if desired.
Final Thoughts
Taco Loaded Baked Potatoes are the kind of meal that feels both comforting and exciting. Crispy-skinned potatoes, savory taco beef, melted cheese, and fresh toppings come together with almost no fuss and always leave the table happy. They are easy enough for a beginner, flexible enough for whatever toppings you love, and satisfying enough to become a regular request.
I hope you make them the next time you want a hearty, fun dinner that doesn’t keep you in the kitchen all evening. I hope the skins turn crisp, the cheese melts just right, and everyone loads their potato exactly the way they like it. If you try them, I’d love to know which toppings you chose and how quickly they disappeared. From my kitchen to yours—crispy, cheesy, taco-loaded perfection.
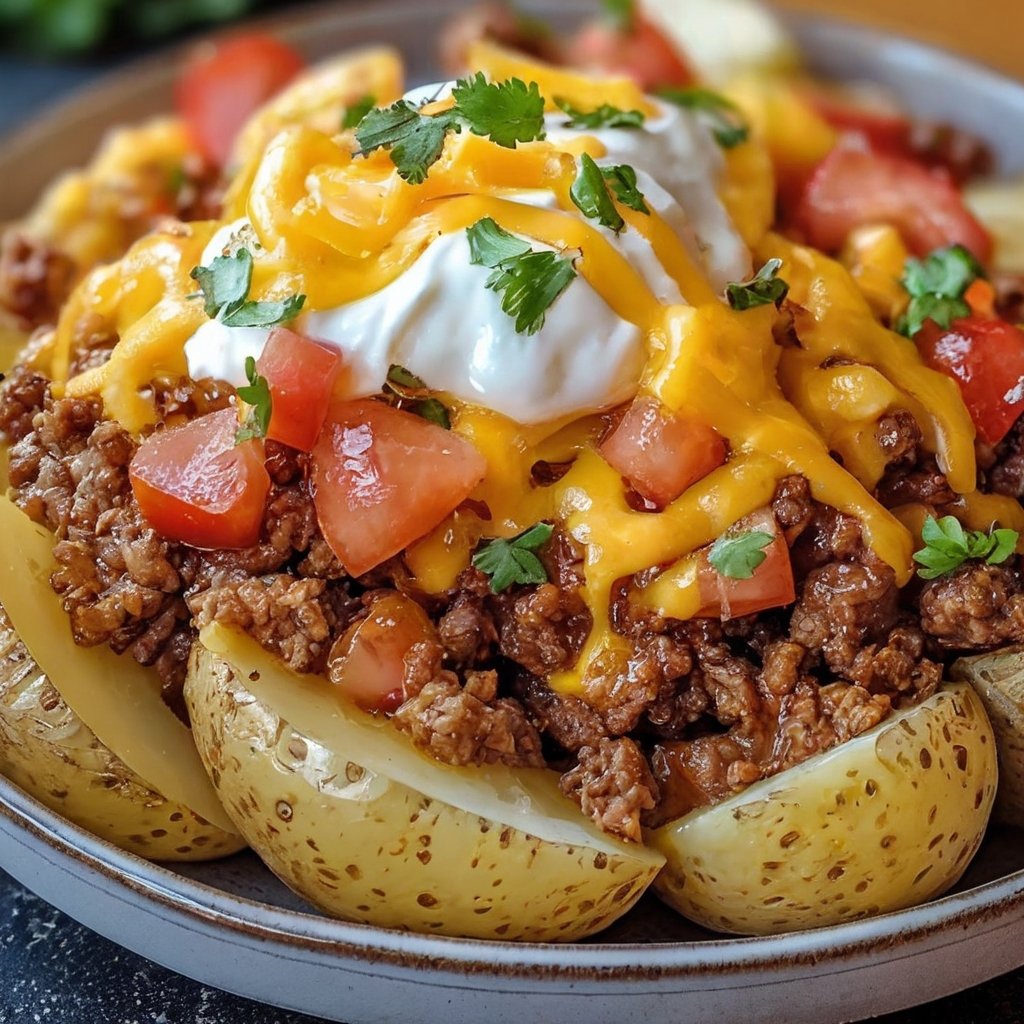
Taco Loaded Baked Potatoes
Ingredients
Equipment
Method
- Scrub and pierce the potatoes. Bake at 400°F for 45–50 minutes until fork-tender.
- While potatoes bake, brown the ground beef in a skillet over medium heat; drain excess grease.
- Stir in taco seasoning and water. Simmer about 5 minutes until thickened.
- Slice potatoes open lengthwise and fluff the insides with a fork.
- Spoon seasoned beef over each potato. Top with cheddar, sour cream, green onions, and tomatoes.
- Serve immediately.
Notes