

Simple Homemade Sandwich Bread
I learned to make bread the winter my daughter was home from college, and honestly? I haven’t bought a loaf since. There’s something about the smell of fresh bread baking that just makes a house feel like home. This dough is so forgiving—even on days when I’m rushing or the kitchen’s cold, it rises beautifully. The crust gets golden and crackling, and the inside stays soft and pillowy. We go through a loaf in about two days now.
This is the kind of bread that makes people pause mid-bite and ask what you did differently. Nothing fancy—just flour, yeast, a little patience, and your hands.
Why You’ll Love This Recipe
You will love this simple homemade sandwich bread because it delivers bakery-quality results with everyday ingredients and a straightforward method. The crust turns golden and crisp while the interior stays tender, soft, and perfect for toasting or sandwiches.
You will love how forgiving the dough is. It rises reliably even if your kitchen isn’t perfectly warm, and the kneading time is short enough for beginners yet effective enough for a beautiful crumb.
You will love the aroma that fills the house while it bakes. Fresh bread has a way of making an ordinary day feel special.
Most of all, you will love that once you make it a few times, you’ll wonder why you ever bought bread from the store. It’s simple, satisfying, and endlessly useful.
Why This Recipe Works
A balanced ratio of flour, water, yeast, salt, and a touch of sugar creates a dough that is easy to handle and rises consistently. Warm (not hot) water activates the yeast without killing it. Kneading develops the gluten so the bread has structure and a soft, elastic crumb. Two rises give the yeast time to create flavor and a light texture. Baking at 375°F produces a deeply golden crust while keeping the interior moist. Optional olive oil or butter adds tenderness and a subtle richness. The result is a reliable everyday loaf that tastes far better than anything mass-produced.
Ingredient Breakdown
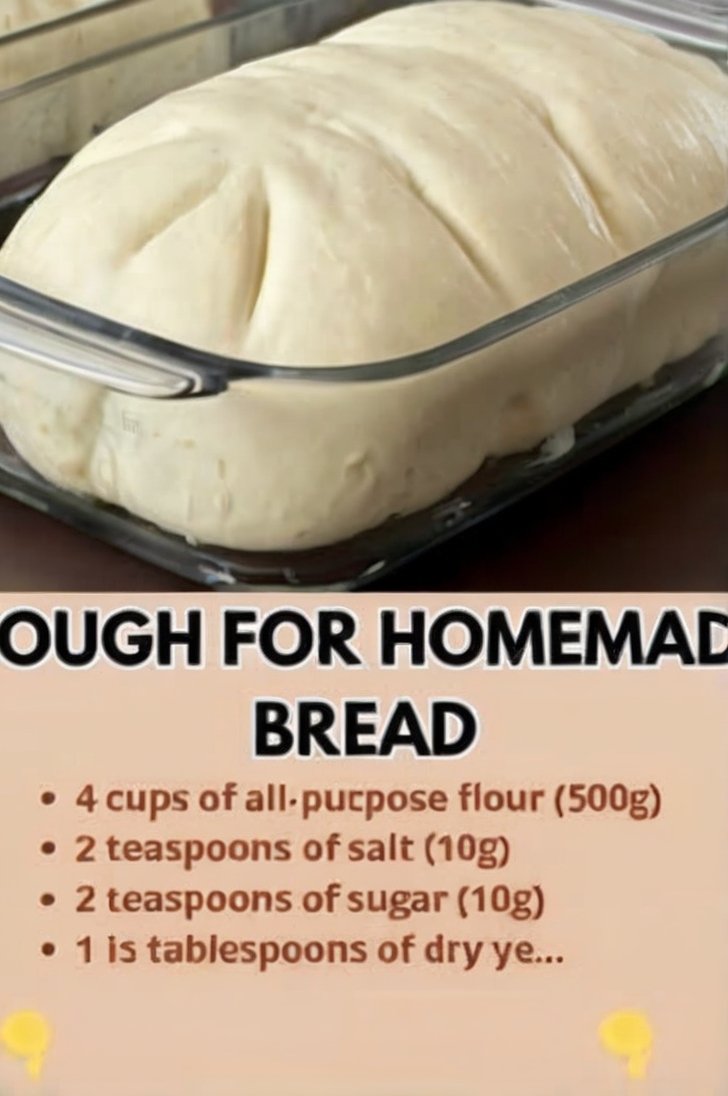
4 cups (500 g) all-purpose flour
The structure of the bread. All-purpose works beautifully for a soft sandwich loaf.
2 teaspoons (10 g) salt
Essential for flavor and for controlling yeast activity.
2 teaspoons (10 g) sugar
Gives the yeast a little food to get started and adds a touch of sweetness.
1½ tablespoons (15 g) dry yeast (or 2 tablespoons fresh yeast)
The leavening agent that makes the dough rise.
1½ cups warm water
Activates the yeast. It should feel pleasantly warm to the touch, not hot.
2 tablespoons olive oil or melted butter (optional)
Adds tenderness and a soft crumb. Highly recommended for everyday sandwich bread.
Kitchen Equipment
A large mixing bowl, a wooden spoon or dough whisk, a clean surface for kneading, a loaf pan or baking sheet, a clean kitchen towel, and an oven are all you need. A kitchen scale is helpful for accuracy but not required.
Step-by-Step Instructions
In a large bowl, whisk together the flour, salt, and sugar until well combined.
In a small bowl or measuring cup, dissolve the yeast in the warm water. Let it sit for about 5 minutes until it becomes foamy and smells yeasty—this shows the yeast is active.
Pour the yeast mixture into the flour mixture. Add the olive oil or melted butter if using.
Stir with a wooden spoon until a shaggy dough forms and most of the flour is incorporated.
Turn the dough out onto a lightly floured surface. Knead for 8–10 minutes, until the dough is smooth, elastic, and only slightly tacky. If it sticks heavily to your hands, add a tiny sprinkle of flour, but avoid adding too much.
Place the dough in a lightly oiled bowl, turning it once to coat. Cover with a clean kitchen towel and let it rise in a warm spot for about 1 hour, or until doubled in size.
Gently punch the dough down to release the air. Shape it into a loaf and place it in a greased 9x5-inch loaf pan, or shape it into a round and place it on a parchment-lined baking sheet.
Cover again and let it rise for 30–40 minutes, until puffy and nearly doubled.
Preheat the oven to 375°F (190°C).
Optional but recommended: brush the top of the loaf with a little melted butter or olive oil and make 2–3 shallow diagonal slashes with a sharp knife or lame.
Bake for 30–35 minutes, until the top is deeply golden brown and the loaf sounds hollow when tapped on the bottom.
Remove from the pan (if using one) and let the bread cool on a wire rack for at least 10 minutes before slicing. Cooling helps the crumb set so the slices don’t compress.
Expert Tips
- Use water that feels warm to the touch—too hot will kill the yeast.
- Check that your yeast is active by looking for foam after 5 minutes.
- Knead until the dough feels smooth and springs back slowly when poked.
- A slightly tacky dough is better than a dry one; resist adding too much flour.
- Create a warm rising spot by placing the bowl near (not on) a heating vent or in an oven with just the light on.
- Punching down the dough redistributes the yeast and improves texture.
- Grease the loaf pan well so the bread releases easily.
- Slashing the top allows the bread to expand evenly in the oven.
- Brushing with butter or oil before baking gives a softer, more golden crust.
- The hollow-tap test is a reliable way to check doneness.
- Let the bread cool at least 10 minutes—slicing too early makes the crumb gummy.
- A metal loaf pan conducts heat well and promotes even browning.
- Weigh the flour if possible for the most consistent results.
- Freshly baked bread freezes beautifully—slice it first for easy toasting later.
Common Mistakes to Avoid
- Using water that is too hot and killing the yeast.
- Skipping the proofing step and not checking that the yeast is alive.
- Adding too much flour during kneading and ending up with a dry loaf.
- Under-kneading so the bread lacks structure and rises poorly.
- Letting the dough rise in a cold spot so it takes far longer or doesn’t double.
- Over-proofing the second rise until the dough collapses.
- Baking in a cold oven instead of preheating fully.
- Slicing the loaf while it’s still steaming hot.
- Using old yeast that no longer activates properly.
- Forgetting the salt—flavor and gluten development both suffer.
- Packing the flour into the measuring cup instead of spooning and leveling (or weighing).
- Covering the dough with plastic wrap that sticks and deflates it.
- Opening the oven door repeatedly during baking and losing heat.
- Expecting the exact same rise time every day—temperature and humidity affect it.
Ingredient Substitutions
All-purpose flour can be replaced with bread flour for a slightly chewier loaf.
Dry yeast can be swapped for an equal amount of instant yeast (mix it directly with the flour) or the noted amount of fresh yeast.
Olive oil can be replaced with melted butter, avocado oil, or left out entirely for a leaner loaf.
Sugar can be replaced with honey (use the same volume) for a subtle different flavor.
Recipe Variations
- Honey Oat – Replace the sugar with honey and roll the shaped loaf in oats before the second rise.
- Herb – Knead in 1–2 teaspoons dried Italian herbs or fresh rosemary.
- Garlic – Add 1–2 teaspoons garlic powder or roasted garlic to the dough.
- Whole Wheat – Replace up to half the all-purpose flour with whole-wheat flour (add a bit more water if needed).
- Seeded – Top the loaf with sesame, poppy, or everything-bagel seasoning before baking.
- Cinnamon Raisin – Knead in cinnamon and raisins for a breakfast loaf.
- Dinner Rolls – Divide the dough into 12 pieces, shape into rolls, and reduce bake time to 18–22 minutes.
- Free-Form Boule – Shape into a round and bake on a sheet pan or in a Dutch oven.
- Cheese – Knead in 1 cup shredded cheddar or Parmesan.
- Olive – Add chopped olives and a little extra olive oil.
- Milk Bread Style – Replace half the water with warm milk for a softer crumb.
- Multigrain – Replace ½ cup flour with a multigrain cereal blend.
- Sweet – Increase sugar to 3–4 tablespoons for a slightly sweeter sandwich bread.
- Mini Loaves – Divide into two smaller pans and reduce bake time slightly.
Make It Healthier
Use half whole-wheat flour for more fiber and nutrients. Reduce or omit the optional oil/butter if desired. The homemade version already avoids the preservatives and excess sodium found in many commercial loaves. Enjoy it as part of balanced meals with plenty of vegetables, lean proteins, and healthy fats.
Meal Prep Guide
This dough is ideal for making ahead. After the first rise, you can refrigerate the dough overnight (punch it down first). The next day, shape it, let it come to room temperature and finish the second rise, then bake. You can also bake the loaf completely, cool it, slice it, and freeze the slices for quick toast throughout the week.
Storage
Store the completely cooled loaf in a bread box, paper bag, or loosely wrapped in a clean towel at room temperature for 2–3 days. For longer storage, refrigerate (it will firm up a bit) or freeze.
Freezing
Slice the cooled loaf, place parchment between slices if desired, and freeze in a freezer bag for up to 3 months. Toast slices straight from frozen or thaw at room temperature.
Reheating
Toast individual slices for the best texture. To refresh a whole loaf, wrap it in foil and warm in a 350°F oven for 10–15 minutes. A quick spritz of water before warming can help revive the crust.
What to Serve With It
This bread is perfect for sandwiches, toast with butter and jam, grilled cheese, or alongside soups and stews. It makes excellent French toast or bread pudding if it starts to go stale. Serve warm with a generous spread of butter for the simplest and most satisfying experience.
Beverage Pairings
Coffee or tea with toast in the morning. A glass of cold milk with a warm slice and butter. For dinner, it pairs well with whatever you’re serving—soup, salad, or a hearty main dish.
Frequently Asked Questions
Can I use instant yeast instead of active dry?
Yes. Mix instant yeast directly with the dry ingredients and proceed; no need to proof it separately.
Why didn’t my dough rise?
The yeast may have been old or the water too hot or too cold. Always check that the yeast foams before continuing.
Can I make this without a loaf pan?
Yes. Shape it into a free-form round or oval and bake on a parchment-lined sheet.
How do I know when the bread is done?
The top should be deep golden and the loaf should sound hollow when tapped on the bottom. Internal temperature around 190–200°F is also a good indicator.
Why is my bread dense?
Possible causes include too much flour, under-kneading, or insufficient rising time.
Can I double the recipe?
Yes. Make two loaves or one larger batch (you may need to knead a bit longer).
How long should I knead?
8–10 minutes by hand is usually enough for a smooth, elastic dough.
Can I let the dough rise longer?
Yes, within reason. A longer, cooler rise can develop more flavor. Just don’t let it over-proof until it collapses.
Is the sugar necessary?
It helps the yeast and adds a touch of flavor, but you can reduce it slightly if preferred.
Can I use bread flour?
Yes. It will give a slightly chewier, taller loaf.
Why do you recommend cooling before slicing?
The crumb finishes setting as it cools. Slicing too soon can make the interior gummy.
How do I store homemade bread?
Room temperature for a couple of days, or slice and freeze for longer storage.
Can I make rolls with this dough?
Yes. Divide into 12 pieces, shape, rise, and bake 18–22 minutes.
What if my kitchen is cold?
Place the covered dough in an oven with only the light on, or near a warm (not hot) spot to encourage rising.
Would you slice into this warm with butter, or wait until it cools?
Warm with butter is pure joy, but waiting at least 10 minutes gives cleaner slices and better texture.
Nutrition Information
Approximate nutrition will vary based on exact ingredients and slice size. Homemade bread is free of many preservatives found in commercial loaves. Values are estimates only and should not be considered professional nutritional advice. Enjoy as part of a balanced diet.
Final Thoughts
This simple homemade sandwich bread is the loaf that ended my store-bought habit. Soft inside, golden and crackling outside, and fragrant enough to make the whole house feel like home. It’s forgiving enough for beginners and reliable enough to become a weekly ritual.
I hope you make it the next rainy weekend—or any day you want that fresh-bread smell filling your kitchen. I hope the dough rises high, the crust turns deep golden, and someone asks what you did differently. If you try it, I’d love to know whether you sliced into it warm with butter or waited until it cooled—and how long the loaf actually lasted in your house. From my kitchen to yours—simple, fragrant, and truly homemade.
Simple Homemade Sandwich Bread
Ingredients
Equipment
Method
- Whisk flour, salt, and sugar in a large bowl.
- Dissolve yeast in warm water; let stand 5 minutes until foamy.
- Add yeast mixture and optional oil/butter to the flour; stir into a shaggy dough.
- Knead 8–10 minutes until smooth and elastic.
- Place in oiled bowl, cover, and rise 1 hour until doubled.
- Punch down, shape into a loaf, and place in greased pan or on parchment.
- Cover and rise 30–40 minutes.
- Preheat oven to 375°F. Optional: brush with oil/butter and slash the top.
- Bake 30–35 minutes until deep golden and hollow-sou
Notes