
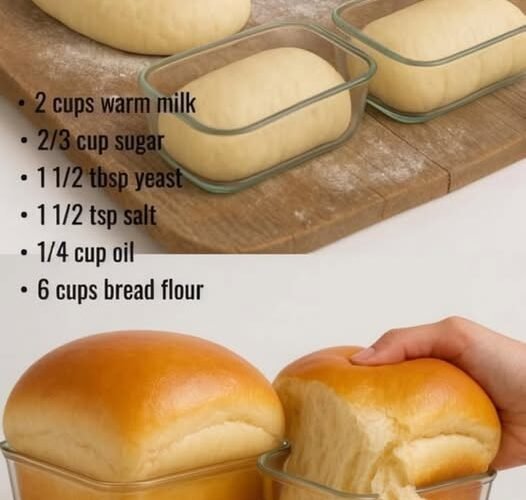
Soft Homemade Bread
I’ve been making this bread every Sunday morning for the past month, and my kitchen smells like an actual bakery now. My neighbor knocked on the door last week just to ask what I was baking.
This is the kind of bread that makes you wonder why you ever bought store-bought. Soft, pillowy, with that perfect golden crust that’s just barely crisp. When you pull it apart, it’s got that tender, cloud-like texture inside — the kind that’s perfect for toast, sandwiches, or honestly just eating warm with butter melting into it.
I started making this because I wanted homemade bread without the all-day commitment, and this one actually delivers. The dough comes together so easily, and watching it rise is oddly satisfying. My husband ate three slices straight out of the oven before dinner was even ready.
Why You’ll Love This Recipe
You will love this soft homemade bread because it delivers bakery-quality results with everyday ingredients and a straightforward method. The crumb is tender and pillowy, the crust is gently golden, and the flavor is lightly sweet and comforting.
You will love how reliable it is. The warm milk and yeast create a lively dough that rises beautifully, and the oil keeps every slice soft for days.
You will love the versatility. Slice it for sandwiches, toast it for breakfast, or tear into it warm with butter. It feels special without requiring advanced baking skills.
Most of all, you will love the way your kitchen smells while it bakes — pure comfort that turns an ordinary Sunday into something memorable.
Why This Recipe Works
Warm milk activates the yeast and softens the crumb. Sugar feeds the yeast and adds gentle sweetness that balances the flour. Oil tenderizes the dough so the finished loaves stay soft instead of drying out. Bread flour provides enough structure for a good rise while still allowing a tender texture. Two rises develop flavor and create the light, airy interior. Baking at 350°F gives even browning without drying the loaves. The result is soft, sliceable bread that tastes better than most store-bought loaves and stays fresh longer.
Ingredient Breakdown
2 cups warm milk
Activates the yeast and creates a soft, tender crumb. Use milk that feels warm to the touch, not hot.
⅔ cup sugar
Feeds the yeast and adds mild sweetness that makes the bread taste bakery-style.
1½ tablespoons active dry yeast
The leavening agent. Make sure it foams so you know it’s alive.
1½ teaspoons salt
Balances the sweetness and strengthens the dough structure.
¼ cup oil
Keeps the bread soft and moist. Vegetable or canola oil works perfectly.
6 cups bread flour
Provides the gluten needed for structure and rise. All-purpose flour can be used if that’s what you have.
Kitchen Equipment
A large mixing bowl, measuring cups and spoons, a wooden spoon or dough hook, two loaf pans (standard 8½ x 4½ or 9 x 5-inch), a clean kitchen towel, and a wire cooling rack.
Step-by-Step Instructions
In a large bowl, combine the warm milk, sugar, and yeast. Let the mixture sit for about 5 minutes until it becomes foamy — this confirms the yeast is active.
Stir in the salt and oil until combined.
Gradually add the flour, one cup at a time, mixing until a soft dough forms. The dough should be slightly sticky but manageable.
Turn the dough out onto a lightly floured surface and knead for 8–10 minutes until it becomes smooth and elastic. (If using a stand mixer with a dough hook, knead about 5 minutes on medium speed.)
Place the dough in a greased bowl, cover with a clean kitchen towel, and let it rise in a warm spot for about 1 hour, or until doubled in size.
Punch the dough down gently and divide it into two equal portions. Shape each portion into a loaf and place into two greased loaf pans.
Cover the pans and let the dough rise again for 30–40 minutes, until it rises just above the edges of the pans.
Preheat the oven to 350°F.
Bake the loaves for 25–30 minutes, until the tops are golden brown and the loaves sound hollow when tapped on the bottom.
Let the bread cool in the pans for a few minutes, then turn out onto a wire rack to finish cooling. (The smell is nearly impossible to resist.)
Expert Tips
- Use milk that is warm to the touch (about 105–110°F). Too hot will kill the yeast.
- Proof the yeast in the milk and sugar first so you know it is active before adding flour.
- Add flour gradually so the dough stays soft rather than dry and stiff.
- Knead until the dough is smooth and passes the windowpane test for best texture.
- A warm, draft-free spot speeds the rise — an oven with the light on works well.
- Grease the pans thoroughly so the loaves release cleanly.
- Shape the loaves tightly for an even rise and nicer crumb.
- The second rise is done when the dough crests just above the pan rim.
- Tap the bottom of a finished loaf — a hollow sound means it’s baked through.
- Brush the tops with melted butter right after baking for extra softness and shine.
- Let the bread cool at least 15–20 minutes before slicing for cleaner cuts.
- Bread flour gives the best structure, but all-purpose works in a pinch.
- Double the recipe and freeze one loaf for later.
- The dough can be mixed by hand or with a stand mixer — both give excellent results.
Common Mistakes to Avoid
- Using milk that is too hot and killing the yeast.
- Skipping the 5-minute proof and ending up with dense bread.
- Adding all the flour at once and making the dough too stiff.
- Under-kneading so the gluten never develops properly.
- Letting the dough rise in a cold kitchen where it barely doubles.
- Over-proofing the second rise until the dough collapses.
- Baking at too high a temperature and drying out the crust.
- Slicing the loaves while they are still steaming hot.
- Using old yeast that no longer foams.
- Forgetting to grease the pans thoroughly.
- Measuring flour by packing the cup instead of spooning and leveling.
- Skipping the second rise and getting dense, flat loaves.
- Opening the oven door repeatedly during baking.
- Expecting the exact same rise time every day — temperature and humidity matter.
Ingredient Substitutions
Bread flour can be replaced with all-purpose flour (the texture will be slightly softer).
Active dry yeast can be replaced with instant yeast (you can mix it directly with the dry ingredients).
Vegetable oil can be swapped for melted butter or light olive oil.
Whole milk can be used in place of any milk percentage for richer flavor.
A portion of the white flour can be replaced with whole-wheat flour for a heartier loaf (start with 1–2 cups).
Recipe Variations
- Honey Version – Replace part of the sugar with honey for deeper flavor.
- Butter-Topped – Brush the warm loaves with melted butter and a sprinkle of flaky salt.
- Herb – Knead in dried rosemary or Italian seasoning.
- Cheese – Add shredded cheddar or Parmesan during the final knead.
- Cinnamon Raisin – Roll the shaped dough with cinnamon-sugar and raisins before the second rise.
- Dinner Rolls – Divide the dough into 12–16 pieces, shape into balls, and bake in a sheet pan.
- Sandwich Loaves – Bake in standard loaf pans for perfect sandwich slices.
- Seeded Top – Brush with egg wash and sprinkle sesame or poppy seeds before baking.
- Whole Wheat Blend – Use half bread flour and half whole-wheat flour.
- Milk Bread Style – Brush with milk before baking for a softer crust.
- Freezer Loaves – Shape, freeze, then thaw and bake later.
- Pull-Apart – Shape into smaller balls and bake in a square pan so they pull apart.
- Sweet Version – Increase the sugar slightly and add a touch of vanilla.
- Garlic Butter – Brush the finished loaves with garlic butter while still warm.
Make It Healthier
Use part whole-wheat flour, reduce the sugar slightly, or choose a lighter oil. Slice thinner portions and pair with protein or vegetables. Homemade bread still lets you control the ingredients and avoid additives found in many commercial loaves.
Meal Prep Guide
Bake both loaves on Sunday. Keep one for the week and freeze the second. The dough can also be shaped into loaves, covered, and refrigerated overnight for a slower, more flavorful rise before baking the next day.
Storage
Once completely cool, store the bread in a plastic bag or airtight container at room temperature for 3–4 days. The oil and milk keep it soft longer than many homemade loaves.
Freezing
Wrap cooled loaves tightly in plastic wrap and then foil, or place in a freezer bag. Freeze for up to 3 months. Thaw at room temperature still wrapped, or slice and toast straight from frozen.
Reheating
Warm individual slices in a toaster or toaster oven. For a whole loaf, wrap in foil and heat in a 300°F oven for 10–15 minutes until warmed through. A light brush of butter after reheating restores that fresh-baked softness.
What to Serve With It
This bread is perfect for sandwiches, toast with butter and jam, grilled cheese, French toast, or simply torn warm with soft butter. It also pairs beautifully with soups, stews, and hearty breakfasts. Use it for avocado toast, egg sandwiches, or as a side for pasta and salads.
Beverage Pairings
Coffee or tea in the morning, cold milk with a warm slice, or iced tea later in the day. A simple latte or hot chocolate feels especially cozy with a fresh piece.
Frequently Asked Questions
Can I use all-purpose flour instead of bread flour?
Yes. The bread will still be soft and delicious, though slightly less chewy.
Why didn’t my yeast foam?
The milk may have been too hot or the yeast was old. Always check the expiration date and use warm (not hot) liquid.
How do I know when the dough has risen enough?
It should roughly double in size. Gently poke it — the indentation should slowly fill back in.
Can I make this in a stand mixer?
Yes. Use the dough hook and knead on medium speed for about 5 minutes.
Why is my bread dense?
Possible causes include inactive yeast, not enough kneading, or a cool rising environment.
How long does homemade bread stay fresh?
3–4 days at room temperature when stored properly. Freeze extras for longer storage.
Can I reduce the sugar?
Yes, but the yeast needs some sugar to rise well and the flavor will be less sweet.
Do I need two loaf pans?
This recipe makes two loaves. You can bake one and freeze the other portion of dough.
Can I shape the dough into rolls instead?
Absolutely. Divide into smaller pieces, shape into balls, and bake for a shorter time.
Why did the tops brown too quickly?
Tent with foil for the last few minutes of baking if needed.
Is this bread good for sandwiches?
Yes — it slices cleanly and has a soft but sturdy crumb.
Can I add mix-ins?
Yes. Raisins, herbs, cheese, or seeds can be kneaded in after the first rise.
How do I get a softer crust?
Brush the warm loaves with melted butter as soon as they come out of the oven.
Would you eat this still warm, or do you have the patience to let it cool first?
Most people can’t wait — a warm slice with butter is hard to resist.
Can I double the recipe?
Yes. Just make sure you have enough pans and space for rising.
Nutrition Information
Approximate nutrition will vary based on exact ingredients, slice thickness, and any additions. This is a classic enriched homemade bread. Values are estimates only and should not be considered professional nutritional advice. Enjoy in moderation as part of a balanced diet.
Final Thoughts
This soft homemade bread has turned Sunday mornings into something I look forward to. The process is simple, the rise is reliable, and the finished loaves are soft, golden, and far better than anything from a plastic bag. Once you’ve tasted a warm slice with butter melting into the tender crumb, store-bought bread suddenly feels unnecessary.
I hope you try it the next time you want your kitchen to smell like a bakery. I hope the dough rises high, the crust turns golden, and someone in your house sneaks a slice before it fully cools. If you make it, I’d love to know whether you ate it warm or managed to wait — and how quickly the first loaf disappeared. From my kitchen to yours — soft, comforting, and worth every minute.
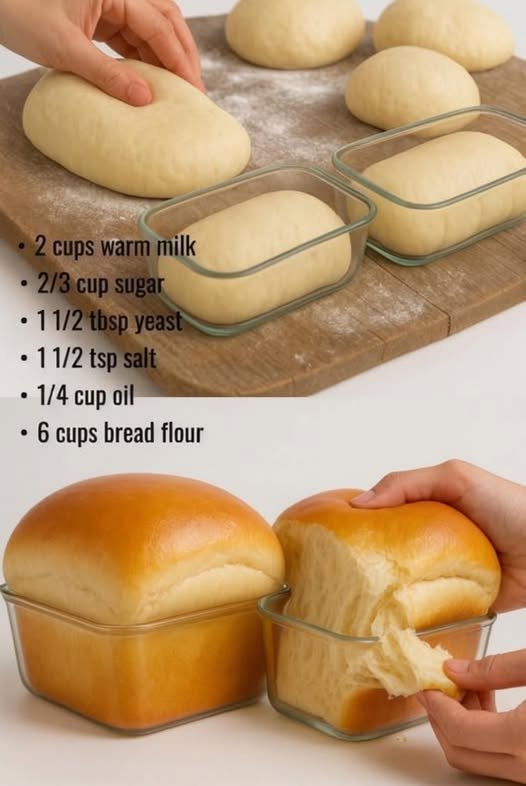
Soft Homemade Bread
Ingredients
Equipment
Method
- Combine warm milk, sugar, and yeast; let foam 5 minutes.
- Stir in salt and oil. Gradually add flour to form a soft dough.
- Knead 8–10 minutes until smooth and elastic.
- Place in greased bowl, cover, and rise 1 hour until doubled.
- Punch down, divide in half, shape into loaves, and place in greased pans.
- Cover and rise 30–40 minutes until above the pan edges.
- Bake at 350°F for 25–30 minutes until golden and hollow-sounding.
- Cool briefly in pans, then turn out onto a wire rack.
Notes