
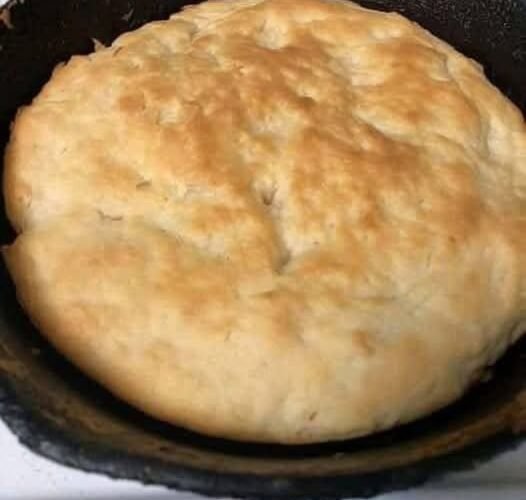
Cast Iron Hoecake (Giant Skillet Biscuit)
My grandfather used to pull this out of his cast iron skillet on Sunday mornings, and the whole kitchen would smell like butter and warmth. He called it hoecake — one giant, golden biscuit that fed the whole table. No fancy shaping, no fuss. Just flour, buttermilk, and that perfect crispy-edged crust that only cast iron can give you.
I didn’t make it for years after he passed. Then one rainy Saturday, I found his old skillet in the back of my cabinet, and something just pulled me back to that kitchen. The first time I flipped it, I heard his voice in my head: “Don’t peek too early, or you’ll lose the rise.”
It came out exactly like I remembered. Flaky on top, soft and tender inside, with those buttery browned spots that make you want to tear into it while it’s still too hot to touch. My husband asked what it was called, and I realized… I’d almost let this one disappear.
Now it’s back in my weekend rotation. Sometimes the simplest recipes are the ones that stick with you the longest.
Why You’ll Love This Recipe
You will love this cast iron hoecake because it delivers the flaky, tender interior of a biscuit with a deeply golden, crispy crust that only a hot skillet can create.
You will love how simple it is — no rolling, no cutting, no individual shaping.
You will love the way the whole kitchen fills with the smell of butter and baking bread.
Most of all, you will love tearing into warm wedges straight from the skillet and tasting something that feels like home.
Why This Recipe Works
Self-rising flour already contains the leavening needed for a good rise, keeping the ingredient list short. Cutting cold fat into the flour creates small pockets that turn into flaky layers as the hoecake bakes. Buttermilk adds tang and tenderness while activating the leavening. Starting the dough in a hot, greased cast iron skillet sets a crisp bottom crust immediately. Finishing in a hot oven cooks the interior through and turns the top golden. The result is one large, shareable biscuit with crispy edges, a soft center, and classic Southern flavor.
Ingredient Breakdown
2 cups self-rising flour
Provides structure and the built-in leavening for rise.
¼ cup shortening or cold butter, cut into pieces
Creates flaky layers and richness (butter adds more flavor; shortening gives a slightly taller rise).
¾ to 1 cup buttermilk
Adds moisture, tang, and tenderness. Start with less and add as needed.
2 tablespoons butter or oil for the skillet
Ensures a crisp, golden crust and prevents sticking.
Kitchen Equipment
A 10-inch cast iron skillet, a large mixing bowl, a fork or pastry cutter, and an oven preheated to 450°F.
Step-by-Step Instructions
Preheat your oven to 450°F.
In a large bowl, cut the shortening or cold butter into the self-rising flour with a fork or your fingers until the mixture resembles coarse crumbs.
Stir in the buttermilk a little at a time until a soft, slightly sticky dough forms. Do not overmix.
Heat a 10-inch cast iron skillet over medium heat. Add the 2 tablespoons butter or oil and swirl to coat the bottom and sides.
Turn the dough out into the hot skillet and gently press it into an even round about 1 inch thick.
Cook on the stovetop for 2–3 minutes until the bottom begins to set and lightly brown.
Transfer the skillet to the preheated oven and bake for 20–25 minutes, until the top is golden and the center sounds hollow when tapped.
Let cool for just a minute, then slice into wedges and serve warm.
Expert Tips
- Use cold fat for the flakiest texture.
- Self-rising flour is key — if you only have all-purpose, add baking powder and salt.
- Add buttermilk gradually so the dough stays soft but not wet.
- A hot skillet is essential for the signature crispy bottom.
- Don’t overwork the dough once the liquid is added.
- Press the dough gently into an even thickness for uniform baking.
- The stovetop step sets the crust before the oven finishes the rise.
- Cast iron holds heat beautifully and gives the best browning.
- Serve immediately while the crust is still crisp.
- A little extra butter brushed on top after baking adds shine and flavor.
- If the dough feels too dry, add buttermilk 1 tablespoon at a time.
- If it’s too sticky, a light dusting of flour on your hands helps.
- This recipe scales easily if you have a larger skillet.
- Leftovers reheat well in a hot skillet or toaster oven.
Common Mistakes to Avoid
- Using warm or melted fat and losing flakiness.
- Overmixing the dough and making it tough.
- Adding all the buttermilk at once and ending up with a wet mess.
- Putting the dough into a cold skillet and missing the crisp crust.
- Pressing the dough too thin so it dries out.
- Peeking too early and losing oven spring.
- Underbaking so the center stays doughy.
- Overbaking and drying out the interior.
- Using a non-cast-iron pan and missing the characteristic crust.
- Letting it cool completely before serving (it’s best warm).
- Skipping the stovetop step and missing bottom browning.
- Using expired self-rising flour that won’t rise properly.
- Cutting with a dull knife and compressing the crumb.
- Storing it uncovered so the crust softens.
Ingredient Substitutions
Self-rising flour can be replaced with 2 cups all-purpose flour + 1 tablespoon baking powder + ½ teaspoon salt.
Buttermilk can be replaced with regular milk plus 1 tablespoon vinegar or lemon juice (let sit 5 minutes).
Shortening can be replaced with cold butter or a combination of both.
Butter or oil for the skillet can be either — butter gives more flavor.
Recipe Variations
- Classic – Keep the recipe as written.
- All-Butter – Use cold butter for both the dough and the skillet.
- Garlic Herb – Add garlic powder and dried herbs to the flour.
- Cheesy – Fold in shredded cheddar before adding the buttermilk.
- Sweet – Add a tablespoon of sugar and serve with honey or jam.
- Bacon – Stir in crumbled cooked bacon.
- Drop Style – Drop the dough in smaller portions for individual hoecakes.
- Bigger Batch – Double the recipe in a 12-inch skillet (add a few extra minutes).
- Cornmeal – Replace ¼ cup of the flour with fine cornmeal for extra texture.
- Honey Butter – Brush with honey butter right after baking.
- Savory Herb – Add chopped chives or green onions.
- Make-Ahead – Mix the dry ingredients and fat ahead; add buttermilk just before cooking.
- Gravy Ready – Bake and top with sausage gravy.
- Skillet Lid – Cover for the first few oven minutes if you want a softer top.
Make It Healthier
Use cold butter in moderation, serve smaller wedges, and pair with eggs or fruit for a balanced breakfast. Whole-grain self-rising flour blends can be used, though the texture will be denser.
Meal Prep Guide
The dry ingredients and cut-in fat can be prepared ahead and refrigerated. Add the buttermilk and cook just before serving for the best rise and texture.
Storage
Cool completely, then store in an airtight container at room temperature for up to 2 days or in the refrigerator for up to 4 days.
Freezing
Wrap wedges tightly and freeze for up to 1 month. Reheat from frozen in a 350°F oven or hot skillet.
Reheating
Reheat in a 350°F oven for 8–10 minutes or in a dry skillet over medium heat to restore crispness. Avoid the microwave if you want to keep the crust.
What to Serve With It
Butter, honey, jam, sausage gravy, eggs, bacon, or alongside a bowl of beans. It works for breakfast, brunch, or as a simple side.
Beverage Pairings
Hot coffee, black tea, cold milk, or fresh orange juice. The buttery flavor pairs especially well with something hot and simple.
Frequently Asked Questions
What exactly is a hoecake?
In this version it’s a large, skillet-baked biscuit — a simple, free-form bread cooked in cast iron. Traditional hoecakes can also refer to cornmeal flatbreads; this is the biscuit-style version.
Do I need cast iron?
Cast iron gives the best crust, but a heavy oven-safe skillet can work in a pinch.
Can I use regular milk?
Yes — add a splash of vinegar or lemon juice to make a quick buttermilk substitute.
Would you eat this with sausage gravy or keep it simple with just butter?
Both are excellent. Gravy turns it into a hearty meal; butter (or honey) keeps it simple and lets the biscuit shine.
Why start on the stovetop?
It sets a crisp bottom crust before the oven finishes cooking the interior.
How do I know when it’s done?
The top should be golden and the center should sound hollow when tapped. A toothpick should come out clean.
Can I make individual biscuits instead?
Yes — portion the dough and bake as drop biscuits or in a muffin tin, adjusting time downward.
What if I don’t have self-rising flour?
Use all-purpose flour with added baking powder and salt (see substitutions).
Why is my hoecake dense?
The dough may have been overmixed, or the self-rising flour was old.
Can I add cheese or herbs?
Absolutely — fold them in after cutting in the fat.
How thick should the dough be?
About 1 inch thick for the best balance of crust and tender interior.
Is this the same as a skillet biscuit?
Yes — it’s essentially one large skillet biscuit meant for sharing.
Can I make it ahead?
The dry mix can be prepared ahead, but the dough is best mixed and baked fresh.
How should I store leftovers?
Airtight at room temperature for a day or two, or refrigerate and reheat in the oven or skillet.
What size skillet is best?
A 10-inch cast iron skillet works perfectly for this amount of dough.
Nutrition Information
Approximate values will vary based on exact ingredients and portion size. This hoecake provides carbohydrates from the flour and fat from the shortening or butter. Values are estimates only and should not be considered professional nutritional advice.
Final Thoughts
This cast iron hoecake is simple, comforting, and full of the kind of flavor that stays with you. One golden, crispy-edged biscuit that feeds the table and fills the kitchen with the smell of butter and warmth — it’s the kind of recipe worth bringing back.
I hope you make it on a slow weekend morning. I hope the bottom turns perfectly crisp, the top rises golden, and someone tears off a wedge while it’s still too hot to handle. If you try it, I’d love to know whether you served it with gravy or kept it simple with butter. From my kitchen to yours — humble, golden, and completely worth keeping alive.
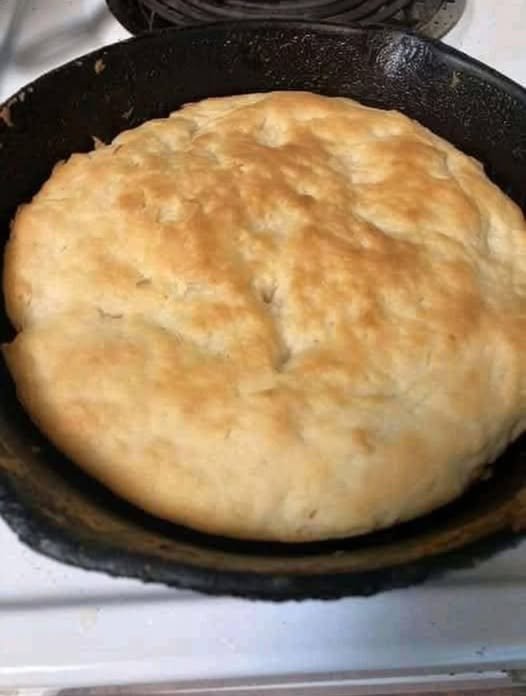
Cast Iron Hoecake (Giant Skillet Biscuit)
Ingredients
Equipment
Method
- Preheat oven to 450°F.
- Cut shortening or butter into flour until coarse crumbs form.
- Stir in buttermilk until a soft, slightly sticky dough forms.
- Heat butter or oil in a 10-inch cast iron skillet over medium heat.
- Press dough into an even 1-inch round in the hot skillet.
- Cook on stovetop 2–3 minutes until the bottom begins to set.
- Transfer skillet to oven and bake 20–25 minutes until golden and hollow-sounding.
- Cool 1 minute, slice into wedges, and serve warm.
Notes