
Pumpkin Dump Cake Recipe: 4 Ingredients, One Dish, and the Cheapest Thanksgiving Dessert You'll Serve This Year
Pour a can of pumpkin puree into the glass casserole dish with three other ingredients for a treat so good your family will fight over the last piece. That's genuinely the whole method. No mixer, no measuring cups beyond a cup of butter, no frosting, no crust, nothing to buy for a pie shell. I made this for the first time years ago for a dinner party I'd over-prepared for, and it turned into the only dessert anyone talked about, which felt like a personal insult to the other two I made. This oven baked pumpkin dump cake is the recipe I keep around for exactly those nights. It leans entirely on pantry staples — canned pumpkin puree, sweetened condensed milk, a box of spice cake mix, and butter — and turns them into a soft, almost pudding-like pumpkin base under a buttery, crumbly, cake-like topping. You dump, you whisk, you drizzle, and the oven does the rest. There is no version of this where you're measuring flour. It's also, quietly, the cheapest dessert on this blog. Four ingredients, about seven dollars, ten servings, and roughly seventy-eight cents a slice. I know that sounds too good, and it is, and the honest catch is that the sweetness is doing most of the work rather than the pumpkin. I'll put real numbers on that in the nutrition section instead of pretending this is a health food, because it isn't one and I'd rather tell you now than let you find out in front of guests. When you need an easy fall-style dessert with almost no prep, this is hard to beat. Serve the warm squares on their own, or pair them with whipped cream, a scoop of vanilla ice cream, or a drizzle of caramel sauce. For a simple dessert spread, it goes nicely with hot coffee, chai, or cold milk. And if you're setting it out for a holiday meal, fresh apple slices or spiced pears make a nice contrast to its rich sweetness. It's about to be that season, so let's get ahead of it.Why You'll Love This Pumpkin Dump Cake
I've made this maybe twenty times, mostly in a hurry, mostly in a dish I scrubbed out of a cupboard. Here's the list of reasons it keeps coming back.- Four ingredients and one dish. There's nothing to buy for a crust, nothing to whip, and no stand mixer. It goes from can opener to oven in about eight minutes.
- About 78 cents a slice. Roughly $7.75 for the whole thing, divided into ten generous servings. For a Thanksgiving table with twelve people, this is the cheapest dessert you will serve all year.
- Feeds a crowd without doubling the work. One 9x13 does ten servings. Make a second dish in a different pan if you need twenty, and the total time barely moves.
- The topping is a genuine streusbel. Dry cake mix plus butter drizzled over the top bakes into a crisp, buttery crumb that is nothing like a frosted cake.
- It is genuinely make-ahead. Bake it a day or two early, refrigerate, and warm it before dinner. This is the dessert that solves a holiday morning that's already on fire.
- It travels and it freezes. The whole dish is one slab you can cover with foil, and it freezes either baked or unbaked for up to three months.
- The pumpkin base is fudgy, not bready. It's more like a dense pudding, which is the opposite of the dry cake people expect when they hear "cake."
- It improves overnight. Day two is measurably better than day one, and that's a rare thing for a bake.
Why This Pumpkin Dump Cake Recipe Works
Dump cakes get a bad reputation, and it's mostly earned by people who stirred when they shouldn't have. Here's what's physically happening in that dish, and why none of it is optional.Do not stir the layers together. That is the whole recipe.
The pumpkin and condensed milk form a wet base, the dry cake mix sits on top, and the melted butter saturates the mix. The butter is what turns the dry layer into a crumb, and steam rising from the hot pumpkin base cooks the middle from underneath while the top browns from above. Stir it and you get a single uniform batter, which is fine but slower to bake, cakier in texture, and no longer a dump cake. The layering is doing the work, and you get two textures for zero extra effort.Butter coverage is the entire topping
There is no liquid fat in the cake mix. If any dry powder is exposed to the oven's heat without butter, that spot bakes into pale flour. The drizzle isn't a garnish over the topping; it is the topping. Sweep the melted butter across the surface until every patch of mix is dark and glossy before it goes in, and check for dry areas from a low angle where the light catches them. A second small drizzle to hit stragglers costs you nothing and prevents the most common complaint about this recipe.Fifty to sixty minutes is not a typo
You're cooking a thick, wet, dairy-containing layer that has to set enough to hold a clean square, plus a raw dry mix on top that has to fully hydrate and brown. Twenty-five minutes gives you a runny center under a set top, which is the failure mode. A bare jiggle in the very center is the right finish. The topping tells you when the edges are done; the center tells you when the base is done. Trust the center, and pull at fifty minutes to check rather than waiting out the full hour.The thirty-minute rest is a structural step
Right out of the oven the pumpkin layer is loose enough to slump, and your first cut will be a puddle with a lid. Resting lets it cool, firm, and slightly contract, so the squares hold together and the crumb on top sets hard enough to survive being cut. Cut it hot and you'll serve mush. Cut it after the rest and you'll get ten clean, tidy squares that hold their shape on a plate for a good twenty minutes, which is a longer serving window than most baked desserts manage.A glass dish is the right call, not a stylistic one
Glass heats evenly and, more importantly, it lets you watch the layer from the side. You can see the pumpkin base set at the edges before the center finishes, which means you can stop at the right moment instead of guessing through an opaque metal side. It also gives you the look people expect, and the transparent sides show off the layers when it's cut.Ingredient Breakdown: What Each Can Is Doing
The base
One 15-ounce can pumpkin puree. Not pie filling, and this distinction matters more than it sounds. Pie filling is pre-sweetened and pre-spiced, and using it makes the finished dessert cloyingly sweet and muddles the spice. Plain puree gives you control, and the spice cake mix and the condensed milk handle the flavor. One 14-ounce can sweetened condensed milk. This is the sweetening, the richness, and the structure all in one, and it is also where nearly all the sugar in this recipe comes from. Whisk it into the puree until there are no streaks, because an unevenly combined base bakes with raw-looking patches.The topping
One 15.25-ounce box spice cake mix, dry. Sprinkled straight from the box, used entirely as the crumb. You get a better result with a well-known brand than a no-name, because the fat and sugar ratios in the mix are what create the streusbel texture. One cup butter, melted. Drizzled over the top to saturate the dry mix. Melted rather than softened, because melted butter soaks in immediately instead of having to spread and press into the flour, and it produces a more even crumb. Draining or browning the butter first is a genuine upgrade; a tablespoon of the browned solids stirred into the topping is the best two-minute improvement available to this recipe.Honest cost per serving
Pumpkin puree about $2.00, sweetened condensed milk about $2.50, spice cake mix about $2.00, and one cup of butter about $1.30. That comes to roughly $7.75 total, or about 78 cents a slice across ten servings. This is the least expensive recipe on this blog by a wide margin, and I keep coming back to that when I'm pricing out a holiday dinner and suddenly need a second dessert nobody has seen. Brand and location will move the number, and using a butter you already had on hand takes it under seven dollars.The Kitchen Equipment You Actually Need
- 9x13-inch glass casserole dish. The size is specified for a reason: it gives a two-inch-deep layer that bakes through in fifty to sixty minutes and yields ten servings. A metal pan works, but you'll be guessing instead of looking, and you may need a few minutes less because metal runs hotter.
- Whisk or a fork. For the pumpkin and condensed milk. A whisk is nicer, a fork works identically.
- Measuring cup for the butter, plus a microwave-safe bowl or small saucepan to melt it.
- Table knife or spoon for drizzling the butter evenly across the dry mix.
- Cooling rack, optional, if you want to speed up the rest. A rack set over the counter cuts the thirty minutes closer to twenty.
- Sharp knife, dipped in hot water and wiped clean between cuts, for portioning. This is the difference between ten tidy squares and a crumb field.
- Foil and a cooling sheet, if you're making this ahead for a holiday and want it covered in the refrigerator.
Step-by-Step: How to Make This Oven Baked Pumpkin Dump Cake
- Preheat and grease the dish. Heat the oven to 350°F. Lightly grease a 9x13-inch glass casserole dish, then set it aside. Don't skip the grease, because the condensed milk base will stick and the topping butter will glue itself to the glass.
- Melt the butter. Melt one cup of butter and let it cool for a few minutes. It should be liquid and pourable, not hot enough to steam. If you want the deeper flavor, brown the butter first and spoon off the solids, leaving the clear golden liquid behind.
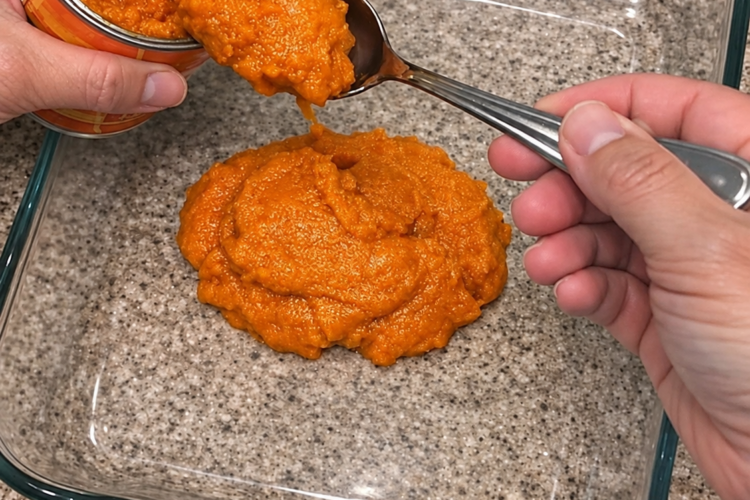
- Whisk the base smooth. Pour both cans into the casserole dish and whisk them together right in the dish, or transfer to a bowl if that's easier on your wrist. Whisk until completely smooth and evenly combined with no pale streaks of condensed milk. Scrape the corners of the dish, because a pocket of unmixed condensed milk bakes into a sticky spot.
- Spread the base. Spread the pumpkin mixture into an even layer about an inch thick, all the way to the corners. Level it with the back of a spoon so the topping bakes evenly rather than pooling on one side.
- Sprinkle the dry mix. Open the spice cake mix and sprinkle it evenly over the top, edge to edge, shaking the box as you go to keep the layer moving and avoid a thick spot in the middle. Cover the entire surface. Any exposed pumpkin will dry out and brown instead of staying soft.
- Drizzle the butter until no dry powder shows. Drizzle the melted butter all over the cake mix, moving in rows and working into every section until the whole top is dark and glossy with no white patches. Look at it from a low angle to catch dry spots the overhead light hides. Add more butter to any gaps. This is the step that determines whether your topping is a crumb or a flour patch.
- Bake 50 to 60 minutes. Bake until the top is golden brown and the center barely jiggles when you nudge the dish. Start checking at fifty minutes. If the top is browning too fast before the center sets, lay a piece of foil loosely over the dish, not pressed down.
- Rest 30 minutes. Remove from the oven and let the dish sit for a full 30 minutes before cutting, so the pumpkin layer firms up enough to portion. Serving it hot straight from the oven will give you a soupy base under a set top.
- Portion and serve. Cut into ten squares with a knife dipped in hot water and wiped between cuts. Serve just warm rather than hot, with whatever you're serving alongside.
Expert Tips for the Best Pumpkin Dump Cake
- Use plain pumpkin puree, not pie filling. Pie filling brings its own sugar and spice, and the result is far too sweet. The cake mix and the condensed milk are already doing that job.
- Melt the butter and let it cool. Pouring butter straight off the heat can start cooking the dry mix before the oven does. Three to five minutes of cooling gives you a much more even saturation.
- Check the topping from a low angle. Overhead light hides dry patches in the texture of the crumb. Get down to eye level with the dish and the floury spots jump right out at you.
- Brown the butter if you have two minutes. The clear golden liquid with a tablespoon of the browned solids stirred in is a genuine flavor upgrade, and it makes the topping smell like a bakery rather than a box.
- Stir the condensed milk thoroughly. It is thicker than the puree and it settles to the bottom of the can. The last of it is what makes a sticky raw patch.
- Level the base. Use the back of a spoon to flatten it to the corners, or the topping bakes thicker in the middle and thinner at the edges.
- Shake the cake mix box as you sprinkle. It clumps, and shaking keeps the layer even rather than leaving a bald patch in the center.
- Check at fifty minutes, not sixty. A glass dish lets you watch the base set from the side. Waiting out the full hour on a dish that's ready at fifty is how you end up with a dry crumb.
- Rest on a cooling rack if you're impatient. It shaves about ten minutes off the resting time by letting heat escape underneath instead of pooling in the glass.
- Dip the knife in hot water between every cut. A warm clean blade is the whole trick. Wipe it and go again each time.
- Add the toppings at the table. Whipped cream, ice cream, caramel, and toasted pecans all go on after the squares are plated. Putting them on early makes the crumb soggy and the ice cream watery.
Common Pumpkin Dump Cake Mistakes to Avoid
- Stirring the cake mix into the pumpkin. It destroys the layered structure that makes this dish worth making, and you'll end up with a plain cake that takes longer to bake.
- Leaving dry patches of mix uncovered. Any spot that doesn't get butter bakes into pale flour, and you'll find them after it's too late to fix.
- Using pumpkin pie filling. It's pre-sweetened and pre-spiced. You'd be adding a second full measure of sugar to a dessert that's already carrying all of it.
- Pulling it at 30 or 40 minutes. The center will be a warm liquid. You need the full fifty to sixty for the base to set enough to hold a square.
- Cutting it hot. The first slice collapses into a puddle, and then everyone assumes the whole thing is a failure.
- Skipping the grease. The condensed milk base and buttery topping will bond to the glass, and the corners will tear out.
- Not waiting for the butter to cool. Hot butter cooks the dry mix on contact, which gives you uneven browning and a raw-tasting layer underneath.
- Underexplaining the sweetness. If you're serving this to people who don't love very sweet desserts, put the whipped cream and ice cream out and let people portion their own sugar. It makes a real difference.
Ingredient Substitutions That Still Work
Straight up: this recipe as written is not gluten-free, not keto, and not low-carb, and it is not a low-sugar dessert. Standard cake mix is wheat flour, and the sweetened condensed milk supplies roughly half the sugar in the finished dish. If someone at your table needs a specific diet, please make them something else rather than serving them this. Here's what you can actually change.- Yellow cake mix instead of spice. This is a good swap and the resulting cake is a straight-up butterscotch dump cake. For a warmer pumpkin flavor, stir 1 to 2 teaspoons of pumpkin pie spice into the dry mix before you sprinkle it, which is the move I'd recommend over buying a second box.
- No spice cake mix: Any plain yellow, buttery, or white cake mix works. Avoid anything with a very heavy fruit or chocolate load, because the flavor competes with the pumpkin.
- Reducing the sugar, honestly. Swap the sweetened condensed milk for unsweetened condensed milk or evaporated milk and sweeten with 1/2 cup honey or maple syrup plus 2 tablespoons of brown sugar. That removes roughly two-thirds of the added sugar and it still sets, because the sugar wasn't providing structure here, the condensed milk's milk solids were. Do not swap in a sugar-free granular sweetener without expecting a texture change; granulated sugar blends carry bulking agents that this recipe doesn't need, so the top may spread.
- No butter: Use melted coconut oil, which behaves almost identically in a dump cake topping and browns a little differently. Coconut oil is nearly solid at room temperature, so melt it first and expect a coconut note in the crumb.
- Browned butter for plain melted butter, which is an upgrade rather than a substitute but fits here.
- Gluten-free: Use a certified gluten-free cake mix. This works better than most cake recipes because the dump cake has no gluten structure to lean on, so the crumb comes entirely from the butter and the mix. Check your condensed milk's label too. I'd only call it gluten-free if every component checks out.
- Lower carb: There is no honest way to make this one low-carb, and I'd rather say so than send you hunting through six ingredients for something that doesn't work. Pumpkin dump cake is built on condensed milk and cake mix. If you want a low-carb pumpkin dessert, that's a different recipe and I'd be happy to write you one.
- Baking in two 8x8 dishes for a bigger crowd or easier transport. Bake 30 to 35 minutes and check ten minutes earlier, because the layer is half as deep and the timing changes completely.
Pumpkin Dump Cake Variations to Try
- Butterscotch dump cake. Yellow cake mix, 1 teaspoon vanilla stirred into the pumpkin base, and a drizzle of caramel sauce on top. This is the one that makes people think you did something complicated.
- Chocolate chip version. Sprinkle 3/4 cup chocolate chips over the dry mix before the butter. The chips melt into the crumb and turn it into something closer to a blondie.
- Cranberry-pecan dump cake. Fold 1 cup of chopped sugared pecans into the base and scatter a few whole cranberries over the top before the butter. This is the one for a Thanksgiving table, and the tart berries cut the sweetness in a way that genuinely helps.
- Pecan and brown sugar streusbel. Instead of just cake mix, use 1 1/2 cups cake mix plus 1/3 cup packed brown sugar and 1/2 cup chopped pecans. The butter saturates all of it and you get a much crunchier top. Served with salted caramel, this is a restaurant dessert.
- Maple oatmeal version. Use spice cake mix, add 1 teaspoon ground cinnamon and 1/2 teaspoon ground ginger to the base, and drizzle maple syrup instead of caramel. This is the version that belongs in November with a heavy sweater on.
- Pumpkin spice latte cake. Add 2 tablespoons of a strong espresso shot, cooled, to the pumpkin base. It doesn't taste like coffee, it just makes the spice read louder and the whole thing taste more like a bakery.
- Fresh ginger and orange. Stir 1 tablespoon of finely grated fresh ginger and 1 teaspoon orange zest into the pumpkin base. It makes the pumpkin taste more like actual pumpkin rather than like a spice blend, which is a genuinely useful trick.
- Individual jars or ramekins. Same ratios, poured into 8-ounce ramekins, baked 30 to 35 minutes. Portion control, no cutting, and you get ten individual desserts for a dinner party.
- Gift version. Pour it into a clean jar with a layer of the dry mix on top and a written note for the condensed milk and butter. A cheap holiday gift that looks deliberate and takes four minutes to assemble.
Make It Healthier (Small Tweaks, Honest Limits)
I want to be straight about this one more than the others, because pumpkin desserts have a specific marketing problem. This is a 4-ingredient dessert in which one can of sweetened condensed milk supplies most of the sugar. It is not a healthy dessert, and calling it one because it contains vegetables would be exactly the kind of claim that gets a food post flagged and pulled from ad networks. Roughly half the calories here come from added sugar. Here is the actual picture, and then some real options.- The condensed milk is the whole story. Swap it for unsweetened condensed milk and sweeten with 1/2 cup honey or maple syrup. That removes about two-thirds of the added sugar and doesn't affect the set, because the structure comes from the milk solids, not the sugar. It's still a dessert, it's just a dessert with a lot less sugar in it.
- Portion it differently. Ten servings assumes a small square. Serve this after a heavy Thanksgiving meal in a 1/2-inch sliver with coffee and skip the ice cream, and the portion does more work than any ingredient swap. Cut thinner squares, not bigger ones.
- Let the toppings do the work. Plain Greek yogurt whipped with a little honey and cinnamon does the job of whipped cream with a fraction of the added sugar, and vanilla ice cream adds volume and perceived richness to a smaller square.
- Use dark spices and real flavor. More cinnamon, ginger, and nutmeg means a smaller square tastes complete. Blended spice only tastes like sugar until it gets louder.
- Pair it with something that has fiber and acid. Fresh apple slices, spiced pears, or a scoop of unsweetened cranberry relish on the side slows the whole thing down and genuinely balances the richness. This is the highest-impact change available and it costs about a dollar.
- Reduce the butter slightly. Using 3/4 cup of butter instead of a full cup gives a slightly less rich crumb that still bakes. You will not notice on day three, which is when this gets eaten anyway.
- Do not buy a "healthy" version of this. There isn't one at the store that tastes like anything, and if you make it yourself, make it the recipe you wanted.
Meal Prep and Make-Ahead Tips
- Make it two days ahead. Bake, cool completely on a rack, cover loosely, and refrigerate. Warm it at 350°F for 15 minutes before serving. Day two is measurably better, which almost never happens with a bake.
- Freeze it unbaked for the big day. Cover the assembled dish tightly with plastic wrap and foil and freeze up to 3 months. Thaw it in the refrigerator overnight, unwrap, and bake as directed, adding 10 to 15 minutes because it's starting cold. This is the reason Thanksgiving morning doesn't have to involve an oven.
- Or bake it and freeze it baked. Cool completely, wrap the whole dish in plastic and a layer of foil, and freeze flat. Thaw in the refrigerator 3 to 4 hours, then refresh at 350°F for 10 minutes to bring the crumb back. The crumb softens in the freezer, so the refresh isn't optional.
- Cut it the night before. Slice the cooled cake into ten squares and refrigerate them in a single layer. Serving a cold square that gets 15 minutes in the oven is faster than cutting a whole dish while guests are watching.
- Do the topping station ahead. Melt and cool the butter, portion the condensed milk, and set out the can opener before you start. This recipe is eight minutes of work and none of it is hard, so the whole thing should take less than fifteen.
- Make two 8x8 dishes for a big table. They bake in 30 to 35 minutes, travel better than one big dish, and let you put a second one in the oven while the first is resting.
- Whip the cream the day before. Store it in a sealed container in the refrigerator, and give it a quick re-whip with a hand mixer for fifteen seconds before serving. Nobody knows.
- Keep the whole thing in the dish. This is a one-dish dessert. Transporting it means foil, a board, and a car seat, which is a lot easier than transporting an assembled cake.
Storage: How Long Does Pumpkin Dump Cake Last?
Covered and refrigerated, pumpkin dump cake keeps for 4 days, and the texture is stable the whole time because the butter in the topping seals the pumpkin base underneath. It also improves on day two, so storing it is genuinely part of the method rather than just leftover management. Cool it completely before covering it, because a lid on a warm dish traps condensation and softens the crumb into something with a texture problem. Loosely tent it with foil rather than sealing plastic wrap directly against the topping, and store the dish on a flat surface in the back of the fridge, not on the door, where the temperature swings. If you want to keep the crumb genuinely crisp, store the topping separately, which is not a realistic suggestion for a dump cake, so instead just accept that the crumb softens overnight and refresh it briefly in the oven before serving. Because it contains condensed milk and butter, treat it as a perishable baked good: no more than two hours at room temperature, and one hour if the room is warm or you're setting it out at a party.Can You Freeze Pumpkin Dump Cake?
Yes, and this is a genuinely good candidate for it, because the recipe has no eggs, no yeast, and no rising step. A condensed milk and pumpkin base freezes without drama. You have two options and they serve different purposes. Freezing unbaked is the better one for planning ahead: assemble everything, cover the dish tightly with plastic wrap and a layer of foil, and freeze for up to 3 months. Thaw in the refrigerator overnight, unwrap, and bake as written with 10 to 15 extra minutes. The result is the freshest version you can get, and it's the reason this dessert can be made six weeks before Thanksgiving. Freezing baked is more convenient if you want to serve slices. Cool it completely, wrap the whole dish in plastic and foil or portion into individual squares and wrap each one, and freeze flat for up to 3 months. Thaw in the refrigerator for 3 to 4 hours, or overnight for a whole dish. The crumb will be softer than fresh, so warm it at 350°F for 10 minutes to bring it back before serving. Don't thaw on the counter; the condensation turns the topping to paste. Individual squares freeze flat and well if you need portion control, and they reheat in four minutes. Do not refreeze anything you've thawed.Reheating Pumpkin Dump Cake
Good news here: unlike a lot of baked goods, this one is genuinely fine at room temperature, because the base is already a cooked custard-like mixture and the topping is essentially a shortbread crumb. A square that's been sitting at room temperature for an hour is perfectly good. The crumb just softens slightly. For the texture you actually baked it for, warm it in a 350°F oven. A whole dish or a plate of squares takes 15 to 20 minutes, and this is the method I'd use before a dinner party because it returns the crumb to something close to day-one texture. Put it in cold, and don't cover it, so the top can dry out and re-crisp. A single square takes 5 to 7 minutes. The microwave works, and I'll be honest about the trade-off. Thirty to forty-five seconds at 70% power with a damp paper towel loosely over the top gets it hot quickly, and the towel keeps the crumb from going rubbery. But the topping comes out soft rather than crisp, and the pumpkin base heats unevenly, so you'll want to let it stand two minutes before eating. For a leftover lunch, the microwave is fine. For serving guests, use the oven. Whatever method you use, add whipped cream, ice cream, caramel, or toasted pecans after reheating, never before, so they melt into the warm square instead of sliding off it.What to Serve With This Pumpkin Dump Cake
The dessert itself is very sweet, so almost everything you put next to it should be either hot, cold, tart, or bitter. Contrast is the whole trick. All of these are good on the counter while the cake rests.- Whipped cream, piped or dolloped on each square, which is the classic pairing and adds volume without adding much sweetness.
- A scoop of vanilla ice cream, served on the warm square so it melts slightly into the top.
- Hot coffee or a cortado, because the bitterness of good coffee is the single best contrast to this much sugar. This is the pairing that makes the whole dessert feel balanced.
- Chai latte or spiced tea, which brings warmth and spice that harmonizes with the cake mix rather than competing with it.
- Caramel sauce, for a butterscotch direction. Salted caramel is better and the salt is what keeps it from being cloying.
- Chopped toasted pecans, for crunch, which this dessert genuinely lacks on its own.
- Fresh apple slices or thinly sliced pear, which is a nice, tart, fibrous contrast to the richness.
- Cranberry relish or sugared cranberries, if this is on a Thanksgiving table. The tartness does more for this dessert than any other pairing, and it's a tradition for a reason.
- Cold milk, for the kids at the table, and for anyone who thinks a glass of milk makes dessert taste more like dessert.
- Cold brew or an iced Americano, in the months when the pumpkin starts showing up and nobody wants a hot drink.
Beverage Pairings for Pumpkin Dump Cake
- Hot black coffee, brewed fresh. The single most reliable pairing for a dessert this sweet, and the most useful thing you can put on the table.
- A cortado, espresso with a splash of steamed milk, if you want a coffee drink that isn't too sweet next to something already this sweet.
- Chai latte, spiced tea with real milk, which echoes the cardamom and clove in the cake mix without turning into a syrup.
- Pumpkin spice latte, for the obvious reason. Order it less sweet than you normally would, because the cake is doing that job already.
- Cold brew or iced coffee, if you're serving this in October and the afternoon is still warm.
- Apple cider or hot cider, for a genuinely seasonal, non-alcoholic option that tastes like October.
- Tawny port or a late-harvest wine, if you're serving adults. A small pour of a sweet wine against a very sweet dessert is more about the pairing ritual than the flavor, and it works fine.
- Irish coffee, for a holiday evening, and it does exactly what you'd hope.
- Cold milk, unapologetically. It is the correct drink for this dessert and every childhood memory you have about it.
FAQ: Pumpkin Dump Cake Questions, Answered
Do I have to stir the cake mix into the pumpkin puree?
No, and you definitely should not. The layers are the entire technique: a wet pumpkin and condensed milk base, a dry cake mix layer, and melted butter to saturate that layer into a crumb. Stirring them together gives you a uniform batter, which is fine but bakes slower, comes out cakier, and no longer has the two distinct textures that make this worth making. The butter drizzled on top is what cooks and hydrates the dry layer from above while the hot base cooks it from below.Why is the middle of my pumpkin dump cake still runny?
Almost always underbaking, or cutting it too soon. The base needs the full fifty to sixty minutes to set, and it looks finished at the edges well before the center is done, which is exactly the trap. Check at fifty minutes by nudging the dish gently in the oven; you want a very slight jiggle in the center and no jiggle at all near the edges. Also let it sit the full thirty minutes before cutting, because the layer continues to firm as it cools, and a square cut straight out of the oven will slump even if the center technically set.How do I fix dry or floury patches on the topping?
Those are spots where the melted butter didn't reach the dry mix, and once baked they cannot be fixed. Prevention is the whole answer: melt the butter and let it cool three to five minutes, then drizzle in rows across the entire surface, working methodically from one corner to the other. Look at the dish from a low angle before it goes in, because overhead light hides dry patches in the texture of the crumb. If you find any, add more butter. A second small drizzle over any remaining gaps costs you nothing and is the difference between a streusbel top and a floury one.Can I make pumpkin dump cake ahead of time?
Yes, and this is one of the best make-ahead Thanksgiving desserts there is. Bake it up to two days early, cool it completely, cover loosely with foil, and refrigerate. Warm it at 350°F for 15 minutes before serving, and day two is measurably better than day one. You can go further and freeze the assembled dish unbaked for up to three months, thaw it in the refrigerator overnight, and bake with 10 to 15 extra minutes. For serving, cutting the squares the night before and warming individual pieces is faster than slicing a whole dish in front of guests.Can I freeze pumpkin dump cake, and how long does it last?
It freezes well for up to 3 months, either unbaked or baked. Unbaked is fresher: cover the assembled dish tightly, freeze, thaw in the refrigerator overnight, and add 10 to 15 minutes to the bake. Baked is more convenient: cool completely, wrap the whole dish or individual squares in plastic and foil, freeze flat, then thaw in the refrigerator for 3 to 4 hours and refresh at 350°F for 10 minutes, because the crumb softens in the freezer. Refrigerated and covered, the cake keeps for 4 days, and it holds its texture because the buttery topping seals the pumpkin base underneath.Can I use yellow cake mix instead of spice cake mix?
Yes, and it's a very good swap, though it shifts the dessert toward butterscotch rather than pumpkin spice. To bring the flavor back, stir 1 to 2 teaspoons of pumpkin pie spice into the dry mix before you sprinkle it over the base, which is cheaper than buying a second box. Any plain, buttery yellow or white cake mix works. Avoid mixes with a heavy chocolate or fruit load, because those flavors fight the pumpkin rather than supporting it. If you want the pumpkin to taste more like actual pumpkin, add a tablespoon of fresh grated ginger and a teaspoon of orange zest to the base, which is more effective than more spice.Can I reduce the sugar in a pumpkin dump cake?
Yes, more effectively than you'd expect, because the condensed milk provides the sweetness and the condensed milk's milk solids provide the structure. Swap the sweetened condensed milk for unsweetened condensed milk or evaporated milk and sweeten with 1/2 cup honey or maple syrup plus 2 tablespoons of brown sugar. That cuts roughly two-thirds of the added sugar and it still sets correctly. A sugar-free granular sweetener is a different story, because those blends contain bulking agents that can make the topping spread, so expect a texture change. Make the smaller portion too: thinner squares, a spoonful of whipped Greek yogurt, and fresh apple slices on the side do more than any single ingredient swap.Is pumpkin dump cake gluten-free?
Not as written, since standard cake mix is wheat flour. This is one recipe that converts to gluten-free more cleanly than most, though, because there's no gluten structure doing the work here and the crumb comes entirely from the butter and the mix. Use a certified gluten-free cake mix and check the labels on your condensed milk, since some brands use wheat-based thickeners. And be honest in how you describe it, because "pumpkin makes it healthy" is a claim that gets food posts flagged and pulled from ad networks. It is a dessert with real added sugar, and no vegetable in it changes that.Nutrition Information
These are labeled estimates for one of ten squares from a 9x13-inch glass dish, made with plain pumpkin puree, sweetened condensed milk, a standard spice cake mix, and one cup of melted butter, with no added sugar or salt of any kind. Actual values will vary with brand, particularly the cake mix and the condensed milk, and with the size of the squares. Note that the butter is fully absorbed by the topping and is not drained. Treat this as a guide, not a measurement.| Nutrient | Approx. per serving | Approx. per serving | Approx. per serving |
|---|---|---|---|
| Calories | Fat | Carbohydrates | |
| ~470 kcal | ~27 g | ~67 g | |
| Protein | Saturated Fat | Sodium | |
| ~4 g | ~13 g | ~185 mg |
Final Thoughts
I think the reason this recipe is on every food blog in September is that fall dessert demands something that looks like an effort, and this is the rare thing that isn't. Four ingredients, one dish, no crust, no frosting, no mixer, and about eight minutes of actual work. That's not a compromise, and I've stopped pretending it is. Most years this is the dessert I make twice, because once wasn't enough and I learned that the second one in a different pan travels better. It is also the best argument I know for paying attention to what a recipe is actually doing. Nothing here is a technique so much as an order of operations: base, then dry layer, then fat, then a long patient bake, then a rest you should not skip. Get those five things in the right sequence and the whole thing works with almost no effort at all. Get the butter coverage wrong and you get flour. Cut it hot and you get soup. That's the entire margin for error, and it's a generous one. So before the season starts: are you a person who takes the corner squares and passes the middle ones to somebody else, or do you stand near the dish pretending you're just getting a plate while you're actually negotiating for the biggest one? Because I have a whole plan for the leftovers, and I'd like to know who's going to be competing with me for them.4 Ingredients, One Dish
Oven Baked 4-Ingredient Pumpkin Dump Cake
Canned pumpkin, sweetened condensed milk, spice cake mix, and butter in one glass dish. A soft, fudgy pumpkin base under a buttery crumb topping, with no crust, no frosting, and no mixer. About 78 cents a slice.
Ingredients
Do not stir the layers together. The pumpkin base, the dry mix, and the butter topping are three separate layers, and that is the whole technique.
Instructions
- Preheat and grease. Heat the oven to 350°F and lightly grease a 9x13-inch glass casserole dish.
- Melt the butter. Melt one cup of butter and let it cool 3 to 5 minutes until pourable but no longer steaming hot.
- Whisk the base smooth. Pour both cans into the dish and whisk until completely combined with no streaks. Scrape the corners, since the last of the condensed milk settles to the bottom and bakes into a sticky spot.
- Spread the base. Spread the pumpkin mixture into an even one-inch layer all the way to the corners and level it with the back of a spoon.
- Sprinkle the dry mix. Sprinkle the cake mix evenly over the entire surface, shaking the box as you go, edge to edge. No exposed pumpkin.
- Drizzle until no dry powder shows. Drizzle the melted butter in rows across the whole top until the mix is dark and glossy with no white patches. Check from a low angle and fill any gaps. This step is what makes the topping a crumb instead of flour.
- Bake 50 to 60 minutes. Bake until the top is golden and the center barely jiggles when you nudge the dish. Start checking at 50 minutes. Loosely tent with foil if the top browns before the center sets.
- Rest 30 minutes. Let the dish sit a full 30 minutes so the pumpkin layer firms up and the squares hold together. Serving it hot will give you a puddle under a set top.
- Cut and serve. Cut into ten squares with a knife dipped in hot water and wiped between cuts. Serve just warm with your toppings added at the table.
Cook's Notes
Costs are estimates based on store-brand pumpkin puree, a can of sweetened condensed milk, a box of spice cake mix, and a cup of butter. Brand and location will move the total. This is the cheapest recipe on the blog.
- The single most important tip for a good pumpkin dump cake: no dry powder left exposed. Melted butter saturating the dry cake mix is the entire topping, not a drizzle over a finished thing. Sweep it row by row and look at the dish from a low angle before baking, because overhead light hides the dry spots.
- Make this pumpkin dump cake up to six weeks ahead. Cover the assembled dish tightly, freeze unbaked for up to 3 months, then thaw in the refrigerator overnight and add 10 to 15 minutes to the bake. It is the reason this is a Thanksgiving dessert and not a Thanksgiving project.
- Reduce the sugar honestly. Swap the sweetened condensed milk for unsweetened condensed milk or evaporated milk and sweeten with 1/2 cup honey or maple syrup. That cuts roughly two-thirds of the added sugar and the base still sets, because the structure comes from the milk solids. Do not use a sugar-free granular blend without expecting the topping to spread.
Nutrition (Labeled Estimates)
Approximate values for 1 of 10 squares from a 9x13-inch dish, made with plain pumpkin puree, sweetened condensed milk, a standard spice cake mix, and one cup of melted butter, with no added sugar or salt. Estimates only; actual values vary by brand and square size. All of the butter is absorbed by the topping and is not drained.
Sugar: approximately 50 g per serving, essentially all added. We are flagging this on purpose. The can of sweetened condensed milk supplies the majority of it, which is why the reduced-sugar swap and the portion guidance in the article matter. Contains milk, wheat, and egg. Not gluten-free, not keto, not low-carb, and not a low-sugar dessert.