
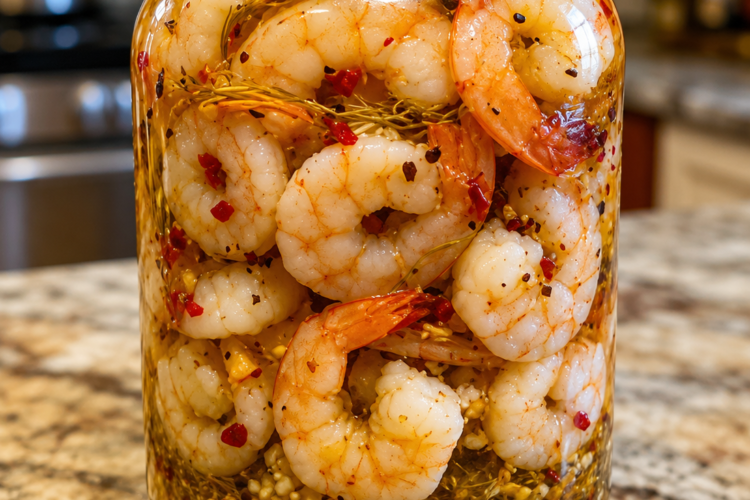
Pickled Shrimp
My grandmother kept a big glass jar of these in the back of her fridge from Memorial Day straight through Labor Day. She never made a fuss about them. She just set the jar on the kitchen table when people started arriving, stuck a few toothpicks in a little dish beside it, and walked away. Within twenty minutes the jar was half empty and someone was already asking if there was another batch cooling somewhere. I used to think she had a secret supplier. Last summer I finally asked for the recipe, and the truth turned out to be simpler and better than I expected.
There is something about cold, tangy pickled shrimp that lands differently on a warm afternoon. The shrimp stay firm and sweet, the red onion softens just enough to lose its sharp bite, and the garlic and spices work their way into every crease. A quiet heat from the red pepper flakes shows up on the second or third bite and keeps you reaching for more. I made a single batch for a weekend cookout last month. By the time the burgers came off the grill the jar was already down to the last few shrimp, and one of the husbands was standing at the counter with a fork, looking slightly guilty and not stopping.
The best part is how little effort the whole thing demands. You cook the shrimp for a couple of minutes, simmer a quick pickling liquid, layer everything in a jar, and walk away. Overnight in the fridge does the rest of the work. No last-minute scrambling, no hot stove when guests are arriving, just a cold, bright, addictive appetizer that somehow tastes like summer itself.
Why You'll Love This Recipe
These pickled shrimp solve the eternal summer hosting problem: you want something impressive that doesn’t keep you stuck in the kitchen. The entire active time is under twenty minutes. Everything else happens while you sleep or while you finish the rest of the menu. They travel perfectly in their jar, they look beautiful on a table with nothing more than a handful of crackers or a loaf of crusty bread, and they improve rather than fade as the hours pass.
The flavor is bright and complex without being complicated. Tang from the vinegar, gentle sweetness from the sugar, warmth from the spices, and that clean ocean sweetness of the shrimp itself. The red onion and lemon slices become part of the experience instead of garnish. People who claim they don’t like “pickled things” usually go back for seconds once they try these. And because the shrimp are already cooked and fully seasoned, there is zero stress about food safety or last-minute cooking temperatures. Just open the jar and let people dig in.
Why This Recipe Works
The method is classic Southern pickling logic applied to shrimp. Quick-cooking the shrimp in salted water and shocking them in cold water locks in a firm, snappy texture instead of the rubbery result you get from overcooking. The pickling liquid is a balanced sweet-sour brine enriched with olive oil so it coats rather than just soaks. Whole spices—peppercorns, mustard seeds, bay leaves—infuse slowly without turning bitter or cloudy. Thinly sliced garlic and red onion soften in the warm liquid and become part of the snack rather than raw obstacles.
Layering the ingredients in the jar matters. The shrimp, onion, garlic, and lemon are distributed so every spoonful carries a little of everything. Pouring the liquid while it is still warm helps the flavors penetrate faster, yet the final chill firms everything up and mellows the sharpness. Eight hours is the minimum for good flavor; overnight is when the magic happens. The olive oil rises to the top and creates a gentle seal that keeps the shrimp submerged and protected. The result is a jar of shrimp that taste like they spent days marinating even though the hands-on work was almost nothing.
Ingredient Breakdown
Large shrimp, peeled and deveined are the star. Look for fresh or properly thawed frozen shrimp that smell clean and ocean-like. Size 21/25 or 16/20 works best—big enough to feel substantial on a toothpick, small enough to eat in one or two bites. Leave the tails on if you want a prettier presentation; remove them if you prefer easier eating. One pound is enough for a generous appetizer for six to eight people, or a smaller crowd that will go back for more.
White vinegar provides the clean, sharp acidity that defines the pickle. Distilled white vinegar keeps the liquid clear and the flavor bright. Apple cider vinegar can be used but will darken the liquid and add a fruitier note.
Olive oil softens the acidity and helps the spices cling to the shrimp. Extra-virgin is fine; a milder olive oil also works if you prefer less peppery flavor.
Red onion, thinly sliced adds color, mild sweetness, and a pleasant crunch that softens overnight. A medium onion is perfect for one pound of shrimp. Slice it as thin as you reasonably can so it becomes tender rather than sharp.
Garlic, thinly sliced infuses the whole jar with savory depth. Three cloves is the sweet spot—enough to notice, not enough to overwhelm. Slicing rather than mincing keeps the garlic from becoming bitter or disappearing.
Sugar balances the vinegar so the finished pickle isn’t harsh. Two tablespoons is enough to round the edges without making the shrimp taste sweet.
Whole black peppercorns and mustard seeds deliver slow, aromatic heat and a gentle pop of flavor. Whole spices stay pleasant in the jar and look attractive when you serve.
Red pepper flakes bring the quiet kick. One teaspoon is noticeable but not aggressive. Add more if your crowd likes heat.
Bay leaves contribute a subtle herbal background that keeps the brine from tasting one-dimensional.
Salt seasons both the cooking water and the brine. Use kosher or sea salt for the cleanest flavor.
Fresh lemon slices brighten everything and add a fresh citrus note that plays beautifully with the shrimp. One lemon, sliced thin, is plenty.
Kitchen Equipment
You need a medium pot for boiling the shrimp, a colander, a medium saucepan for the brine, a sharp knife and cutting board, and a large glass jar or non-reactive container with a tight-fitting lid. A wide-mouth quart jar or a 6-cup glass storage container works perfectly. Avoid metal containers; the acid can react. A pair of tongs or a slotted spoon makes layering easier. That is the entire list.
Step-by-Step Instructions
Fill a medium pot with water, salt it generously (it should taste like the sea), and bring it to a rolling boil. Add the peeled and deveined shrimp and stir once. Cook only until the shrimp turn pink and just begin to curl, usually 2 to 3 minutes. Do not walk away. The moment they look opaque and firm, drain them in a colander and rinse under cold running water for 30 seconds to stop the cooking. Spread them on a plate or tray so they cool quickly. Overcooked shrimp will turn rubbery in the brine; this quick shock keeps them tender.
While the shrimp cool, make the pickling liquid. In a medium saucepan combine 1 cup white vinegar, ½ cup olive oil, 2 tablespoons sugar, 1 tablespoon whole black peppercorns, 1 tablespoon mustard seeds, 1 teaspoon red pepper flakes, 2 bay leaves, and 1 teaspoon salt. Set the pan over medium heat and stir until the sugar and salt dissolve completely. Bring the mixture just to a simmer—small bubbles around the edges—then turn off the heat. The liquid should smell bright, spicy, and inviting.
Choose a clean glass jar or container large enough to hold everything with a little headspace. Begin layering: a few shrimp, a few slices of red onion, a couple of garlic slices, a lemon slice. Repeat until all the shrimp, onion, garlic, and lemon are in the jar, distributing the ingredients evenly so no single element dominates any section.
Pour the warm pickling liquid slowly over the layered shrimp. The liquid should cover everything completely. If a few shrimp float, press them down gently with a spoon. The olive oil will rise to the top; that is normal and desirable. Let the jar sit at room temperature until the liquid cools to the touch, about 30 to 45 minutes. Then seal the jar tightly and transfer it to the refrigerator.
Leave the shrimp alone for at least 8 hours. Overnight is better. The longer they sit, the more the flavors marry and the onion softens into something almost sweet. When you are ready to serve, give the jar a gentle shake or stir to redistribute the oil and spices, then set it out with toothpicks, crackers, or sliced baguette. The shrimp are ready to eat cold, straight from the jar.
Expert Tips
Salt the shrimp cooking water well. Under-seasoned shrimp taste flat no matter how good the brine is.
Err on the side of undercooking the shrimp by 30 seconds. They continue to firm up slightly in the warm liquid and then in the fridge.
Slice the onion and garlic as thinly as you can manage. Thick pieces stay sharp and never fully soften.
Use a glass container. Plastic can absorb odors and flavors; metal can react with the vinegar.
If the shrimp are not fully submerged after pouring, make a little extra brine (equal parts vinegar and water with a pinch of salt and sugar) and top them off. Exposure to air can dull the flavor and texture.
For the cleanest presentation, remove the bay leaves before serving, or warn guests they are not meant to be eaten.
These taste even better on day two and day three. Plan accordingly.
Common Mistakes to Avoid
Overcooking the shrimp is the fastest way to ruin the texture. Two to three minutes is plenty; pull them the second they turn pink and opaque.
Pouring boiling-hot brine directly over the shrimp can make them tough. Let the liquid come just to a simmer, then turn off the heat so it is hot but not aggressively boiling.
Skipping the cooling step before refrigerating traps excess heat and can make the shrimp continue cooking. Always cool to room temperature first.
Using a container that is too small forces the shrimp into a packed mass and prevents even flavor distribution. Give them room to nestle among the onions and lemon.
Forgetting to submerge everything leaves some shrimp exposed to air. They will dry out and lose their bright flavor.
Cutting the chilling time short leaves the onion sharp and the spices under-developed. Eight hours is the absolute minimum.
Ingredient Substitutions
If large shrimp are unavailable, medium shrimp work; just reduce the boiling time by 30 to 60 seconds. Extra-large shrimp are fine too—cook them a minute longer and slice them in half after pickling if you want smaller pieces.
Apple cider vinegar can replace white vinegar for a slightly fruitier, golden brine. The flavor will be different but still excellent.
Neutral oil such as avocado or grapeseed can stand in for olive oil if you prefer a cleaner taste.
Yellow onion can replace red onion, though you lose the pretty color. Shallots are a more delicate and elegant option.
If you dislike mustard seeds, simply leave them out; the brine still works. Coriander seeds make a nice alternative for a different aromatic note.
For less heat, reduce the red pepper flakes to ½ teaspoon or omit them. For more heat, add a sliced fresh jalapeño or a pinch of cayenne.
Fresh dill or thyme sprigs can be layered in with the lemon for an herbal variation.
Recipe Variations
Add a handful of pitted green olives or pepperoncini to the jar for a briny, Mediterranean twist.
Layer in thin slices of fennel for a subtle anise note that pairs beautifully with shrimp.
Replace half the white vinegar with fresh lemon juice for an even brighter, more citrus-forward pickle.
For a Southern classic feel, add a few dashes of hot sauce to the brine and serve the shrimp over creamy grits or with saltine crackers.
Make a spicy version by doubling the red pepper flakes and adding a teaspoon of Old Bay seasoning to the cooking water.
For a party-friendly presentation, spear each shrimp with a piece of onion and a lemon slice on a decorative toothpick and arrange them on a platter. Spoon a little of the brine over the top just before serving.
Make It Healthier
Shrimp are naturally lean and high in protein, so this recipe already starts from a good place. To lighten it further, reduce the olive oil to ⅓ cup; the brine will still coat the shrimp adequately. Cut the sugar to 1 tablespoon if you are watching added sugars—the vinegar and spices carry plenty of flavor. Serve the pickled shrimp over a bed of crisp lettuce or cucumber slices instead of crackers to keep the plate lighter. The dish is naturally gluten-free and low-carb, making it an easy fit for many eating styles. Because it is served cold and requires no heavy sauces or frying, it feels refreshing rather than heavy even in the middle of summer.
Meal Prep Tips
This recipe was made for advance preparation. Cook and pickle the shrimp one or two days before you need them. The flavor peaks between 24 and 72 hours. Keep the jar sealed in the coldest part of the refrigerator until serving time. If you are taking them to a picnic or potluck, pack the jar in a cooler with ice packs and keep it cold until you set it out. A quart jar fits neatly in most coolers and travels without spills if the lid is tight. You can also portion the shrimp into smaller jars for individual gifts or for easy grab-and-go appetizers during a longer gathering.
Storage
Store the pickled shrimp in their brine in a tightly sealed glass container in the refrigerator. They keep well for up to one week. Always use a clean utensil when removing shrimp so you do not introduce bacteria into the jar. The onions and lemon will continue to soften over time; that is normal and actually pleasant. If the oil solidifies slightly in a very cold refrigerator, simply let the jar sit at room temperature for ten minutes and give it a gentle stir before serving.
Freezing
Freezing is not recommended. The texture of the shrimp becomes soft and watery once thawed, and the vegetables lose their pleasant bite. This is a refrigerator recipe meant to be enjoyed within a week of making it.
Reheating
These shrimp are intended to be eaten cold. Reheating would toughen the shrimp and dull the bright pickling flavors. If the jar has been sitting out and the shrimp have lost their chill, simply return them to the refrigerator for twenty minutes before serving again.
What to Serve With It
Classic saltine crackers or buttery round crackers are the traditional partners and still perfect. Sliced baguette or crusty country bread lets people make little open-faced bites. For a more substantial spread, set the jar beside a cheese board with sharp cheddar, creamy goat cheese, and olives. Cucumber rounds or endive leaves make excellent low-carb vehicles. At a cookout the pickled shrimp shine next to grilled corn, simple green salad, and cold beer. They also work as a bright starter before a seafood boil or a plate of fried chicken. Leftover shrimp (if you are lucky enough to have any) are excellent chopped into a quick salad with avocado and more of the pickled onion.
Beverage Pairings
Cold beer is the natural match—something crisp and light like a pilsner or a Mexican lager cuts the acidity and heat perfectly. A dry white wine such as Sauvignon Blanc or Albariño echoes the bright, briny notes. For a non-alcoholic option, sparkling water with a squeeze of lemon or a tall glass of iced tea with fresh mint keeps the palate refreshed. On especially hot days, a frozen margarita or a simple gin and tonic stands up well to the spice and vinegar. The goal is something cold and clean that lets the shrimp stay the star.
Frequently Asked Questions
Can I use frozen shrimp? Yes. Thaw them completely in the refrigerator overnight, pat them dry, and proceed. Avoid shrimp that have been thawed and refrozen.
Do I have to peel the shrimp? Peeling makes them easier to eat as finger food. You can leave the tails on for appearance if you prefer.
How long do they really need to pickle? Eight hours is the minimum for good flavor. Overnight (12–16 hours) is ideal. After three days the texture is still excellent; after a week they are still safe but the shrimp begin to soften more than most people like.
Can I make them spicier? Absolutely. Increase the red pepper flakes, add a sliced fresh chili, or include a few dashes of your favorite hot sauce in the brine.
Is the olive oil necessary? It helps the spices cling and softens the acidity. You can reduce it, but do not omit it entirely or the shrimp will taste sharper and less rounded.
What if I don’t have mustard seeds? Leave them out. The recipe still works. Coriander seeds or a pinch of celery seed can fill the aromatic gap.
Can I use cooked cocktail shrimp from the store? You can, but the texture and flavor will not be as good. Freshly cooked shrimp absorb the brine better and stay firmer.
Are these gluten-free? Yes, as long as your spices and vinegar are pure and you serve them with gluten-free crackers or vegetables.
How many people does one pound serve? As an appetizer, one pound comfortably serves 6–8 people, or 4–6 very enthusiastic ones.
Can I double the recipe? Yes. Use a larger pot for the shrimp and a bigger jar or two jars for the finished pickle. The brine recipe doubles cleanly.
Nutrition Information
Approximate nutrition per serving (based on 8 appetizer servings): Calories: 180 Total Fat: 11g Saturated Fat: 1.5g Cholesterol: 95mg Sodium: 480mg Total Carbohydrates: 6g Dietary Fiber: 0.5g Total Sugars: 4g Protein: 16g
Values are estimates and will vary based on exact shrimp size and how much brine is consumed with each serving. The dish is naturally high in protein and low in carbohydrates.
There is a special satisfaction in a recipe that asks almost nothing of you and still manages to become the thing people talk about on the way home. These pickled shrimp are that recipe. They carry the easy generosity of every summer table my grandmother ever set—bright, cold, a little addictive, and always gone before the main course arrived. Once you make them you will understand why she always started a second jar before the first one was empty. Keep a jar in the fridge this season. When friends drop by or the afternoon turns long and warm, you will be ready with something that tastes like the best kind of summer memory.
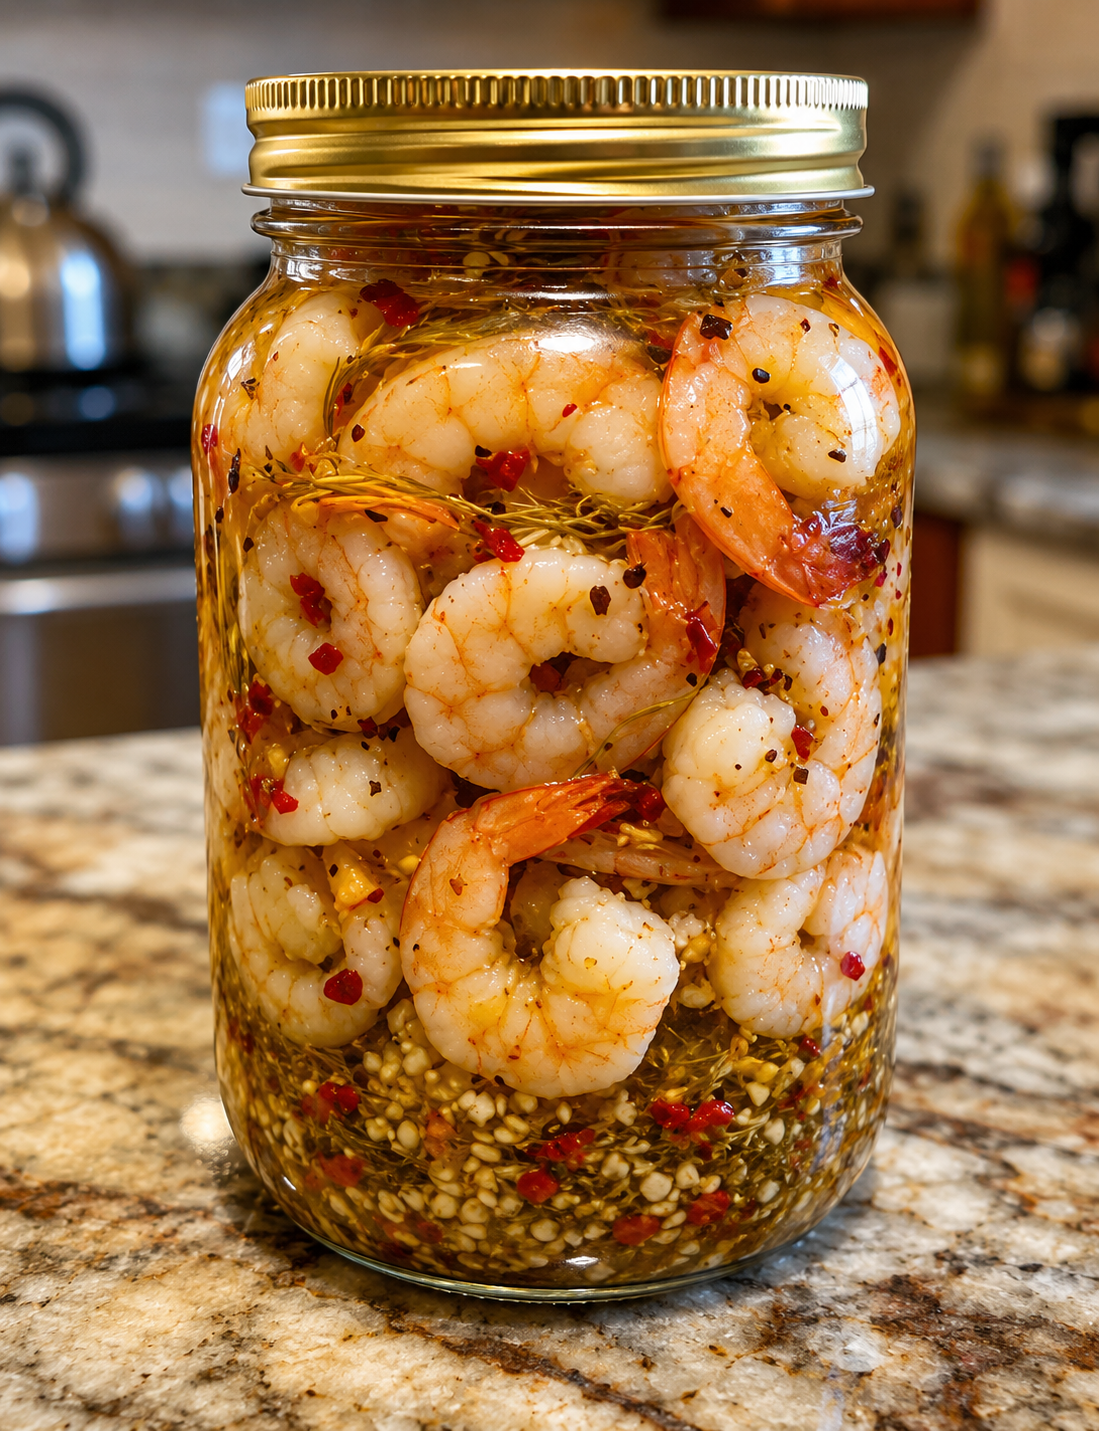
Cold pickled shrimp
Ingredients
Equipment
Method
- Bring a pot of salted water to a boil.
- Add the shrimp and cook for 2 to 3 minutes, just until pink and lightly curled.
- Drain the shrimp and rinse immediately under cold water.
- In a medium saucepan, combine the vinegar, olive oil, sugar, peppercorns, mustard seeds, red pepper flakes, bay leaves, and salt.
- Bring to a gentle simmer over medium heat, stirring until the sugar dissolves.
- Layer the cooked shrimp, sliced red onion, garlic, and lemon slices in a large glass jar or container.
- Pour the warm pickling liquid over the shrimp, making sure everything is covered.
- Press down gently so the shrimp stay submerged.
- Cool to room temperature, then cover tightly and refrigerate for at least 8 hours or overnight.
- Serve cold with crackers, crusty bread, or toothpicks.
Notes