
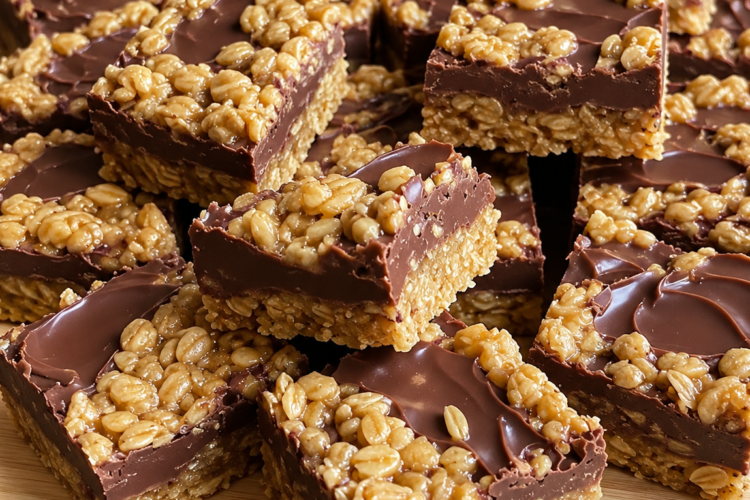
There are certain recipes that feel like a secret you are finally allowed to share. The kind that require no oven, almost no waiting, and somehow still deliver that deep, satisfying sweetness that makes everyone in the house suddenly appear in the kitchen. These no-bake chocolate oat bars are exactly that kind of recipe for me. I first tasted something like them at a friend’s house after school when I was twelve. Her mom pulled a pan from the refrigerator, cut thick squares that held together just enough to pick up, and handed them over with a smile. The top was crumbly and oat-y, the middle was pure chocolate-peanut butter fudge, and the bottom was the same buttery oat layer pressed firm. I ate two before I even sat down.
Years later I started making my own version on busy weeknights when the idea of turning on the oven felt like too much, or on hot summer afternoons when the last thing anyone wanted was more heat in the kitchen. The smell of butter melting with brown sugar and vanilla is enough to stop conversation. The way the chocolate and peanut butter melt into a glossy ribbon that spreads over the oat base is pure kitchen magic. And that final moment when you press the remaining oat mixture on top and slide the pan into the refrigerator feels like a promise of something good coming soon.
These bars are the opposite of fussy. They ask for six pantry ingredients, one saucepan, and a little patience while they chill. Yet the result tastes like you spent far more time than you actually did. The oats stay pleasantly chewy, the chocolate layer is rich and smooth, and the whole bar holds together just firmly enough to cut cleanly once it has set. I have brought them to potlucks, packed them in lunchboxes, served them after weeknight dinners, and watched them disappear every single time. Someone always asks for the recipe. Someone always goes back for a second piece.
This is the kind of treat that reminds you why simple food can still feel special. It is the bar you make when you want something homemade without the commitment of baking. It is the dessert that shows up when the day has been long and everyone needs a little sweetness. And once you taste that first bite—crumbly oat, fudgy chocolate, the quiet richness of peanut butter—you will understand why these bars have stayed in my rotation for years.
Why You’ll Love This Recipe
You will love these no-bake chocolate oat bars because they deliver maximum reward for almost no effort. There is no oven to preheat, no dough to roll, and no complicated timing. Everything happens on the stovetop in a few minutes, then the refrigerator does the rest. The combination of textures is deeply satisfying: a sturdy yet tender oat base, a thick middle layer of chocolate and peanut butter that sets into something almost fudge-like, and a crumbly oat topping that gives each bite a little contrast.
You will love how reliable the recipe is. The ingredients are ordinary pantry staples. The method is straightforward enough for beginners and flexible enough for experienced cooks who want to play with variations. The bars hold their shape once chilled, travel well, and keep for days in the refrigerator. They feel special enough for company yet easy enough for a Tuesday afternoon craving.
You will love the way they taste. The brown sugar and butter give the oat layers a warm, caramel-like depth. The vanilla rounds everything out. The chocolate and peanut butter melt into a smooth, rich filling that is neither too sweet nor too heavy. Every bite is balanced between chewy, creamy, and slightly crunchy.
Most of all, you will love that these bars make people happy. They are the kind of treat that disappears from the pan before you expect it to. They are the ones kids ask for again and the ones adults quietly wrap an extra piece of for later. In a world that often feels complicated, a simple no-bake bar that tastes this good is worth keeping close.
Why This Recipe Works
The structure of these bars depends on a few quiet scientific principles that happen to taste delicious. When butter melts with brown sugar, the sugar dissolves into the fat and creates a sticky, cohesive mixture once the oats are added. Quick-cooking oats absorb some of that buttery syrup and soften just enough to become tender while still holding their shape. Pressing half of the mixture firmly into the pan creates a base that sets as it cools and provides a sturdy foundation.
The chocolate and peanut butter layer works because both ingredients melt smoothly over low heat and then firm up again as they cool. Semisweet chocolate chips contain cocoa butter that solidifies at cool temperatures, giving the middle layer its fudgy set. Peanut butter contributes fat and protein that keep the chocolate from becoming brittle and add a savory richness that balances the sweetness. Spreading this mixture while it is still warm allows it to settle into an even layer before it begins to firm.
The remaining oat mixture, crumbled over the top and pressed gently, adheres just enough to stay in place without becoming dense. Chilling the pan for several hours allows the butter to resolidify and the chocolate to set completely, so the bars cut cleanly and hold together when lifted. Bringing them to room temperature for a few minutes before slicing softens the chocolate slightly and makes cleaner cuts.
None of these steps is complicated, yet each one contributes to the final texture. The result is a bar that feels substantial without being heavy, sweet without being cloying, and homemade without requiring advanced technique.
Ingredient Breakdown
Butter (1 cup) Butter is the foundation of the oat layers. It carries flavor, helps the brown sugar dissolve, and provides the fat that binds the oats together once cooled. Unsalted butter lets you control the salt level, though salted works if that is what you have. Real butter gives the best flavor and texture. From a nutrition standpoint it contributes fat-soluble vitamins. Melt it gently so it does not brown. Store butter in the refrigerator and use it cold for measuring accuracy.
Brown Sugar (½ cup, packed) Brown sugar adds moisture, a subtle molasses note, and the stickiness that helps the oat mixture hold together. Packing it firmly ensures accurate measurement. Light brown sugar keeps the flavor mild; dark brown sugar deepens the caramel notes. Brown sugar contains a small amount of minerals from the molasses. Store it in an airtight container so it stays soft.
Vanilla Extract (1 teaspoon) Vanilla softens the richer flavors of butter, sugar, and chocolate and makes the whole bar taste more complete. Pure vanilla extract is preferable to imitation. A little goes a long way. Store the bottle tightly closed away from heat and light.
Quick-Cooking Oats (3 cups) Quick oats are ideal because they absorb the butter-sugar mixture readily and soften to a pleasant chew without remaining hard. Old-fashioned rolled oats can be used but will give a heartier, chewier texture and may need an extra minute of cooking. Oats contribute soluble fiber, particularly beta-glucan, which supports heart health and steady energy when enjoyed as part of a balanced diet. Choose plain oats without added flavors. Store them in an airtight container in a cool cupboard.
Semisweet Chocolate Chips (1 cup) Semisweet chips melt smoothly and set into a firm yet tender layer. The moderate sweetness balances the peanut butter and brown sugar. Good-quality chips with a decent cocoa percentage produce a cleaner chocolate flavor. Chocolate provides antioxidants from cocoa solids. Store chips in a cool, dry place.
Peanut Butter (½ cup) Peanut butter adds richness, a savory counterpoint to the chocolate, and helps the middle layer stay creamy rather than brittle. Creamy peanut butter blends most smoothly; natural peanut butter works if stirred well first. Peanut butter contributes protein and healthy fats. Choose a brand you enjoy eating by the spoonful. Store natural versions in the refrigerator after opening if recommended.
Kitchen Equipment
You will need a 9×9-inch square pan, parchment paper or a light greasing of the pan, a large saucepan for the oat mixture, a smaller saucepan or heatproof bowl for melting the chocolate and peanut butter, a wooden spoon or spatula, a measuring cups and spoons set, and a knife for cutting the finished bars. A piece of parchment large enough to line the pan with overhang makes removal easier. That is the entire list. No mixer, no special pans, no oven required.
Step-by-Step Instructions
Lightly grease a 9×9-inch square pan or line it with parchment paper, leaving an overhang on two sides for easy lifting later. Set the pan aside.
Place the butter in a large saucepan over medium heat. Let it melt completely, swirling the pan occasionally. Once melted, stir in the packed brown sugar and vanilla extract. The mixture will look glossy and smell sweetly buttery. Add the quick-cooking oats and stir until every flake is coated. Reduce the heat to low and cook for two to three minutes, stirring often, until the mixture is well blended and the oats have softened slightly. The kitchen will fill with a warm, toasty aroma.
Remove the pan from the heat. Press half of the oat mixture firmly and evenly into the bottom of the prepared pan. Use the back of a spoon or a piece of parchment to compact it so it forms a solid base. Set the remaining oat mixture aside for the topping.
In a small heavy saucepan over low heat, combine the semisweet chocolate chips and peanut butter. Stir frequently as they melt together into a smooth, glossy mixture. This usually takes three to five minutes. Do not rush the heat or the chocolate can scorch. Once completely smooth, pour the chocolate-peanut butter mixture over the oat base in the pan. Spread it evenly with a knife or the back of a spoon so it reaches the corners.
Crumble the reserved oat mixture evenly over the chocolate layer. Press it down gently with your fingers or the back of a spoon so it adheres but still looks crumbly on top. Cover the pan and refrigerate for at least two to three hours, or overnight, until the chocolate layer is fully set and the bars feel firm.
When ready to serve, remove the pan from the refrigerator and let it sit at room temperature for ten to fifteen minutes. This softens the chocolate slightly and makes cleaner cuts. Lift the bars out using the parchment overhang if you used it, or run a knife around the edges. Cut into squares or rectangles with a sharp knife, wiping the blade between cuts for neat edges. Serve at cool room temperature.
Expert Tips
- Pack the brown sugar firmly into the measuring cup for accuracy. Loose sugar will make the oat mixture less cohesive.
- Use quick-cooking oats for the most tender texture. Old-fashioned oats work but remain chewier.
- Press the bottom oat layer firmly. A compact base holds together better when cut.
- Melt the chocolate and peanut butter over truly low heat and stir constantly to avoid scorching.
- Spread the chocolate layer while it is still warm and fluid so it settles evenly.
- Press the top oat layer gently. Too much pressure can make it dense instead of crumbly.
- Chill the bars long enough. Two hours is the minimum; overnight produces the cleanest slices.
- Let the bars sit at room temperature briefly before cutting. Ice-cold chocolate can crack.
- Wipe the knife with a warm, damp cloth between cuts for the neatest edges.
- Line the pan with parchment for the easiest removal and cleanest presentation.
- Taste the peanut butter before using. A brand you enjoy plain will taste best in the bars.
- If the chocolate mixture seems too thick to spread, stir in a teaspoon of neutral oil or extra peanut butter.
- Store the cut bars in a single layer or with parchment between layers so they do not stick.
- For thicker bars, use an 8×8-inch pan and extend the chilling time slightly.
Common Mistakes to Avoid
- Using old-fashioned oats without adjusting expectations. The texture will be noticeably chewier and less cohesive.
- Not packing the brown sugar. The oat mixture may turn out too dry and crumbly.
- Cooking the oat mixture too long or on high heat. The butter can separate and the oats can become greasy.
- Pressing the bottom layer too lightly. The bars will fall apart when cut.
- Melting the chocolate over high heat. It can seize or burn and become grainy.
- Spreading the chocolate after it has started to set. It will not form an even layer.
- Skipping the chill time. Warm bars will not hold their shape.
- Cutting the bars straight from the refrigerator. The chocolate can crack and the pieces look ragged.
- Using natural peanut butter that has separated without stirring it first. The texture of the filling will be oily or dry.
- Greasing the pan too heavily. Excess grease can make the bottom layer soggy.
- Adding the oats before the sugar has dissolved into the butter. The mixture may not bind as well.
- Storing the bars uncovered in the refrigerator. They can dry out or absorb other flavors.
- Trying to rush the melting of chocolate by raising the heat. Patience produces a smoother result.
- Using chocolate chips that contain stabilizers that resist melting smoothly. Choose a brand known to melt well.
Ingredient Substitutions
Butter can be replaced with an equal amount of coconut oil or a good plant-based butter for a dairy-free version. The flavor will shift slightly toward coconut if using coconut oil.
Brown sugar can be swapped for coconut sugar or an equal amount of white sugar mixed with a teaspoon of molasses. The moisture level and flavor will change modestly.
Quick-cooking oats can be replaced with old-fashioned rolled oats for a heartier texture. Pulse them briefly in a food processor if you prefer a finer result.
Semisweet chocolate chips can be replaced with dark chocolate chips, milk chocolate chips, or chopped chocolate bars. Adjust sweetness expectations accordingly.
Peanut butter can be swapped for almond butter, cashew butter, or sunflower seed butter for different flavor profiles or allergy needs. The filling will still set, though the taste will change.
Vanilla extract can be replaced with almond extract for a different aromatic note, or omitted if necessary.
Recipe Variations
- Dark Chocolate Sea Salt Bars – Use dark chocolate chips and sprinkle flaky sea salt over the top oat layer before chilling.
- Almond Butter Version – Replace the peanut butter with almond butter and add a handful of sliced almonds to the top.
- Coconut Oat Bars – Add ½ cup shredded coconut to the oat mixture and use a bit of coconut oil in place of some butter.
- Mocha Chocolate Bars – Stir 1 teaspoon instant espresso powder into the melting chocolate mixture.
- Peanut Butter Cup Style – Use milk chocolate chips and double the peanut butter for a sweeter, softer middle.
- Cranberry Chocolate Oat Bars – Add ⅓ cup dried cranberries to the oat mixture for tart contrast.
- Cookie Butter Bars – Replace the peanut butter with cookie butter or Biscoff spread for a spiced filling.
- Triple Chocolate – Mix white chocolate chips into the oat layers and use dark chocolate for the middle.
- Protein-Boosted Bars – Stir a scoop of vanilla or chocolate protein powder into the oat mixture, adding a splash of milk if needed.
- Cinnamon Spice Bars – Add 1 teaspoon cinnamon to the oat mixture for warm flavor.
- Nut-Free Sunflower Bars – Use sunflower seed butter and ensure all other ingredients are nut-free.
- Mint Chocolate Bars – Add ¼ teaspoon peppermint extract to the chocolate layer.
- S’mores Inspired – Add a handful of mini marshmallows to the chocolate layer just before it sets and use a graham-flavored oat mix if desired.
Make It Healthier
These bars are a treat, and they should taste like one. A few thoughtful swaps can improve the nutritional profile without losing the spirit of the recipe. Use a natural peanut butter with no added sugar. Choose dark chocolate chips with a higher cocoa percentage for more antioxidants and less sugar. Replace half the butter with unsweetened applesauce or mashed banana for lower fat, accepting a softer texture. Reduce the brown sugar slightly and rely more on the chocolate for sweetness. Add a tablespoon of chia seeds or ground flax to the oat mixture for extra fiber and omega-3s. Cut smaller squares and enjoy them mindfully alongside a piece of fruit or a handful of nuts. These adjustments keep the familiar flavor while making the bars easier to fit into a balanced way of eating.
Meal Prep Guide
These no-bake bars are ideal for advance preparation. Make a full pan on the weekend and keep it covered in the refrigerator for grab-and-go snacks throughout the week. They hold up well in lunchboxes if kept cool. For longer planning, freeze individual bars wrapped in parchment and placed in a freezer bag. The recipe doubles easily in a 9×13-inch pan if you need more. Because no baking is required, you can prepare them even on the hottest days or when kitchen time is limited. Portion them into small containers for controlled servings and easy packing.
Storage
Once the bars are fully set and cut, store them in an airtight container in the refrigerator. Place parchment paper between layers if stacking. They keep well for up to one week. The texture remains best when they are kept cool. Always use clean hands or utensils when removing bars so the rest stay fresh. If the kitchen is particularly warm, keep them refrigerated until shortly before serving.
Freezing
These bars freeze excellently. Cut them into individual portions, wrap each one in parchment or plastic wrap, and place them in a freezer-safe container or bag. They will keep for up to three months. Thaw in the refrigerator overnight or on the counter for twenty to thirty minutes before eating. The chocolate layer may develop a slight bloom after freezing, but the flavor and texture remain very good. Freezing is a convenient way to keep a treat on hand without the temptation of an entire pan in the refrigerator.
Reheating
These are no-bake bars meant to be enjoyed cool or at cool room temperature, so traditional reheating is rarely needed. If you prefer a softer chocolate layer, let a bar sit at room temperature for fifteen to twenty minutes. Avoid the microwave if possible, as it can make the chocolate oily and the oats tough. If the bars have been frozen, thawing is all that is required. The goal is to restore a pleasant, slightly yielding texture rather than to heat them through.
What to Serve With It
These bars are satisfying on their own, yet they pair nicely with a few simple accompaniments. A cold glass of milk is the classic partner and balances the richness. Fresh berries on the side add brightness and a little acidity. A small scoop of vanilla ice cream or a dollop of whipped cream turns them into a more elaborate dessert. For an afternoon snack plate, serve squares alongside apple slices and a handful of nuts. At a potluck they sit happily next to fruit salad or other finger desserts. Leftover bars make a welcome addition to a lunchbox with a piece of cheese or yogurt for protein balance.
Beverage Pairings
Cold milk is the timeless choice and softens the chocolate and peanut butter beautifully. Hot coffee or a simple black tea provides a pleasant bitter contrast. Iced coffee or cold brew works especially well in warmer weather. For a non-caffeinated option, try cold oat milk or almond milk. A small glass of dessert wine or a nutty amontillado sherry can be lovely for an adult gathering. Sparkling water with a squeeze of orange cleanses the palate between bites. The best pairing is whatever makes the moment feel complete and enjoyable.
Frequently Asked Questions
Can I use old-fashioned oats instead of quick-cooking? Yes, though the texture will be chewier and the bars may not hold together quite as firmly. Some people prefer the heartier result.
Do I have to use peanut butter? No. Almond butter, cashew butter, or sunflower seed butter all work. The flavor will change accordingly.
How long do the bars need to chill? At least two to three hours, or overnight for the cleanest cuts. The chocolate must be fully set.
Can I make these dairy-free? Yes. Use a plant-based butter and dairy-free chocolate chips. The results are still excellent.
Why are my bars falling apart? The bottom layer may not have been pressed firmly enough, or the bars may not have chilled long enough.
Can I reduce the sugar? You can reduce the brown sugar slightly, but the oat mixture may become less cohesive. The chocolate also contributes sweetness.
How should I store them? In an airtight container in the refrigerator for up to one week. Use parchment between layers if stacking.
Can I freeze the bars? Yes. Wrap individual bars and freeze for up to three months. Thaw in the refrigerator or at room temperature.
What size pan is best? A 9×9-inch pan produces nicely thick bars. An 8×8-inch pan makes them thicker; a 9×13-inch pan makes them thinner.
Can I add mix-ins to the oat layer? Yes. Mini chocolate chips, chopped nuts, or dried fruit can be stirred into the oat mixture before pressing.
Why did my chocolate layer turn grainy? The chocolate may have been heated too quickly or gotten a small amount of water in it. Melt slowly and stir constantly.
Do these taste like traditional oatmeal cookies? They share some flavors but are denser, fudgier, and more candy-bar-like because of the chocolate-peanut butter middle.
Can I use natural peanut butter? Yes, as long as it is well stirred so the oils are incorporated. The filling may be slightly softer.
How many bars does the recipe make? Depending on how you cut them, usually 16 modest squares or 9 larger ones.
Are these gluten-free? They can be if you use certified gluten-free oats. Standard oats are often cross-contaminated.
Nutrition Information
Estimated nutrition per bar (based on 16 bars): approximately 220–250 calories, 14–16 g fat, 22–25 g carbohydrates, 4–5 g protein, 2–3 g fiber. Values vary depending on specific brands of chocolate chips, peanut butter, and exact portion size. These figures are estimates only and are not a substitute for professional nutritional advice. Enjoy these bars as an occasional treat within a varied and balanced way of eating.
Final Thoughts
There is something deeply comforting about a recipe that asks so little and gives so much. These no-bake chocolate oat bars have become one of those quiet staples in my kitchen—the ones I turn to when I want something sweet without the production of baking, when the day has been long, or when I simply want the house to smell like butter and chocolate for a little while. They remind me that good food does not always require heat or hours of effort. Sometimes it just requires a saucepan, a few pantry ingredients, and the willingness to let the refrigerator finish the work.
I hope you make a pan soon. I hope the chocolate melts smoothly and the oat layers press together just right. And I hope, when you finally cut the first square and take that first bite, you feel the same small happiness I still get from this simple, reliable treat. If you try them, I would love to know how quickly they disappeared at your house. From my kitchen to yours—sweet, easy, and shared with pleasure.
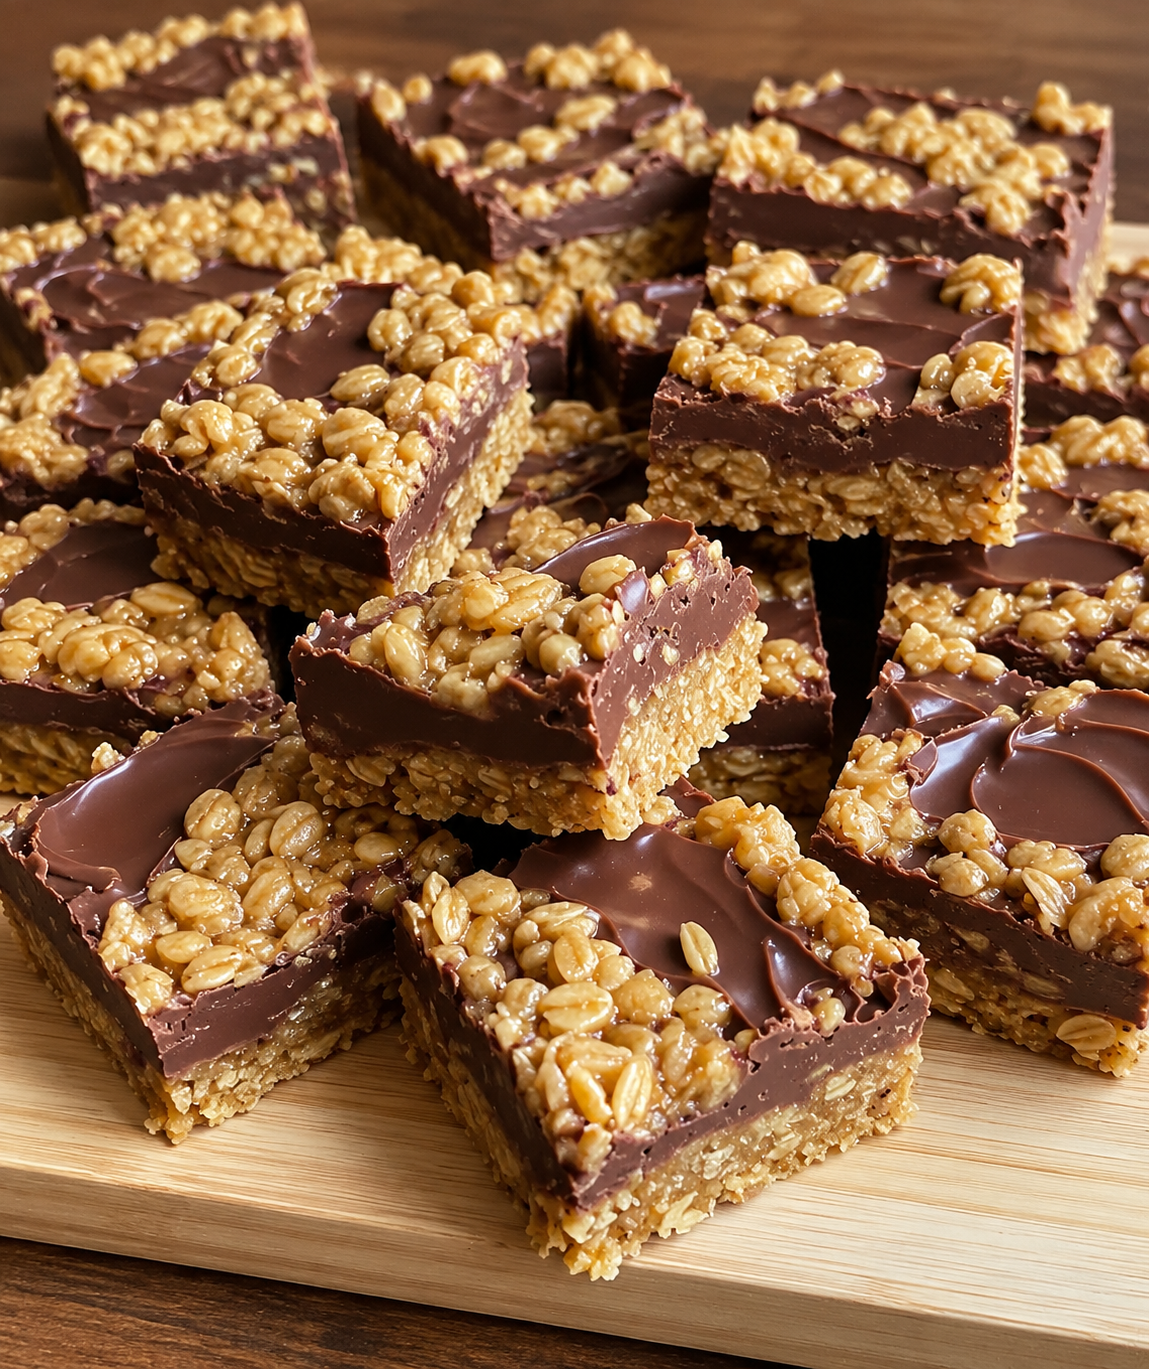
Easy no-bake bars with a buttery oat crust
Ingredients
Equipment
Method
- Grease or line a 9×9-inch pan.
- Melt butter in a large saucepan over medium heat. Stir in brown sugar and vanilla. Add oats and cook over low heat 2–3 minutes until blended.
- Press half the oat mixture firmly into the prepared pan. Reserve the rest.
- Melt chocolate chips and peanut butter together over low heat, stirring until smooth. Pour over the oat base and spread evenly.
- Crumble remaining oat mixture over the chocolate and press gently.
- Cover and refrigerate 2–3 hours or overnight until set.
- Bring to room temperature briefly, then cut into bars.
Notes