
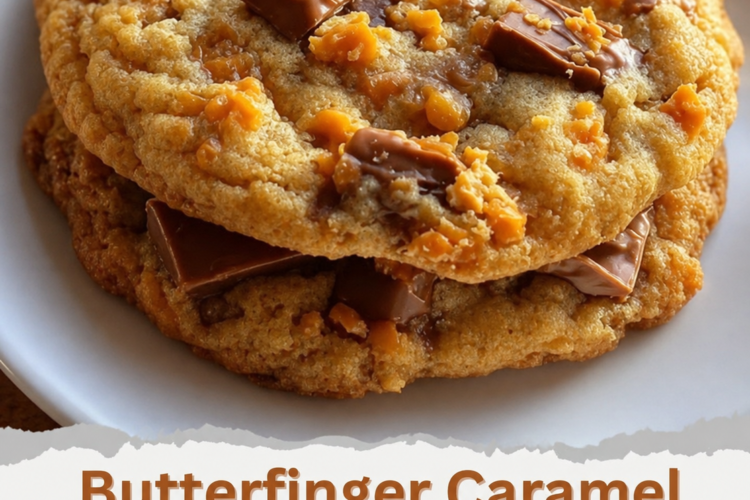
Butterfinger Caramel Cookies – Thick, Chewy, Crispy-Edged Cookies Loaded with Melty Candy
I made these on a random Tuesday night because I had leftover Halloween candy stashed in the pantry, and honestly? I was not expecting much. But the second these came out of the oven with those crispy golden edges and that buttery caramel smell filling the kitchen, my husband wandered in like he had a sixth sense. He grabbed one before they even cooled and just stood there chewing with his eyes closed. That is when I knew.
These cookies are dangerously good. The Butterfinger pieces get all melty and crunchy at the same time, and the caramel bits create little pockets of gooey sweetness that pull apart when you break the cookie in half. They are thick, chewy in the center, crispy around the edges, and honestly taste like something you would pay way too much for at a bakery. I brought the rest to work the next day and they were gone in under an hour. Three people asked for the recipe before lunch.
This is the cookie I now make whenever leftover candy bars start calling my name or when I simply want a batch of something that feels special without complicated techniques. The dough comes together like a classic chocolate chip cookie, then gets loaded with crushed Butterfinger and caramel bits. The result is pure candy-bar cookie heaven—buttery, chewy, crispy, and packed with texture in every bite.
Why You’ll Love This Recipe
You will love these Butterfinger caramel cookies because they take a reliable, thick-and-chewy cookie base and load it with two kinds of candy that melt and crunch in the best possible way. The edges bake up golden and crisp while the centers stay soft and gooey. The Butterfinger pieces soften just enough to become chewy-crunchy, and the caramel bits turn into sticky, sweet pockets that stretch when you pull the cookie apart.
You will love how easy they are. The method is straightforward creaming and mixing. No chilling required (though a short chill helps if your kitchen is warm). They bake in about 10–12 minutes and fill the house with the kind of smell that draws people into the kitchen. They travel well, freeze well, and disappear fast at potlucks, bake sales, or office snack tables.
You will love the nostalgia and the upgrade. These taste like the best parts of Halloween candy and a bakery cookie had a perfect meeting. They feel indulgent and a little playful at the same time. Once you taste that first warm cookie with the melty Butterfinger and gooey caramel, the ordinary chocolate chip version starts to feel incomplete.
Most of all, you will love the reactions. These are the cookies that make people close their eyes while chewing. They are the ones that vanish from the plate while someone is still asking for the recipe. In a world of complicated desserts, a candy-loaded cookie this good is pure joy.
Why This Recipe Works
The cookie base follows classic principles for thick, chewy cookies with crisp edges. Creaming softened butter with both brown and granulated sugar incorporates air and dissolves some of the sugar, creating a light yet rich foundation. Brown sugar adds moisture and chew; granulated sugar promotes spreading and crispness. Eggs bind the dough and contribute structure, while vanilla rounds out the flavor.
The dry ingredients—flour, baking soda, and salt—provide structure and lift. Baking soda reacts with the acidity in the brown sugar and helps the cookies rise and brown. A light hand when mixing prevents tough cookies. Folding in the caramel bits and crushed Butterfinger at the end distributes the candy evenly without crushing it further or overworking the dough.
Baking at 350°F sets the edges while leaving the centers slightly soft. They finish firming as they cool on the sheet. The candy pieces melt just enough in the heat to create pockets of caramel and the signature Butterfinger texture without disappearing completely. These techniques produce cookies that are thick, chewy, crispy-edged, and loaded with candy-bar character.
Ingredient Breakdown
Unsalted Butter (1 cup, softened) Butter provides richness, flavor, and the fat needed for tender cookies. Softened butter creams properly with the sugars to create the right texture. Unsalted lets you control the salt level.
Brown Sugar (1 cup, packed) Brown sugar adds moisture, chewiness, and a subtle molasses flavor that complements the caramel and Butterfinger. Packing ensures accurate measurement.
Granulated Sugar (½ cup) Granulated sugar helps the cookies spread and develop crisp edges while balancing the moisture from the brown sugar.
Large Eggs (2) Eggs bind the dough, add structure, and contribute to a tender crumb. Room-temperature eggs incorporate more evenly.
Vanilla Extract (2 teaspoons) Vanilla enhances the overall flavor and makes the cookies taste more complete and bakery-like.
All-Purpose Flour (2¼ cups) Flour provides structure. The amount keeps the cookies thick rather than flat.
Baking Soda (1 teaspoon) Baking soda gives the cookies lift and encourages browning.
Salt (½ teaspoon) Salt balances the sweetness and sharpens all the other flavors.
Caramel Bits (1 cup) Caramel bits melt into gooey pockets of sweetness that stay distinct rather than disappearing into the dough. They are convenient and distribute evenly.
Crushed Butterfinger Candy Bars (1 cup) Butterfinger pieces add the signature crunchy-peanut-butter-candy texture and flavor. Crushing them into varied sizes creates both melty and crunchy bits throughout the cookies.
Kitchen Equipment
A large mixing bowl, an electric mixer (hand or stand), a separate bowl for dry ingredients, a spatula, measuring cups and spoons, a cookie scoop or spoons, two baking sheets, parchment paper, and a wire rack are all you need. That is the complete practical list.
Step-by-Step Instructions
Preheat the oven to 350°F. Line two baking sheets with parchment paper.
In a large bowl, beat the softened butter with the packed brown sugar and granulated sugar until the mixture is light and fluffy, about 3 minutes.
Add the eggs one at a time, beating well after each addition. Mix in the vanilla extract until smooth.
In a separate bowl, whisk together the flour, baking soda, and salt.
Gradually add the dry ingredients to the wet mixture, mixing on low speed or by hand until just combined. Do not overmix.
Gently stir in the caramel bits and crushed Butterfinger pieces until they are evenly distributed throughout the dough.
Scoop rounded tablespoons of dough onto the prepared baking sheets, spacing them about 2 inches apart.
Bake for 10–12 minutes, until the edges are golden brown and the centers still look slightly soft and underdone.
Let the cookies cool on the baking sheet for 5 minutes so they firm up, then transfer them to a wire rack to cool completely.
Try not to eat four while they are still warm. (This is the hardest step.)
Expert Tips
- Soften the butter properly—cool room temperature, not melted—for the best creaming.
- Cream the butter and sugars fully for light texture and good structure.
- Add eggs one at a time so the dough stays smooth and emulsified.
- Measure flour carefully (spoon and level) so the cookies stay thick rather than dry.
- Mix the dry ingredients in just until combined to avoid tough cookies.
- Crush the Butterfinger into a mix of fine and larger pieces for varied texture.
- A cookie scoop keeps the cookies uniform so they bake evenly.
- Do not overbake—the centers should still look a little soft when you remove them.
- Let the cookies rest on the hot baking sheet for 5 minutes; they continue to set.
- Parchment paper prevents sticking and promotes even browning.
- For thicker cookies, chill the scooped dough for 20–30 minutes before baking.
- Store cooled cookies with a piece of bread in the container to keep them soft.
- Double the recipe easily—these disappear fast.
- Warm a leftover cookie for 10 seconds in the microwave to revive the gooey centers.
Common Mistakes to Avoid
- Using melted butter instead of softened. The cookies will spread too much.
- Under-creaming the butter and sugars. The texture will be dense.
- Overmixing after adding the flour. Tough cookies result.
- Overbaking until the centers look fully set. They will be dry once cooled.
- Skipping the parchment paper. The caramel bits can stick and burn.
- Making the dough mounds too large or too small without adjusting bake time.
- Crowding the baking sheets. The cookies need space to spread properly.
- Using old baking soda. The cookies will not rise or brown well.
- Adding the candy too early and crushing it into dust. Keep some texture.
- Transferring the cookies too soon. They will fall apart while still soft.
- Storing warm cookies. Condensation makes them soggy.
- Expecting the caramel bits to stay completely intact. They are meant to melt into pockets.
- Using cold eggs straight from the fridge without bringing them closer to room temperature.
- Forgetting the salt. The cookies will taste flat and overly sweet.
Ingredient Substitutions
Unsalted butter can be replaced with salted butter; reduce or omit the added salt.
Brown sugar can be light or dark; dark gives a deeper molasses note.
Caramel bits can be replaced with chopped soft caramel candies (freeze them briefly for easier chopping).
Butterfinger can be replaced with other crunchy candy bars such as Heath, Skor, or chopped peanut butter cups for different flavor profiles.
All-purpose flour can be replaced with a 1:1 gluten-free baking blend if needed.
Vanilla extract can be replaced with almond extract for a different note (use less).
Recipe Variations
- Chocolate Butterfinger Cookies – Add ¾ cup chocolate chips along with the candy.
- Extra-Caramel – Increase the caramel bits to 1½ cups for more gooey pockets.
- Peanut Butter Twist – Replace ¼ cup of the butter with creamy peanut butter.
- Salted Caramel Version – Sprinkle flaky sea salt on the cookies right after baking.
- Triple Candy – Use a mix of Butterfinger, Heath, and chocolate chips.
- Oatmeal Butterfinger – Replace ½ cup of the flour with rolled oats for extra chew.
- White Chocolate Caramel – Add white chocolate chips with the caramel bits.
- Spiced Version – Add ½ teaspoon cinnamon to the dry ingredients.
- Giant Bakery-Style – Scoop larger mounds and bake 2–3 minutes longer.
- Stuffed Cookies – Place a small piece of soft caramel in the center of each dough ball before baking.
- Holiday Sprinkle – Add festive sprinkles to the dough or on top for parties.
- Dark Brown Sugar Only – Use all brown sugar for maximum chew and molasses flavor.
- Freezer Dough Balls – Scoop and freeze the raw dough; bake from frozen, adding 1–2 minutes.
Make It Healthier
These cookies are a candy-loaded treat and should be enjoyed as such. For a slightly lighter approach, reduce the caramel bits and Butterfinger by a third, use a bit less sugar, or make smaller cookies so one feels satisfying. Darker chocolate or a sprinkle of sea salt can make them feel more balanced. Portion control and sharing the batch are the most effective strategies—enjoy them as an occasional special cookie rather than an everyday snack.
Meal Prep Guide
These cookies are excellent for making ahead. The dough can be scooped and frozen for later baking. Baked cookies keep well at room temperature for several days and freeze beautifully for longer storage. Bake a full batch on the weekend and portion them for lunches, snacks, or gifting. The flavor and texture hold up very well, making them a practical treat to have on hand.
Storage
Store cooled cookies in an airtight container at room temperature for up to five days. Place parchment between layers if stacking. For longer softness, add a slice of bread to the container (replace as needed). Keep them covered so they do not dry out.
Freezing
Baked cookies freeze well for up to three months. Cool completely, then freeze in a single layer before transferring to a freezer bag or container. Thaw at room temperature or warm briefly in the microwave. Raw dough balls can also be frozen; bake from frozen, adding 1–2 minutes to the baking time.
Reheating
Microwave: 8–12 seconds for a just-baked, gooey texture. Oven: 300°F for 3–5 minutes to re-crisp the edges. Toaster oven: Works well for small batches. Avoid long reheating so the candy pieces do not burn.
What to Serve With It
These cookies are perfect on their own with a glass of cold milk. They also shine on a dessert tray alongside other cookies or brownies. Pack them in lunchboxes, bring them to potlucks, or wrap a few for teacher gifts and neighbors. A scoop of vanilla ice cream between two warm cookies makes an outstanding ice cream sandwich. Leftover cookies (if any) are excellent with afternoon coffee or tea.
Beverage Pairings
Cold milk is the classic and most satisfying pairing. Hot coffee or a latte cuts the sweetness and complements the caramel and Butterfinger flavors. Black tea or a chai latte also works well. For a special treat, a small glass of dessert wine or a creamy liqueur echoes the rich candy notes. Sparkling water with a squeeze of citrus refreshes the palate. Choose a drink that either matches the cozy sweetness or provides a clean contrast.
Frequently Asked Questions
Can I use homemade caramel instead of caramel bits? Yes, but chop soft caramels and freeze them briefly so they do not melt too much into the dough during mixing.
Do I need to chill the dough? It is not required, but a 20–30 minute chill helps the cookies stay thicker if your kitchen is warm.
Can I use other candy bars? Yes. Heath, Skor, chopped Snickers, or peanut butter cups all work well.
Why are my cookies flat? The butter may have been too soft or melted, or the dough needed a short chill. Also check that the baking soda is fresh.
How do I keep them chewy? Do not overbake, and store them airtight. A slice of bread in the container helps maintain softness.
Can I make them gluten-free? Yes. Use a 1:1 gluten-free flour blend designed for baking.
How many cookies does this make? About 30–36 cookies depending on scoop size.
Can I double the recipe? Absolutely. Use a large mixer bowl and bake in batches.
Why did the caramel bits burn? They may have been too close to the edges or the oven ran hot. Parchment helps, and pulling the cookies when the edges are just golden prevents over-browning.
Can I add chocolate chips too? Yes. Add ½–¾ cup along with the candy for a triple-threat cookie.
How long do they stay fresh? Up to five days at room temperature or three months in the freezer.
Do the Butterfinger pieces stay crunchy? They soften into a chewy-crunchy texture that is part of the appeal.
Can I use salted butter? Yes. Reduce or omit the added salt in the recipe.
What if I do not have brown sugar? All granulated sugar will work but the cookies will be less chewy and have less depth of flavor.
Are these good for gifting? Yes. They travel well and look impressive in a tin or cellophane bag.
Nutrition Information
Estimated nutrition per cookie (based on 36 cookies): approximately 140–160 calories, 7–9 g fat, 18–20 g carbohydrates, 1–2 g protein. Values vary depending on exact scoop size and the brands of candy used. These figures are estimates only and are not a substitute for professional nutritional advice. Enjoy these cookies as an occasional sweet treat within a balanced diet.
Final Thoughts
These Butterfinger caramel cookies started as a way to use up leftover Halloween candy and turned into one of the most requested recipes in my kitchen. They prove that a few extra ingredients in a classic cookie dough can create something that tastes far more special than the effort required. The crispy edges, chewy centers, melty Butterfinger, and gooey caramel pockets still make my husband close his eyes with the first bite, and they still disappear from every plate I send out.
I hope you make a batch this weekend—or any random Tuesday when candy is calling. I hope the edges turn golden, the centers stay soft, and the first warm cookie makes someone in your kitchen pause mid-chew. If you try them, I would love to know how quickly they vanished and whether anyone asked for the recipe before the plate was empty. From my oven to yours—thick, chewy, candy-loaded, and pure joy.
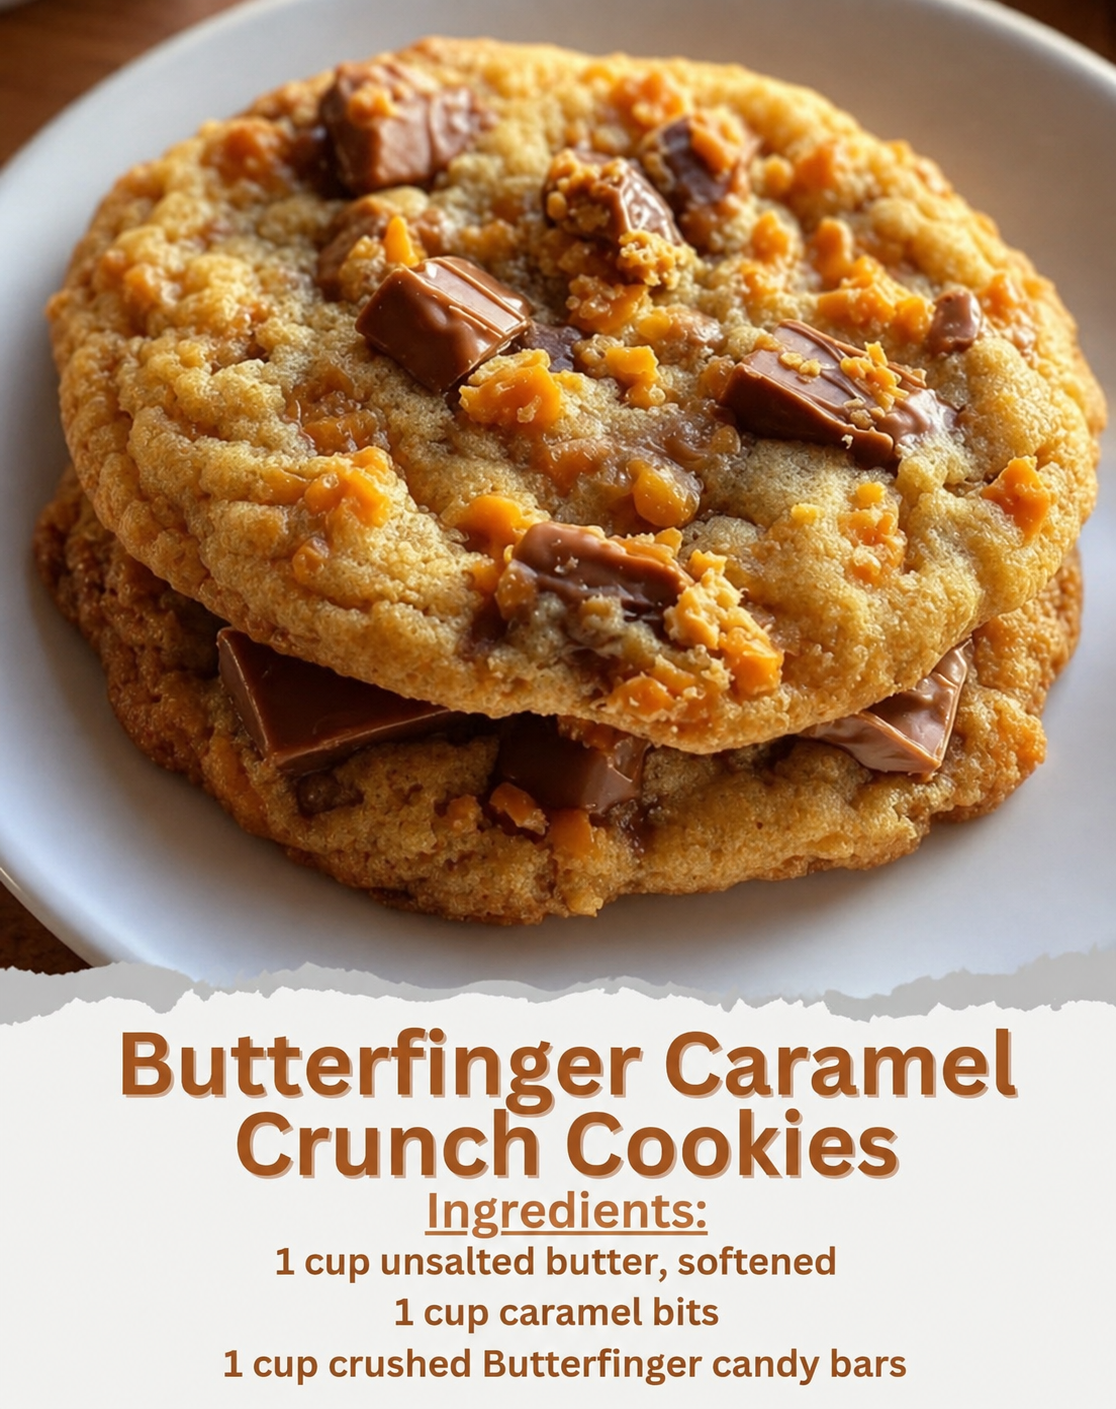
Butterfinger Caramel Cookies
Ingredients
Equipment
Method
- Preheat oven to 350°F and line baking sheets with parchment.
- Beat softened butter with both sugars until light and fluffy, about 3 minutes.
- Add eggs one at a time, then vanilla; mix until smooth.
- Whisk flour, baking soda, and salt in a separate bowl.
- Gradually mix dry ingredients into wet until just combined.
- Stir in caramel bits and crushed Butterfinger.
- Scoop rounded tablespoons onto sheets, spacing 2 inches apart.
- Bake 10–12 minutes until edges are golden and centers look slightly soft.
- Cool on the sheet 5 minutes, then transfer to a wire rack.
Notes