
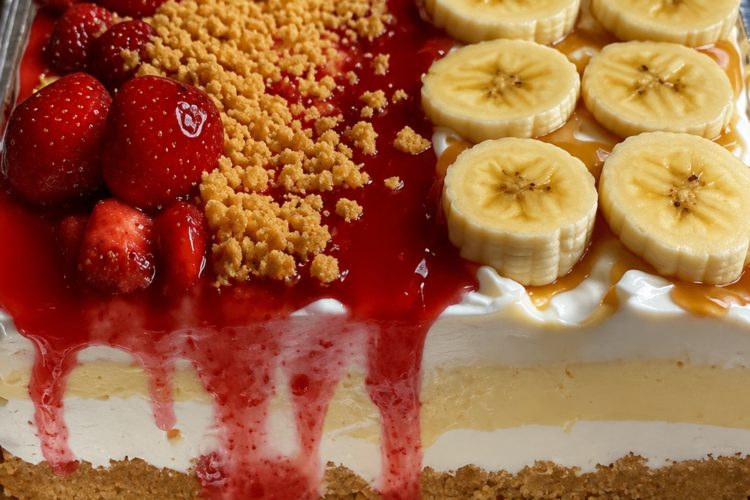
No-Bake Strawberry Crunch & Banana Pudding Cheesecake – Two Desserts in One Pan
I brought this to my sister’s birthday dinner last weekend, and I swear three people asked if I bought it from a bakery. When I said I made it at home, they didn’t believe me until I showed them the photos on my phone. This is one of those desserts that looks fancy but honestly comes together easier than you’d think. It’s a no-bake cheesecake split down the middle—half strawberry crunch, half banana pudding. The kind of thing that makes people go quiet for a second when they take the first bite.
The strawberry side has that sweet-tart glaze with fresh berries and a buttery crunch topping that tastes like summer. The banana pudding side is creamy, nostalgic, and tastes exactly like the dessert your grandma used to make for Sunday dinners. And that golden graham cracker (or vanilla wafer) crust underneath? Holds everything together like a dream.
I made this on a random Thursday night because I had bananas that were about to turn and a container of strawberries I impulse-bought. It ended up being one of the best dessert decisions I’ve made in a while. One pan, no oven, and a dessert that feels like two classic favorites sharing the same creamy cheesecake base.
Why You’ll Love This Recipe
You will love this no-bake split cheesecake because it gives you two beloved desserts in a single 9x13 pan. One half is bright strawberry with a crunchy cookie topping; the other is classic banana pudding with vanilla wafer crumbs. Underneath both is a smooth, creamy no-bake cheesecake filling and a buttery crust. It looks impressive, tastes nostalgic, and requires zero baking.
You will love how practical it is. The crust presses in minutes. The filling comes together with a mixer and a whisk. Assembly is simple layering and topping. It needs only a few hours in the refrigerator (overnight is even better). It travels well, slices cleanly once chilled, and feeds a crowd. Perfect for birthdays, potlucks, holidays, or anytime you want a show-stopping dessert without turning on the oven.
You will love the flavor and texture contrast. The cheesecake base is light, creamy, and lightly sweet. The strawberry side is fresh, glossy, and crunchy. The banana side is soft, comforting, and full of classic pudding flavor. Every square offers a little of both worlds if you cut across the middle—or pure preference if you stay on one side.
Most of all, you will love the reactions. This is the dessert that makes people ask if it came from a bakery. It is the one that disappears while someone is still deciding which side to try first. In a world of complicated layered desserts, a no-bake split cheesecake this good is pure celebration.
Why This Recipe Works
A simple crust of crushed vanilla wafers or graham crackers bound with melted butter and a little sugar provides a sturdy, flavorful base that holds up under the creamy filling. Softened cream cheese beaten with powdered sugar and vanilla creates a smooth, tangy foundation. Instant vanilla pudding whisked with cold milk thickens quickly and adds structure and classic flavor. Folding in freshly whipped heavy cream lightens the mixture into a mousse-like cheesecake filling that sets firmly in the refrigerator without gelatin.
Dividing the toppings cleanly down the middle allows two distinct flavor experiences to share the same creamy base. Fresh strawberries and glaze give bright, juicy contrast and a glossy finish. Crushed golden Oreos or vanilla wafers add the signature strawberry-crunch texture. Sliced ripe bananas and extra wafer crumbs recreate the nostalgic banana pudding experience. Chilling for at least four hours (preferably overnight) lets the filling set completely so the dessert slices cleanly and the flavors meld.
These techniques—no-bake crust, lightened cream-cheese-and-pudding filling, and two complementary toppings—produce a bakery-worthy dessert with minimal effort and no oven time.
Ingredient Breakdown
Crushed Vanilla Wafers or Graham Crackers (2 cups) The crumbs form the buttery, sturdy crust. Vanilla wafers lean into the banana-pudding nostalgia; graham crackers give a classic cheesecake base.
Melted Butter (½ cup) and Sugar (¼ cup) Butter binds the crumbs; sugar adds a touch of sweetness and helps the crust set.
Cream Cheese (16 oz, softened) Cream cheese provides the tangy, rich backbone of the no-bake filling. Softening is essential for a smooth texture.
Powdered Sugar (1 cup) Powdered sugar sweetens the cream cheese without grittiness and helps stabilize the filling.
Vanilla Extract (1 tsp) Vanilla enhances the overall flavor and ties the two sides together.
Heavy Whipping Cream (2 cups, whipped to stiff peaks) Whipped cream lightens the filling into a cloud-like, mousse-style cheesecake that sets beautifully when chilled.
Instant Vanilla Pudding Mix (1 box) + Cold Milk (1½ cups) The pudding thickens the filling, adds structure, and contributes classic vanilla flavor that works for both the strawberry and banana sides.
Fresh Strawberries (1½ cups, sliced) + Strawberry Glaze or Jam (½ cup) Strawberries provide bright, fresh fruit; the glaze or jam adds shine, sweetness, and helps the berries stay in place.
Crushed Golden Oreos or Vanilla Wafer Crumbs (½ cup) These create the signature “strawberry crunch” topping with buttery, sweet texture.
Ripe Bananas (2–3, sliced) + Extra Vanilla Wafer Crumbs Bananas deliver the classic banana pudding flavor and soft texture; the crumbs echo the traditional topping.
Kitchen Equipment
A 9x13-inch pan, foil or parchment for lining, a food processor or rolling pin for crushing cookies, mixing bowls, an electric mixer, a whisk, a spatula, and a sharp knife for slicing are the main tools.
Step-by-Step Instructions
Line a 9x13-inch pan with foil or parchment paper, leaving an overhang for easy removal if desired.
Mix the crushed vanilla wafers or graham crackers with the melted butter and sugar until evenly coated. Press the mixture firmly into the bottom of the prepared pan. Chill the crust while you make the filling.
In a large bowl, beat the softened cream cheese, powdered sugar, and vanilla extract until completely smooth and fluffy.
In a separate bowl, whisk the instant vanilla pudding mix with the cold milk until it thickens, about 2 minutes.
Fold the thickened pudding into the cream cheese mixture until well combined. Then gently fold in the whipped heavy cream until the filling is light, creamy, and uniform. Avoid overmixing so the whipped cream stays airy.
Spread the cheesecake filling evenly over the chilled crust.
For the strawberry side: Arrange the sliced strawberries over one half of the filling. Drizzle with strawberry glaze or warmed jam and sprinkle the crushed golden Oreos or vanilla wafer crumbs evenly over the berries.
For the banana pudding side: Arrange the sliced bananas over the other half of the filling and sprinkle with extra vanilla wafer crumbs.
Cover the pan and refrigerate for at least 4 hours, or overnight for the best set and flavor.
Use the foil or parchment overhang to lift the dessert out if desired, or slice directly in the pan. Cut into squares and serve cold.
Expert Tips
- Soften the cream cheese fully for a lump-free filling.
- Whip the heavy cream to stiff peaks so the filling stays light and sets firmly.
- Fold the whipped cream in gently to maintain volume.
- Use cold milk for the pudding so it thickens properly and quickly.
- Press the crust firmly so it holds together when sliced.
- Choose ripe but still firm bananas so they do not turn mushy.
- Slice the strawberries and bananas just before assembling for the freshest look.
- Warm the strawberry jam slightly if using it instead of prepared glaze for easier drizzling.
- Chill the dessert overnight if possible—the texture and flavor improve.
- A sharp knife wiped clean between cuts gives the neatest squares.
- Keep the two toppings clearly divided down the middle for the best visual effect.
- Vanilla wafer crumbs on both sides create a cohesive look if you prefer.
- Line the pan for the easiest removal and cleanest presentation.
- Taste the filling before spreading—you can add a touch more powdered sugar or vanilla if desired.
Common Mistakes to Avoid
- Using cold cream cheese. The filling will be lumpy.
- Under-whipping the cream. The filling may not set as firmly.
- Overmixing after adding the whipped cream. The mixture can deflate.
- Using warm or room-temperature milk for the pudding. It may not thicken properly.
- Pressing the crust too loosely. It can crumble when sliced.
- Adding the fruit toppings too early and letting them sit at room temperature. The bananas can brown and the berries can weep.
- Skipping the full chilling time. The dessert will be too soft to slice cleanly.
- Using overripe, mushy bananas. They will make the topping watery.
- Spreading the filling before the crust is chilled. The crust can mix into the filling.
- Cutting with a dull knife. The layers will smear.
- Leaving the dessert uncovered in the refrigerator. It can absorb odors or dry out.
- Expecting the exact texture of a baked cheesecake. This is a lighter, mousse-style no-bake version.
- Overloading one side with topping so the weight compresses the filling unevenly.
- Serving before it is fully cold. The flavors and texture are best when well chilled.
Ingredient Substitutions
Vanilla wafers can be replaced with graham crackers or digestive biscuits for the crust and toppings.
Heavy whipping cream can be replaced with a stabilized whipped topping in a pinch, though fresh cream gives better flavor and texture.
Instant vanilla pudding can be replaced with cheesecake-flavored or white chocolate pudding for variation.
Strawberry glaze can be replaced with warmed strawberry jam or a simple homemade berry sauce.
Golden Oreos can be replaced with more vanilla wafers or shortbread crumbs for the crunch topping.
Bananas can be replaced with additional strawberries for an all-berry version if desired.
Recipe Variations
- All-Strawberry Crunch – Top the entire pan with strawberries, glaze, and cookie crumbs.
- All-Banana Pudding – Top the entire pan with bananas and vanilla wafer crumbs.
- Chocolate Banana – Add a layer of chocolate ganache or chocolate chips under the banana side.
- Mixed Berry – Use a combination of strawberries, blueberries, and raspberries on the fruit side.
- Lemon Blueberry – Flavor the filling with lemon zest and top one side with blueberries.
- Cookies-and-Cream – Fold crushed Oreos into the filling and top one side with more Oreo crumbs.
- Peanut Butter Banana – Swirl a little peanut butter into the filling on the banana side.
- Tropical – Use crushed pineapple (well-drained) and toasted coconut on one side.
- Mini Individual Cups – Layer the components in clear cups for individual servings.
- Gluten-Free – Use gluten-free cookies for the crust and toppings.
- Lighter Version – Use reduced-fat cream cheese and light whipped topping (texture will be softer).
- Holiday Version – Add red and green toppings or festive sprinkles for Christmas or other celebrations.
- Make-Ahead Party Pan – Prepare fully the day before; the flavors improve overnight.
Make It Healthier
This is a rich, celebratory dessert. To lighten it slightly, use reduced-fat cream cheese, lighten the whipped cream with a bit of Greek yogurt, reduce the powdered sugar modestly, and load the toppings with extra fresh fruit. Serve smaller squares and pair with a cup of coffee or tea. The no-bake method already keeps it simpler than many layered desserts. Enjoy it as a special-occasion treat within a balanced approach to eating.
Meal Prep Guide
This dessert is ideal for making ahead. Assemble it the day before serving—the overnight chill improves both texture and flavor. It holds well in the refrigerator for a couple of days, making it perfect for parties and gatherings. You can prepare the crust and filling components separately a day early and assemble when ready. The finished dessert also freezes reasonably well for longer storage.
Storage
Keep the cheesecake covered in the refrigerator for up to four days. The banana side is best within the first two days for optimal color and texture. Store any leftovers in an airtight container or tightly wrapped to prevent the dessert from absorbing refrigerator odors.
Freezing
The fully assembled dessert can be frozen for up to one month. Freeze uncovered until firm, then wrap tightly in plastic wrap and foil. Thaw overnight in the refrigerator before serving. Note that the banana slices may soften and darken slightly after freezing; the strawberry side holds up better. For best results, freeze without the fresh fruit toppings and add them after thawing.
Reheating
This is a cold dessert and does not require reheating. Serve straight from the refrigerator. If the dessert has been frozen, thaw completely in the refrigerator before slicing and serving.
What to Serve With It
This split cheesecake is a complete dessert on its own. A dollop of extra whipped cream or a few additional fresh berries on the plate makes it even prettier. It pairs beautifully with coffee, tea, or a glass of cold milk. For a birthday or celebration, it can stand alone as the centerpiece dessert. Leftover squares are excellent for lunchboxes or afternoon treats.
Beverage Pairings
Coffee or espresso balances the sweetness and richness. Black tea or a fruit-forward herbal tea also pairs well. Cold milk is classic and comforting, especially with the banana pudding side. A sparkling wine or light dessert wine feels festive for special occasions. Sparkling water with a squeeze of lemon or strawberry refreshes the palate between bites.
Frequently Asked Questions
Can I make this fully banana or fully strawberry? Yes. Simply top the entire pan with one style of topping.
Do I have to use instant pudding? The instant pudding helps the filling set properly. Cook-and-serve pudding is not recommended unless fully cooled and thickened first.
Can I use Cool Whip instead of whipped cream? Yes. Use an 8-oz container of thawed whipped topping and fold it in gently. Fresh cream gives better flavor, but whipped topping works.
How do I keep the bananas from browning? Slice them just before assembling and serve within a day or two for the best appearance. A light brush of lemon juice can help slow browning.
Can I make it in a springform pan? A 9x13 pan is ideal for the split presentation and easy serving. A large springform can work but will give thicker slices and a different look.
How long does it need to chill? At least 4 hours; overnight is best for clean slices and fully set texture.
Can I use frozen strawberries? Fresh are preferred for texture and appearance. If using frozen, thaw and drain them very well.
Is this gluten-free? Only if you use gluten-free cookies for the crust and toppings.
Can I add a third topping? You can divide the pan into three sections if desired, though two halves are the cleanest presentation.
How do I get clean slices? Chill thoroughly and use a sharp knife wiped clean between cuts. A brief freeze (20–30 minutes) before slicing can also help.
Can I make the filling without a mixer? A hand mixer or sturdy whisk and some arm strength will work, but an electric mixer makes the cream cheese stage much easier.
Does it travel well? Yes. Keep it cold and covered. Add the final crumb toppings just before serving if traveling a long distance.
Can I reduce the sugar? You can modestly reduce the powdered sugar, but the texture and set may be slightly affected.
What size pan is required? A standard 9x13-inch pan works perfectly.
How many does this serve? About 12–16 squares depending on how large you cut them.
Nutrition Information
Estimated nutrition per square (based on 15 squares): approximately 320–380 calories, 22–26 g fat, 28–34 g carbohydrates, 4–5 g protein. Values vary depending on the exact cookies used, the amount of topping, and portion size. These figures are estimates only and are not a substitute for professional nutritional advice. This dessert is rich and best enjoyed as a special treat in moderate portions.
Final Thoughts
This no-bake strawberry crunch and banana pudding cheesecake has become one of my favorite ways to feed a crowd and create a little dessert drama. It looks like it came from a bakery, tastes like two classic favorites at once, and requires no oven time at all. Every time someone tries both sides and then goes back for a second square, I am reminded why this combination works so well.
I hope you make it for the next birthday, potluck, or random Thursday when the fruit on the counter needs a purpose. I hope the filling sets perfectly, the toppings stay bright, and the first bite makes the table go quiet for a second. If you try it, I would love to know which side disappeared first—the strawberry crunch or the banana pudding. From my kitchen to yours—creamy, nostalgic, and pure no-bake celebration.
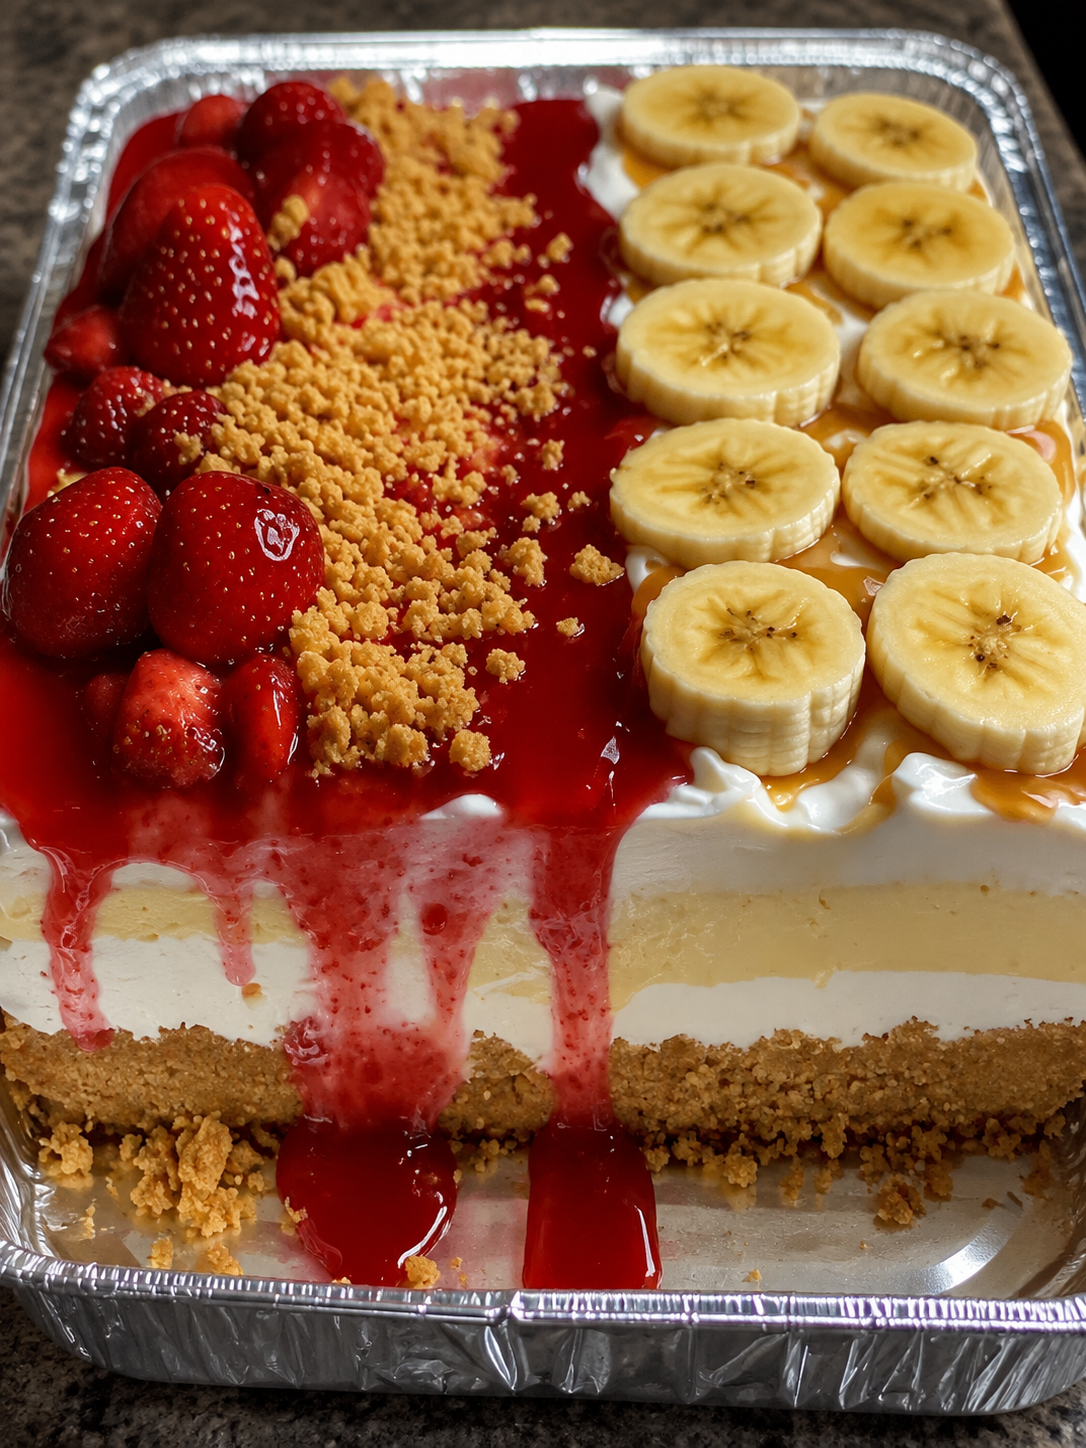
No-Bake Strawberry Crunch & Banana Pudding Cheesecake
Ingredients
Equipment
Method
- Mix crust ingredients and press firmly into a foil- or parchment-lined 9x13 pan. Chill.
- Beat cream cheese, powdered sugar, and vanilla until smooth.
- Whisk pudding mix with cold milk until thick; fold into cream cheese mixture.
- Gently fold in whipped cream until light and creamy. Spread over the crust.
- Top one half with strawberries, glaze, and cookie crumbs. Top the other half with banana slices and vanilla wafer crumbs.
- Cover and refrigerate at least 4 hours or overnight. Slice and serve cold.
Notes