
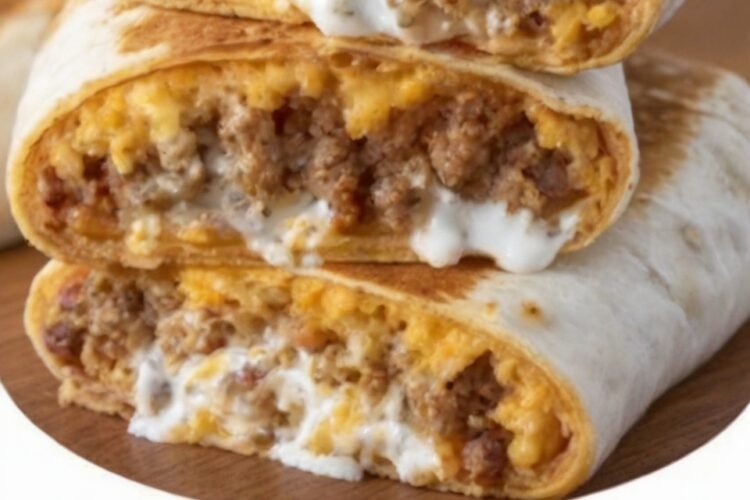
Homemade Quesaritos – Melty, Cheesy, Crispy Taco Bell-Style Comfort at Home
My husband walked in from work, saw me wrapping these up, and said “Wait… is that what I think it is?” He grabbed one before I could even plate them. That’s how good these are.
I wasn’t even planning to make these tonight. But sometimes you just need that Taco Bell craving satisfied without leaving the house, you know? And honestly? These might be better. The cheese gets all melty between the layers, the seasoned beef is perfectly spiced, and that grilled tortilla with the crispy golden marks… I made six and there’s one left. One.
The best part? You probably have everything already. Ground beef, taco seasoning, cheese, sour cream, tortillas, and a little rice. That’s it. No drive-thru line, no soggy wrappers—just pure cheesy comfort straight from your own kitchen. A crispy cheese-fused tortilla wraps around seasoned beef, rice, sour cream, and more cheese for a handheld meal that stretches with every bite.
Why You’ll Love This Recipe
You will love these homemade quesaritos because they capture everything craveable about the fast-food version and make it even better. A layer of cheese is fused right onto the tortilla for extra melt and crispiness. Seasoned ground beef delivers familiar taco flavor. Rice adds substance, sour cream adds cool creaminess, and more cheese ties it all together. Grilled until golden with beautiful marks, they are crispy outside and gooey inside.
You will love how practical they are. The ingredients are everyday staples. The method is straightforward: brown the beef, fuse the cheese to the tortilla, fill, roll, and grill. They come together in about 30 minutes and satisfy the craving without leaving home. Perfect for weeknights, weekend treats, or anytime the drive-thru calls.
You will love the texture and flavor contrast. The outer cheese layer turns crispy and golden. The tortilla stays soft yet sturdy. The filling is savory, creamy, and cheesy. Every bite has that satisfying stretch and the familiar taco seasoning you love.
Most of all, you will love the reactions. These are the kind of homemade fast-food copies that make someone grab one before it hits the plate. They are the ones that disappear while someone is still saying “we should make these every week.” In a world of complicated dinners, quesaritos this good and this doable are pure comfort.
Why This Recipe Works
Browning the ground beef and simmering it briefly with taco seasoning and water creates a saucy, well-spiced filling that stays moist. Fusing shredded cheese directly onto the tortilla in a hot skillet creates a crispy, melty outer layer that sets these apart from a regular burrito—the cheese becomes part of the wrapper. A thin layer of sour cream adds cool creaminess and helps the filling stay in place. Cooked rice provides bulk and texture that balances the rich beef and cheese. Additional shredded cheese inside guarantees the classic melt and stretch.
Rolling tightly and grilling seam-side down in a lightly oiled skillet seals the quesarito and creates golden, crispy exterior marks. Medium heat allows the inside to warm through while the outside crisps without burning. The result is a handheld, double-cheesy, taco-seasoned roll that tastes like the fast-food favorite but fresher and more satisfying.
Ingredient Breakdown
Ground Beef (1 lb) Ground beef is the savory, seasoned heart of the filling. An 80/20 or 85/15 blend provides good flavor and moisture.
Water (¼ cup) + Taco Seasoning (1 Tbsp) Water helps the seasoning coat the beef and creates a light sauce. Taco seasoning delivers the familiar blend of chili powder, cumin, garlic, and other spices.
Olive Oil (2 Tbsp) Olive oil is used for grilling the finished quesaritos so they develop golden, crispy marks.
Large Flour Tortillas (4) Large flour tortillas are flexible enough to roll tightly and sturdy enough to hold the filling. They crisp beautifully when grilled.
Shredded Cheddar or Mexican Blend Cheese (1½ cups + extra for the quesadilla layer) Cheese does double duty: a layer fused to the outside for crispiness and melt, plus more inside for stretch and flavor.
Sour Cream (½ cup) Sour cream adds cool, tangy creaminess and helps the filling adhere.
Cooked Rice (½ cup, white or Spanish) Rice adds substance and texture, making the quesarito more filling and true to the original style.
Kitchen Equipment
A large skillet for the beef, a second clean skillet (or the same one wiped clean) for fusing the cheese and grilling, a spatula, and a knife for slicing are the main tools. Measuring cups and spoons complete the list.
Step-by-Step Instructions
In a skillet over medium-high heat, brown the ground beef, breaking it up as it cooks until no pink remains. Drain excess fat.
Stir in the taco seasoning and water. Simmer for about 3 minutes until the sauce thickens and coats the beef. Remove from heat and set aside.
Warm a clean skillet over medium heat. Sprinkle a handful of shredded cheese directly onto the pan in a circle roughly the size of your tortilla.
Place a tortilla on top of the melting cheese and press gently. Cook for about 1 minute until the cheese fuses to the tortilla, then carefully flip so the cheese side is facing up.
Build the quesarito: spread a thin layer of sour cream down the center of the cheese-side-up tortilla. Add a scoop of seasoned beef, a spoonful of cooked rice, and a generous sprinkle of shredded cheese.
Fold in the sides, then roll tightly like a burrito, keeping the cheese layer on the outside.
Wipe the skillet clean if needed, add a little olive oil, and place the quesarito seam-side down. Grill for 2–3 minutes per side until golden and crispy with grill marks and the cheese inside is melted.
Slice in half, watch the cheese stretch, and serve warm with extra sour cream, salsa, or guacamole if desired.
Repeat with the remaining tortillas and filling.
Expert Tips
- Drain the beef well so the filling is not greasy.
- Use a medium heat for fusing the cheese—too hot and it burns before it adheres.
- Press the tortilla gently onto the melting cheese so it bonds well.
- Do not overfill or the quesarito will be hard to roll and may burst.
- Roll tightly and start seam-side down to seal.
- A light coating of oil in the pan helps create even golden marks.
- Keep finished quesaritos warm in a low oven while you cook the rest.
- Freshly shredded cheese melts more smoothly than pre-shredded.
- Spanish rice adds extra flavor, but plain white or leftover rice works perfectly.
- Adjust the taco seasoning to your preferred spice level.
- Wipe the skillet between steps if cheese residue starts to burn.
- Slice on a diagonal for the best cheese-pull presentation.
- Double the recipe easily for larger appetites or leftovers.
- Serve immediately for maximum crispness and stretch.
Common Mistakes to Avoid
- Skipping the drain step after browning the beef. Excess grease makes the filling heavy.
- Using too high heat when fusing the cheese. It can scorch instead of melting smoothly.
- Overfilling the tortilla. Rolling becomes difficult and the filling can leak.
- Rolling too loosely. The quesarito may open while grilling.
- Not pressing the tortilla onto the cheese long enough for it to fuse.
- Grilling on too high heat so the outside burns before the inside is hot.
- Using cold rice straight from the refrigerator without warming it slightly. It can cool the filling.
- Forgetting the sour cream layer. It adds creaminess and helps hold everything together.
- Crowding the pan when grilling. The quesaritos need space to crisp evenly.
- Using very small tortillas. Large ones are easier to fill and roll.
- Letting the finished quesaritos sit too long before serving. They lose crispness.
- Adding too much water to the beef. The filling should be saucy but not wet.
- Expecting the exact texture of a drive-thru version. Homemade is fresher and often cheesier.
- Skipping the final grill step. That crispy cheese exterior is what makes it a quesarito.
Ingredient Substitutions
Ground beef can be replaced with ground turkey, chicken, or a plant-based ground.
Taco seasoning can be replaced with a homemade blend of chili powder, cumin, garlic powder, onion powder, paprika, and salt.
Flour tortillas can be replaced with whole-wheat or larger burrito-size tortillas.
Cheddar or Mexican blend can be replaced with Monterey Jack, Colby Jack, or a mix.
Sour cream can be replaced with Greek yogurt or a dairy-free alternative.
Cooked rice can be replaced with cilantro-lime rice, cauliflower rice, or omitted for a lower-carb version.
Olive oil can be replaced with neutral oil or butter for grilling.
Recipe Variations
- Spicy Quesarito – Add diced jalapeños or a dash of hot sauce to the beef or filling.
- Chicken Quesarito – Use seasoned shredded or ground chicken instead of beef.
- Bean and Beef – Add a spoonful of refried or black beans with the rice.
- Breakfast Quesarito – Use scrambled eggs, breakfast sausage or chorizo, and cheese.
- Veggie-Loaded – Add sautéed peppers, onions, or corn to the filling.
- Extra-Cheesy – Double the cheese fused to the tortilla and inside.
- Chipotle Version – Stir a little chipotle sauce or adobo into the beef.
- Guacamole Inside – Add a spoonful of guacamole with the sour cream.
- Air-Fryer Finish – After rolling, air-fry at 375°F for 4–6 minutes, turning once, for extra crispness.
- Mini Quesaritos – Use smaller tortillas for appetizer-sized versions.
- Steak Quesarito – Replace the ground beef with thinly sliced seasoned steak.
- Make-Ahead Components – Cook the beef and rice ahead; assemble and grill just before serving.
- Loaded Plate – Serve sliced quesaritos with extra rice, beans, and toppings for a full meal.
Make It Healthier
These quesaritos are a fun, indulgent treat. To lighten them, use lean ground beef or turkey, reduced-fat cheese and sour cream, whole-wheat tortillas, and increase the proportion of rice or add extra vegetables. Serve with a side salad or extra salsa and guacamole for more nutrients. Enjoy one as a satisfying meal rather than multiple, and balance the rest of the day with lighter choices.
Meal Prep Guide
The seasoned beef and rice can be cooked a day or two ahead and refrigerated. Assemble and grill the quesaritos just before serving for the best crispness and cheese melt. Leftover grilled quesaritos reheat well in a skillet or air fryer. This makes the recipe practical for busy nights when you want the fast-food experience at home without starting from scratch.
Storage
Store cooled leftover quesaritos in an airtight container in the refrigerator for up to three days. Keep any extra toppings separate. Reheat in a way that restores crispness rather than making the tortilla soggy.
Freezing
Assembled but ungrilled quesaritos can be frozen on a tray until solid, then transferred to a freezer bag. Grill from frozen (adding a few extra minutes) or thaw in the refrigerator first. Fully grilled leftovers can also be frozen; reheat in a skillet, oven, or air fryer until hot and crispy again. Texture is best when freshly grilled.
Reheating
Skillet: Reheat over medium heat with a little oil, turning, until the exterior is crisp and the center is hot. Air fryer: 350–375°F for 4–6 minutes, turning once. Oven: 350°F for 10–12 minutes. Avoid the microwave if you want to keep the exterior crispy. Always heat until the filling is steaming hot.
What to Serve With It
These quesaritos are satisfying on their own. Serve with extra sour cream, salsa, guacamole, or pico de gallo for dipping. A simple side of Mexican rice, refried beans, or a green salad rounds out the meal. They are perfect for casual dinners, game day, or whenever the Taco Bell craving hits. Leftover slices make a great lunch the next day.
Beverage Pairings
A cold soda or sparkling water pairs perfectly with the cheesy, savory flavors. Iced tea or a classic cola echoes the fast-food experience. A light beer or margarita makes it feel like a fun weekend treat. For a non-alcoholic option, agua fresca or lemonade is refreshing. Choose a drink that either cuts the richness or matches the casual, craveable mood.
Frequently Asked Questions
Can I skip the rice? Yes. The quesarito will still be delicious—just a bit less filling.
Can I use corn tortillas? Flour tortillas are recommended for flexibility and the classic texture. Corn tortillas are more likely to crack when rolled.
How do I get the cheese to stick to the tortilla? Sprinkle the cheese in a hot pan, place the tortilla on top, press gently, and wait about a minute for it to fuse before flipping.
Can I make these ahead? Cook the beef and rice ahead. Assemble and grill just before serving for the best results.
Are these spicy? Not as written. Use a spicy taco seasoning or add jalapeños if you want heat.
Can I use a different protein? Yes. Ground turkey, chicken, shredded chicken, or steak all work well.
How many does this recipe make? 4 large quesaritos. Easily doubled.
Why is my cheese burning? The pan is too hot. Use medium heat and watch closely while fusing the cheese.
Can I air-fry them? Yes. After rolling, air-fry at 375°F for 4–6 minutes, turning once, until crispy and heated through.
How long do leftovers keep? Up to three days in the refrigerator. Reheat in a skillet or air fryer for best texture.
Can I freeze them? Yes. Freeze assembled ungrilled or fully cooked. Reheat until hot and crispy.
What cheese works best? Cheddar, Mexican blend, Monterey Jack, or a mix all melt well and taste great.
Do I need Spanish rice? No. Plain cooked white or brown rice works perfectly.
How do I keep them from falling apart? Do not overfill, roll tightly, and start seam-side down in the pan.
Are these exactly like Taco Bell’s? They capture the same spirit—cheesy, seasoned, crispy—but homemade versions are often fresher and customizable.
Nutrition Information
Estimated nutrition per quesarito (based on 4): approximately 520–620 calories, 28–35 g fat, 38–45 g carbohydrates, 28–32 g protein. Values vary depending on the exact tortillas, cheese, beef fat content, and amount of rice used. These figures are estimates only and are not a substitute for professional nutritional advice. These are a hearty, satisfying meal best enjoyed in moderation as part of a balanced diet.
Final Thoughts
These homemade quesaritos started as a quick way to satisfy a Taco Bell craving and turned into a requested favorite. They prove that a few everyday ingredients and a hot skillet can create something melty, crispy, and deeply comforting—no drive-thru required. The cheese stretch, the seasoned beef, and those golden grill marks still make me happy every time I make them.
I hope you make a batch the next time the craving hits. I hope the cheese fuses perfectly, the tortilla turns golden and crispy, and the first one disappears before you finish the second. If you try them, I would love to know whether you kept them classic or added jalapeños—and how many were left at the end of the night. From my kitchen to yours—cheesy, crispy, and pure homemade comfort.
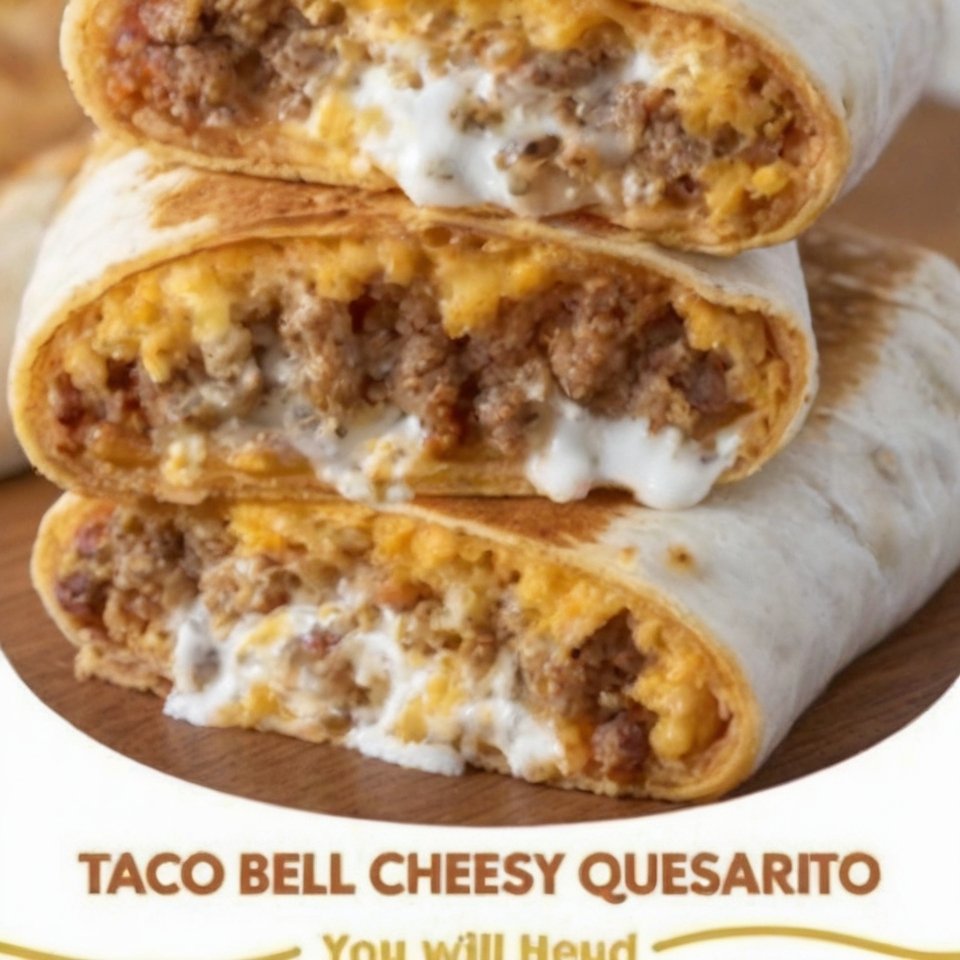
Homemade Quesaritos
Ingredients
Equipment
Method
- Brown ground beef; drain fat. Stir in taco seasoning and water; simmer 3 minutes until thickened.
- In a clean skillet over medium heat, sprinkle a handful of cheese in a tortilla-sized circle. Place tortilla on top, press gently, cook 1 minute until cheese fuses, then flip cheese-side up.
- Spread sour cream down the center; add beef, rice, and more cheese. Fold sides and roll tightly, cheese layer outside.
- Add a little olive oil to the skillet; grill quesarito seam-side down 2–3 minutes per side until golden and crispy.
- Slice and serve warm with extra sour cream, salsa, or guacamole.
Notes