
Soft Homemade Dinner Rolls – Pillowy, Buttery, and Worth Every Minute
My grandmother used to make these every Sunday, and the smell alone would wake up the entire house. Now I make them on cold evenings when I need something warm and comforting, and honestly? They disappear before they even cool down.
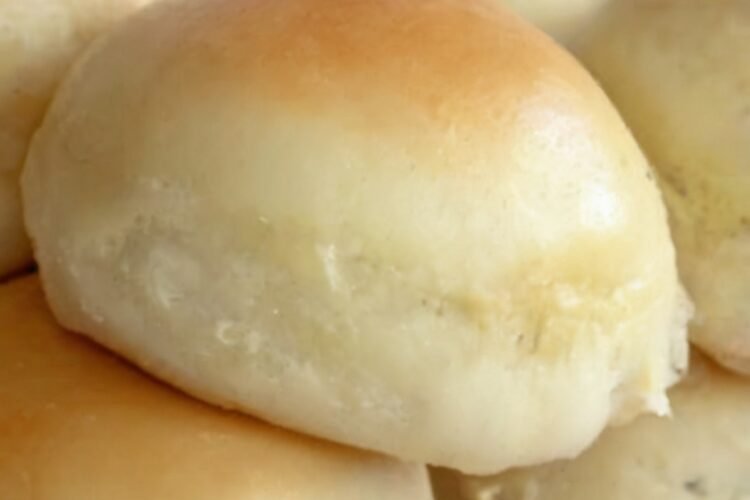
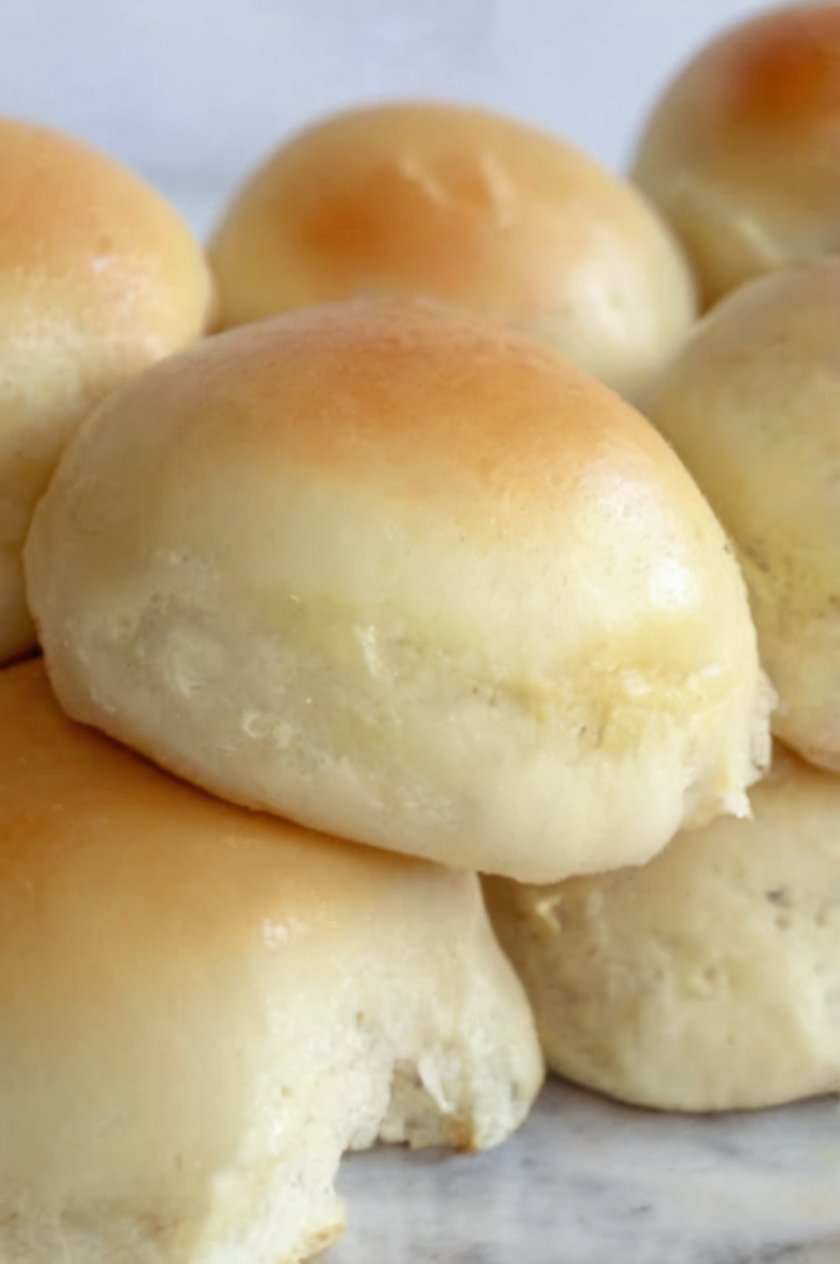
There’s something about pulling apart a soft, pillowy dinner roll that’s still warm from the oven. The tops are golden and glossy, the insides are cloud-soft, and when you tear one open, steam rises up with that unmistakable fresh-baked smell. I’ve watched people reach for their third roll without even realizing it.
These are the kind of rolls that make any meal feel special. Buttery, tender, just slightly sweet. Perfect next to soup, perfect with dinner, perfect eaten straight from the basket with way too much butter melted into the center. A simple enriched dough, two gentle rises, and a final brush of melted butter turn basic ingredients into the softest, most comforting dinner rolls you’ll bake at home.
Why You’ll Love This Recipe
You will love these soft homemade dinner rolls because they deliver classic bakery-style results with a straightforward method. The dough is enriched with milk, butter, and egg for tenderness and flavor. A touch of sugar feeds the yeast and adds gentle sweetness. The rolls bake up golden on top and cloud-soft inside, with that fresh-baked aroma that fills the kitchen.
You will love how reliable they are. The steps are clear and forgiving. The dough is pleasant to knead and shape. They pair with almost any meal—soup, roast chicken, holiday dinners, or a simple weeknight supper. Leftovers (if any) make excellent sandwich rolls or breakfast toast the next day.
You will love the texture and flavor. The exterior is soft with a light golden crust. The interior is tender, slightly sweet, and buttery. Brushed with melted butter right out of the oven, they stay glossy and irresistible.
Most of all, you will love the reactions. These are the rolls that make people linger at the table. They are the ones that vanish from the basket before the main dish is finished. In a world of store-bought bread, soft homemade dinner rolls this good are pure comfort and quiet pride.
Why This Recipe Works
Warm milk activates the yeast and contributes to a soft, tender crumb. Sugar feeds the yeast and adds a subtle sweetness that makes the rolls especially appealing. Melted butter enriches the dough and keeps the rolls moist. An egg adds structure, color, and richness. A moderate amount of flour creates a soft dough that stays light rather than dense when handled gently.
The first rise develops flavor and gluten structure so the rolls hold their shape and bake up airy. Dividing into twelve equal pieces and shaping into smooth balls produces uniform rolls that bake evenly. The second rise allows the shaped rolls to become puffy and light. Baking at 375°F sets the structure and turns the tops golden without drying the interiors. Brushing with melted butter immediately after baking softens the crust slightly and adds glossy flavor. These classic enriched-dough techniques produce consistently soft, tender, bakery-style dinner rolls.
Ingredient Breakdown
Warm Milk (1 cup, about 110°F) Milk provides richness and helps create a soft crumb. The ideal temperature activates the yeast without killing it.
Sugar (⅓ cup) Sugar feeds the yeast, aids browning, and gives the rolls a gentle sweetness.
Active Dry Yeast (2¼ teaspoons / 1 packet) Yeast is the leavening agent that makes the rolls rise and become light and airy.
Melted Butter (⅓ cup + 2 tablespoons for brushing) Butter enriches the dough and, when brushed on after baking, keeps the tops soft and flavorful.
Salt (1 teaspoon) Salt balances the sweetness and strengthens the gluten structure.
Egg (1, beaten) The egg adds richness, color, and helps bind the dough.
All-Purpose Flour (3½ to 4 cups) Flour provides structure. The exact amount can vary slightly depending on humidity and how the dough feels—soft but not sticky is the goal.
Kitchen Equipment
A large mixing bowl, measuring cups and spoons, a wooden spoon or dough whisk, a clean surface for kneading, a baking sheet, a clean kitchen towel or plastic wrap, and a pastry brush are the main tools. A stand mixer with dough hook is optional but helpful.
Step-by-Step Instructions
In a large bowl, combine the warm milk, sugar, and yeast. Let the mixture sit for about 5 minutes until it becomes foamy and smells yeasty.
Stir in the ⅓ cup melted butter, salt, and beaten egg until everything is well combined.
Add the flour one cup at a time, stirring after each addition, until the dough pulls away from the sides of the bowl and feels soft but not sticky. You may not need the full 4 cups.
Turn the dough out onto a lightly floured surface and knead for about 5 minutes until it is smooth and elastic.
Place the dough in a greased bowl, cover with a clean towel, and let it rise in a warm spot for about 1 hour, or until doubled in size.
Punch down the dough and divide it into 12 equal pieces. Shape each piece into a smooth ball.
Place the rolls on a greased baking sheet, leaving a little space between each one. Cover and let them rise again for 30 minutes, until they are puffy and beginning to touch.
Preheat the oven to 375°F.
Bake for 12 to 15 minutes, until the tops are golden and the rolls sound slightly hollow when tapped on the bottom.
Brush the tops with the remaining 2 tablespoons melted butter as soon as they come out of the oven.
Serve warm and watch them vanish.
Expert Tips
- Check that the milk is warm but not hot (around 110°F) so it activates the yeast without killing it.
- Let the yeast mixture become visibly foamy before proceeding—this confirms the yeast is alive.
- Add flour gradually. The dough should be soft and slightly tacky but not sticky.
- Knead until the dough is smooth and elastic; it should spring back slowly when poked.
- A warm, draft-free spot (such as an oven with the light on) helps the dough rise reliably.
- For the most even rolls, divide the dough by weight if you have a scale.
- Shape the balls by pulling the edges underneath so the tops are smooth and taut.
- Do not skip the second rise—the rolls need that time to become light and puffy.
- Brush with butter while the rolls are still hot so it melts in and keeps the tops soft.
- For extra-soft rolls, place them closer together so they bake into one another.
- These are best served warm the day they are made.
- Leftover rolls freeze well and reheat beautifully.
- A light egg wash before baking (instead of or in addition to the butter brush) creates a shinier top.
- If the kitchen is cold, the rises may take longer—patience pays off.
Common Mistakes to Avoid
- Using milk that is too hot. It can kill the yeast and prevent rising.
- Skipping the proofing step. If the yeast does not foam, it may be expired or the liquid was the wrong temperature.
- Adding too much flour. The dough should stay soft; excess flour makes dense rolls.
- Under-kneading. The dough needs enough kneading to develop gluten and become elastic.
- Over-kneading (especially in a stand mixer). The dough can become tough.
- Rushing the rises. The dough needs time to double and then become puffy after shaping.
- Baking before the second rise is complete. The rolls will be dense rather than light.
- Overbaking until the rolls are dry. Pull them when the tops are golden.
- Forgetting to brush with butter. That final step keeps the crust soft and adds flavor.
- Placing the rolls in a cold or drafty spot to rise. They need gentle warmth.
- Using expired yeast. Always check the date and proof it first.
- Shaping uneven pieces. Different sizes will bake unevenly.
- Moving the rolls too soon after baking. Let them sit a minute so they firm up slightly.
- Storing warm rolls in a sealed container. Condensation can make them soggy; cool first.
Ingredient Substitutions
Active dry yeast can be replaced with instant yeast (you can mix it directly with the dry ingredients, though proofing is still a good check).
Whole milk can be replaced with 2% milk; the rolls will be slightly less rich.
All-purpose flour can be replaced with bread flour for a bit more chew, or a 1:1 gluten-free baking blend (results will vary).
Butter can be replaced with a neutral oil or plant-based butter for a dairy-free version (flavor and texture will change slightly).
The egg can be replaced with a flax egg or simply omitted for an egg-free version (the rolls will be a bit less rich).
Recipe Variations
- Honey Butter Rolls – Replace the sugar with honey and brush with honey-butter after baking.
- Garlic Herb Rolls – Add garlic powder and dried herbs to the dough; brush with garlic butter.
- Whole Wheat Version – Replace up to half the flour with whole wheat flour (add a little extra liquid if needed).
- Sweet Orange Rolls – Add orange zest to the dough and a light orange glaze after baking.
- Parker House Style – Flatten each ball, fold in half, and bake for a classic folded shape.
- Cloverleaf Rolls – Place three small balls in each muffin cup for a traditional cloverleaf look.
- Seeded Tops – Brush with egg wash and sprinkle with sesame or poppy seeds before baking.
- Make-Ahead – Shape the rolls, cover, and refrigerate overnight for the second rise; bake the next day.
- Freezer Rolls – Bake fully, cool, and freeze; reheat when needed.
- Cheese Rolls – Add shredded cheddar or Parmesan to the dough for a savory twist.
- Cinnamon Sugar – Brush warm rolls with butter and toss in cinnamon sugar for a sweet treat.
- Dinner Roll Basket – Bake in a round pan so the rolls rise into each other for a pull-apart presentation.
- Extra-Buttery – Increase the butter in the dough slightly for even richer rolls.
Make It Healthier
These rolls are a classic enriched bread. To lighten them, reduce the sugar slightly, use part whole-wheat flour, or enjoy smaller portions alongside a vegetable-heavy meal. Homemade rolls let you control the ingredients and avoid additives found in many store-bought versions. Serve them as an occasional special addition rather than an everyday extra.
Meal Prep Guide
The dough can be made ahead and refrigerated after the first rise or after shaping. Cold dough may need a bit more time to finish rising at room temperature before baking. Fully baked rolls freeze beautifully and can be reheated as needed, making them practical for holidays or busy weeks. Bake a double batch and freeze half for easy future meals.
Storage
Store cooled rolls in an airtight container or zip-top bag at room temperature for up to three days. For longer storage, refrigerate for up to a week or freeze. The rolls stay softest the day they are made but remain enjoyable for several days when stored properly.
Freezing
Baked rolls freeze well for up to three months. Cool completely, place in a freezer bag or airtight container, and freeze. Thaw at room temperature or reheat from frozen. You can also freeze shaped unbaked rolls; thaw and let them finish rising before baking.
Reheating
Oven: Wrap rolls in foil and warm at 300–325°F for 8–12 minutes until heated through. Microwave: Warm individual rolls for 10–15 seconds. Air fryer or toaster oven: A few minutes at a moderate temperature restores a bit of exterior texture. Brush with a little extra butter after reheating for the closest-to-fresh taste.
What to Serve With It
These soft dinner rolls are perfect with soups, stews, roasted meats, holiday dinners, or simple weeknight meals. Serve them in a basket lined with a clean towel to keep them warm. They are excellent with butter, honey, jam, or just torn open and eaten plain. Leftover rolls make great sandwich bases or breakfast toast with eggs.
Beverage Pairings
These rolls pair with almost any mealtime beverage. Cold milk is classic and comforting. Hot coffee or tea works well at dinner or with a leftover roll for breakfast. Sparkling water or iced tea keeps the palate refreshed. For a special dinner, a light white wine or a simple red complements the buttery bread. Choose a drink that matches the rest of the meal.
Frequently Asked Questions
Can I use instant yeast instead of active dry? Yes. Instant yeast can be mixed directly with the flour, though proofing it with the warm milk and sugar is still a good way to confirm it is active.
Why didn’t my dough rise? The yeast may have been expired, or the milk was too hot or too cold. Always proof the yeast and use the correct liquid temperature.
Can I make the dough in a stand mixer? Yes. Use the dough hook and knead on low to medium speed for about 4–5 minutes until smooth and elastic.
How do I know when the rolls are done? The tops should be golden and the rolls should sound slightly hollow when tapped on the bottom. An internal temperature of about 190–200°F also indicates doneness.
Can I shape them differently? Yes. Make cloverleaf rolls in a muffin tin, Parker House folds, or a single pull-apart pan of rolls.
Why are my rolls dense? Possible reasons include too much flour, under-proofing, expired yeast, or over-baking. Keep the dough soft and give the rises full time.
How many rolls does this make? 12 standard dinner rolls. You can divide into more pieces for smaller rolls.
Can I reduce the sugar? Yes, though the rolls will be less sweet and the yeast will have less food. They will still rise.
Are these good for sandwiches? Yes. They make soft, tender sandwich rolls, especially when split and filled while still slightly warm.
How long do leftovers keep? 2–3 days at room temperature, about a week in the refrigerator, or up to 3 months in the freezer.
Can I freeze the dough? Yes. Freeze after shaping. Thaw in the refrigerator or at room temperature, let rise until puffy, then bake.
Do I have to brush them with butter? It is highly recommended for soft tops and extra flavor, but the rolls are still delicious without it.
What if I don’t have a warm place to rise the dough? Use an oven with just the light on, or place the bowl near (not on) a warm appliance. Avoid hot environments that could kill the yeast.
Can I use bread flour? Yes. Bread flour will give a slightly chewier texture. You may need a little less or more liquid depending on the brand.
Why did my rolls brown too quickly? Your oven may run hot. Check early and tent with foil if the tops are browning before the centers are done.
Nutrition Information
Estimated nutrition per roll (based on 12 rolls): approximately 180–220 calories, 7–9 g fat, 26–30 g carbohydrates, 4–5 g protein. Values vary depending on exact flour amount and butter used. These figures are estimates only and are not a substitute for professional nutritional advice. These rolls are a comforting bread best enjoyed as part of a balanced meal.
Final Thoughts
These soft homemade dinner rolls have stayed in my kitchen for years because they never fail to make a meal feel warmer and more complete. The process is simple and satisfying, and the result—golden tops, cloud-soft interiors, and that fresh-baked aroma—still feels like a small celebration every time. They connect me to my grandmother’s Sunday table and create the same sense of comfort in my own home.
I hope you bake a batch the next time you want something warm and special to set on the table. I hope the dough rises beautifully, the tops turn golden, and the basket empties faster than you expect. If you try them, I would love to know whether you served them with butter, honey, or just tore into them plain—and how many disappeared before the rest of the meal. From my oven to yours—soft, buttery, and pure homemade comfort.
Soft Homemade Dinner Rolls
Ingredients
Equipment
Method
- Combine warm milk, sugar, and yeast. Let sit 5 minutes until foamy.
- Stir in melted butter, salt, and beaten egg.
- Add flour gradually until a soft, non-sticky dough forms. Knead 5 minutes until smooth and elastic.
- Place in a greased bowl, cover, and let rise 1 hour until doubled.
- Punch down, divide into 12 pieces, and shape into smooth balls. Place on a greased baking sheet. Cover and rise 30 minutes until puffy.
- Preheat oven to 375°F. Bake 12–15 minutes until golden.
- Brush with melted butter immediately. Serve warm.
Notes